
So when one of my best friends’ babies, my godchild, was in the hospital for surgery last week and ended up staying much longer than expected, my first thought was of Libby and the bunny. I knew I had to make one.
Materials needed:
- one pair of socks (regular or knee high)
- needle and thread
- stuffing material
- embroidery floss and embroidery needle
- buttons (optional for children 3+)
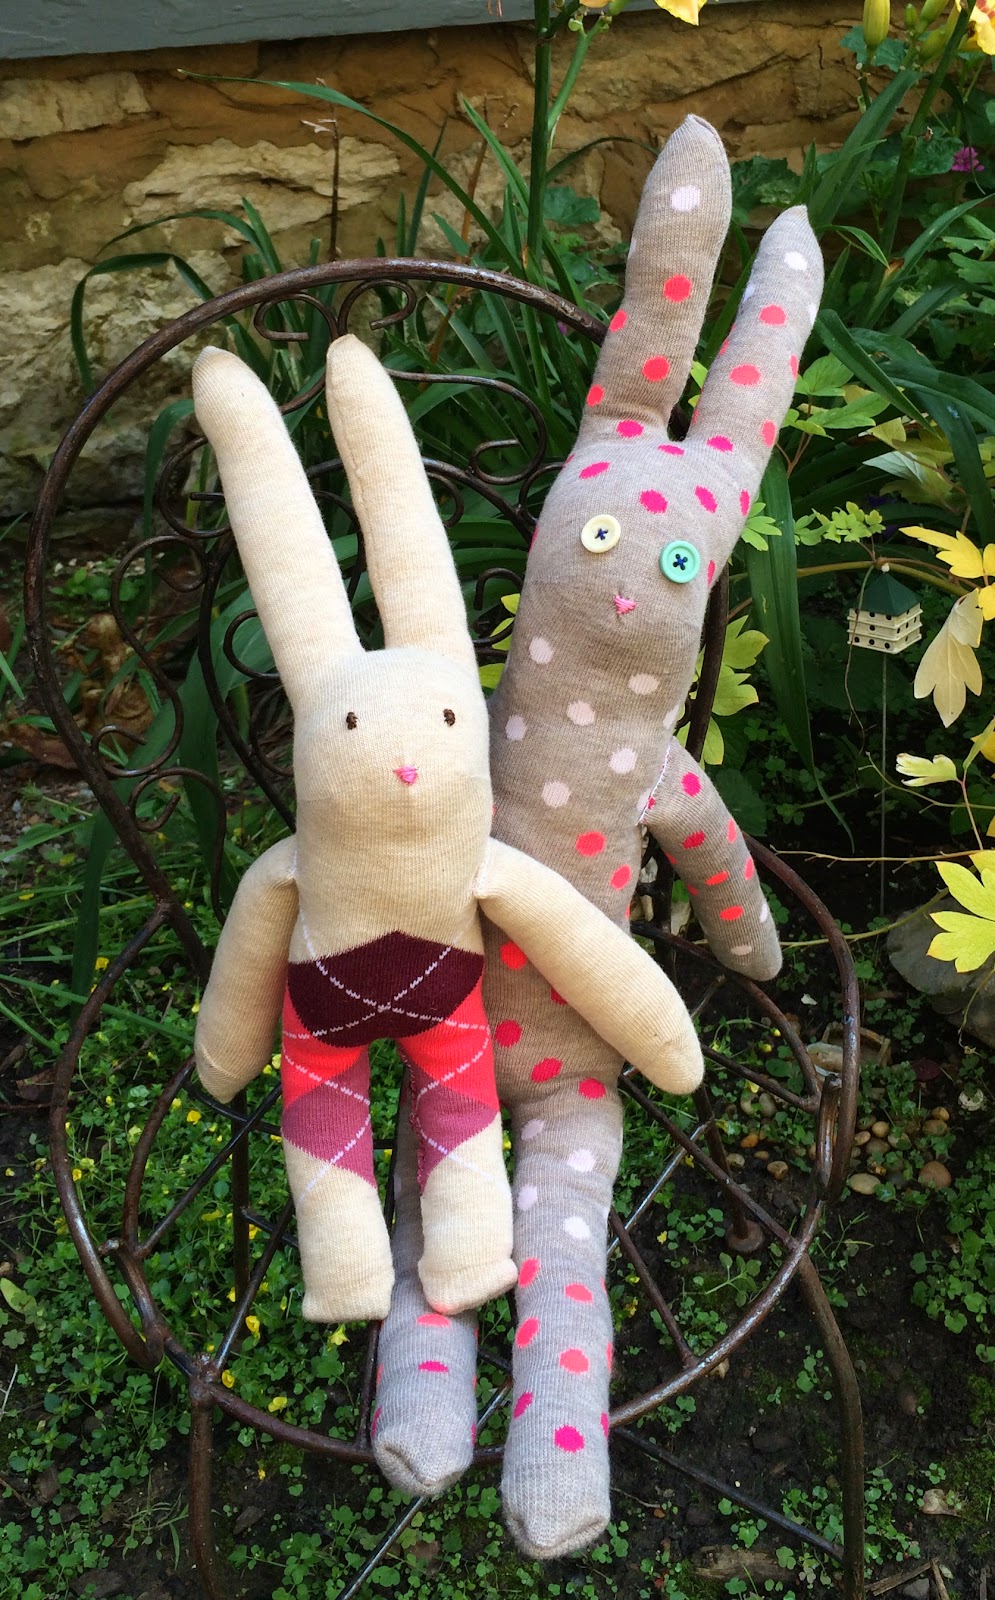
First, take one sock and open it up so the heel is facing you. Lay it flat. The heel of the sock will be the bunny’s face.

Then, make a cut in the middle of the toe of the sock, cutting towards the heel. This will be the bunny’s ears. Don’t cut all the way to the heel though, remember the heel becomes the face. Next, make a cut from the opposite end of the sock for the bunny’s legs. Again, don’t cut all the way up to the heel…this time you need to leave room for a body too.


Turn the sock inside-out. Starting at the tip of an ear, stitch down one ear and up the other. Next, sew the legs in a similar fashion, but this time leave about a 2-inch opening.


Turn the sock right-side-out. Through the 2-inch opening, carefully stuff the bunny’s ears, body and legs. Sew the opening closed.


Now take the other sock and cut off the toe, close to the heel. Lay this part flat, like you did the first sock, and cut it in half. These will be the arms.


Turn one sock piece inside-out and, starting from the tip, stitch the side closed. Turn it right-side-out again and fill it with stuffing.


Next, fold the open edge inwards and pinch it together. Sew the arm closed, attaching it to the body at the same time. Repeat with the other arm.


Your bunny’s adorable already, isn’t it? But, it still needs a face! Using embroidery floss, stitch on little eyes or attach buttons (if the child receiving the bunny is 3 years old or older) and sew a lil nose. All done!


As you can see from the picture below, using knee socks gives you a tall and skinny bunny and using slightly smaller socks results in an adorable, baby bunny rabbit. Now to deliver them to my godchild and her 3 yr old sister…I can’t wait to see those happy faces!
“Making something is one way to say, ‘I love you.'” -Daniel Tiger