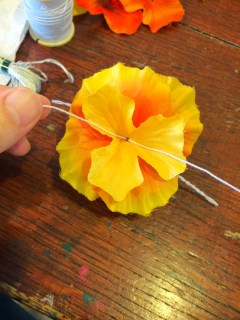
DIY Flower Fairies

I first made FLOWER FAIRIES with my youngest sister when we were kids. They are just so sweet, I couldn’t wait to make them again with my girls! L and I made these fairies this past week and we plan on making more tomorrow…I’m thinking garlands, magnets, and of course, just flower fairy dolls for playing pretend!


Materials needed:

  • florist wire
  • fabric flowers
  • wooden beads
  • other beads (wooden, plastic; colorful, plain)
  • acrylic paint
  • embroidery thread
  • scissors
  • hot glue gun and glue

First, paint simple, little faces on your wooden beads.

While your beads dry, take the artificial flowers apart. All you’ll need is the fabric petals. If you have any tiny flowers, set them aside to use for head decorations.

Cut a 14-inch piece of wire, and an 8-inch piece of wire. Fold the 14-inch piece in half.

With the smaller piece, bring both ends towards the center and twist the wire, leaving a little loop on each side for the fairy’s “hands.” Set aside.


Select the colors of embroidery thread you’d like to use for the fairy’s hair. Wrap the thread around all four of your fingers.

Place your looped, embroidery thread into the fold of the 14-inch piece of wire. Twist the wire, once to secure it in place.

Next, thread a “head” onto the wires (the large wire folded in half), followed by a couple small or medium-sized flowers.


Take the small wire piece (already folded and twisted into arms) and place it under the flowers, but in-between the two wires. If you like, you can fold each arm over once to secure the arms in place a little more.

Next, thread a bead onto the wire, followed by 2, 3, or more large flower petals.

At this point, separate the long wires into two legs. Fold each one in half and twist the wire, leaving a little loop on each end for the fairy’s “feet.”


Time to style some hair! You can twist the hair and glue it on top the fairy’s head. You can simply cut the thread loops and let it hang wild and free. Get creative with it!


To finish each flower fairy, glue a small flower on top of the hair. Too cute!!!


To host a tea party for your flower fairies, be sure to check out our “It’s Tea Time! Tea Party Ideas” page!


DIY String Bowls

Before we packed up our Easter stuff, I decided to make some fun and funky STRING BOWLS with L…we used the bottoms of our Easter eggs for molds. How cute are these? And even better, all the materials needed we already had lying around the house…you probably do too! If you don’t have Easter egg bottoms to use, any small or medium-sized bowls will work for molds.

Materials needed:

  • small plastic bowls or Easter egg bottoms
  • yarn or string
  • white glue
  • water
  • plastic wrap
  • scissors
  • glitter (optional)
  • hair dryer (optional)

First, cover your molds with plastic wrap.

In a small bowl, mix a little bit of water into some white glue. If you like, mix some glitter into the glue as well.

Next, cut your string into small pieces and stir it into the glue. You can experiment with this step…we did one bowl using 1-inch pieces of yarn, another using 2-3 inch pieces, and one bowl using one long piece of string.


Remove each piece of string from the glue, one at a time, and lay them across your mold. If the glue is thick on the string, you can squeeze some of the excess glue off.


Once all your string is laid out across and around your molds, lay them aside to dry. It may take a couple days for the glue to dry completely, or you can speed up the process by using a hair dryer.

After the glue has dried, turn your bowls over. Remove the molds and the plastic wrap.


Using fine-tipped scissors, you can trim any string or glue that you may need to off the edges.


Beautiful and fun! Perfect for rings, hair clips, buttons and trinkets!

Knuckle-Print Carrots

How cute are these KNUCKLE-PRINT CARROTS we made for Easter? They’re not only fun to make with your little ones, but they make sweet gifts for parents and grandparents too!

Materials needed:

  • paper
  • orange and green paint
  • little knuckles

Just a little note: Whenever doing projects like this, I like to have a sheet of paper to practice on first. Our practice paper is the big white one here, giving us lots of room to experiment with before making little Easter cards for the grandparents.

First, paint your kid’s knuckles orange. Have them stamp the paper with their knuckles. We found that it worked best if L was standing or on her knees doing this part, making sure she was well above the paper.


Next, I marked each carrot lightly with a pencil, so we knew which side would be best to put the “leaves” on.

Using your child’s thumb or index finger, have them make little leaves atop each carrot. I had to help L with this part…as you can see in the picture below, when left to do it alone, she was happy putting green dots all over her carrots! Ha!


So sweet! Happy Spring!

Egg Carton Flower Wreath

Can you believe this beautiful Spring wreath was made primarily out of egg cartons!?! I just love the outcome! I’ve wanted to make an EGG CARTON FLOWER WREATH for years! Last year we tried it, using tempera paints, but the colors weren’t nearly as vibrant. I highly suggest using acrylics for this project. Our EGG CARTON FLOWER WREATH hangs inside Our Beautifully Messy House, as we await the first blooms of spring flowers outside in our garden!


Materials needed:

  • 3 egg cartons
  • med-large cardboard piece
  • sharp scissors (fabric scissors)
  • acrylic paints
  • hot glue gun and glue

First, cut the egg cartons into flower shapes. Get creative! The pointy, divider sections can be used to make narrow flowers or daffodil trumpets and the lids of the egg cartons can be cut into leaves.

After all your flowers are cut, time to paint with your little ones! L and I painted side-by-side…when she was finished with a flower or bored with a color, I’d let her start on another one while I filled in any spots she may missed. After all the flowers were painted a solid color, I went back and painted on some details! Although the flowers look great in solid colors, the details really bring them to life…worth the extra 30 minutes of painting!


To make your wreath base, use some large mixing bowls to trace circles onto your cardboard and cut it out. I used two separate pieces of cardboard and just taped them together. Once your wreath base is cut out, give it a quick coat of green paint.


Next, using a hot glue gun, glue the leaves onto your wreath base randomly.

After the leaves are in place, glue the flowers on. Try to space the colors out, but don’t think too much about order. In nature, nothing is perfect and the imperfections themselves are beautiful!


Hang your wreath on a door, a wall or in your kitchen window! Enjoy!!!


20+ Non-Candy Easter Egg Surprises

Last year we put a few chocolates into L’s Easter eggs, but for the most part the Easter bunny left her with NON-CANDY EASTER EGG SURPRISES and she LOVED it! Inside the eggs were buttons, a spool of thread (to string the buttons into a necklace), a lil plastic turtle, and strips of paper with fun activities for the whole family to do.


Some of the “ACTIVITIES” included:

  • Hop like a bunny.
  • Jump like a frog.
  • Who can laugh the silliest?
  • Give daddy a hug.
  • Give a bunny kiss to mommy.
  • Walk backwards.
  • Clap and count to 10.
  • Peep like a chick.
  • Play ring-around-the-rosie.
  • Roll like an egg.


Yes, it was silly and ridiculous, but we had so much fun!!!

Other NON-CANDY EASTER EGG IDEAS:

  • Army men
  • Marbles
  • Puzzle pieces
  • Stickers
  • Crayons
  • A Prism
  • Coins
  • Beads
  • Play-dough (Recipe here.)
  • Fairy folk (DIY here.)
  • Shoelaces
  • Plastic figurines
  • Wooden Stamps
  • Jacks
  • Story Stones (DIY here.)
  • Buttons (and thread to make a necklace)
  • Mardi-Gras Beads
  • Miniature Tea Set
  • Rocks (like Jade, Obsidian, Pyrite, Quartz, etc.)
  • Dice
  • Erasers


You also might like these CRAZY COLORED EASTER EGGS


And this DIY SOCK BUNNY RABBIT! Enjoy!!!

Crazy Colored Easter Eggs

Last year was the first time we colored our Easter eggs in this fashion and oh my gosh, was it easy!!! These CRAZY COLORED EASTER EGGS are much cleaner and quicker to make than the traditional dyed Easter eggs! And aren’t they just beautiful???


Materials needed:

  • white eggs
  • pot with water
  • broken crayons
  • tin foil
  • large dish or pan
  • fork
  • tongs
  • glitter (optional)
  • towel for drying
  • parchment paper

First, put your eggs in the pot of water and on your stovetop to boil. I’ve always heard that 13 minutes is the magic number for perfectly cooked, hard-boiled eggs.

While your eggs cook, line your pan with tin foil. Also, prepare a place on your kitchen counter for your finished eggs…just a piece of parchment paper will do!

Make some crayon shavings, using a sharp knife. The more wild and beautiful your colors, the more wild and beautiful the eggs!

Sprinkle the crayon shavings on top of the tin foil and add glitter if you like too! You don’t need a whole lot of crayon shavings…less is really better to avoid big color mixtures turning the eggs into yucky shades of brown.

Once the eggs are cooked, use tongs to carefully move one egg at a time onto the towel to dry, and then into the pan of crayon shavings. Have your little one roll the egg around the shavings, pushing gently with the underside of a fork. Since the eggs are still very hot, the crayon shavings will melt immediately, painting the eggs!


After each egg is dyed, remove it with the tongs and lay it on the parchment paper to cool completely.  Repeat with the remaining eggs!


I just love our CRAZY COLORED EASTER EGGS!!! Beautiful!!! Enjoy!

DIY Flower Garden Entrance

I made this FLOWER GARDEN ENTRANCE for WB’s first birthday this week and I just love how it turned out! We put it up in our kitchen, but eventually we’ll move it to brighten up the entrance to her bedroom! A FLOWER GARDEN ENTRANCE is the perfect decoration for birthday parties, tea parties, or anytime you want to bring a little sunshine inside! You could hang it in a doorway or above a window!


IMG_8968

IMG_8966

Materials needed:

  • adjustable shower curtain rod
  • 2 rolls of green tulle
  • silk flowers
  • florist tape
  • hot glue gun and glue
  • piece of string

(Silk flowers are on sale during the winter months at most craft stores…I got these all 50% off!)

IMG_8957


First, I measured the height and width of the doorway where our FLOWER GARDEN ENTRANCE would be. Our house is old with doors of various heights and widths…I wanted to make sure that if I made it in the kitchen doorway it would fit in the doorway to my daughter’s room.

Next, put up the curtain rod and tie a piece of string around the middle. You will thread the tulle through this, so make it not too tight, but not too loose.

IMG_8950


Now thread the tulle through the string, cutting strips in similar lengths. The tulle will travel along the top of the rod and straight down (see the next steps), so measure and cut accordingly.


IMG_8953

IMG_8952


Next, wrap a small scrap of tulle around the middle a few times, tie and cut. You can now remove the string that was holding everything up.


IMG_8954

Do the same at both ends of the curtain rod…wrapping a scrap of tulle around the long tulle strands, tie and cut.


IMG_8955

IMG_8956


Now, figure out where you want your flowers to go. For long stems, I used floral tape to secure them to the curtain rod in various spots. With individual flowers, I just used a hot glue gun to glue them in place. Other smaller stems can be tucked in and behind the rest and may not even need tape or glue.


IMG_8960

IMG_8958

IMG_8959


And finally, pick a few small, delicate flowers to glue in place along the long strands of tulle. My favorite and final touch!

IMG_8964

IMG_8968

IMG_8966

My girls were so excited to find this hanging in the kitchen this morning! Easy, beautiful and fun!!!

DIY Fairy Door…Gnome Door…

In our garden the fairies and gnomes live amongst each other. Their village spreads around the yard with lil houses, patios and ponds hidden beneath the flowers. Throughout the year, L and I like to collect and make things to add to our garden…this morning we made a lil fairy door.

Materials needed:

  • sticks
  • florist wire
  • a button


First, have your kids collect some sticks and twigs around the yard. Sort through the sticks, finding ones that are particularly straight. Lay these sticks side-by-side, getting an idea of what your door will look like.


Next, cut two pieces of florist wire about 2-ft long each. Fold them in half.


Take the first stick you have laid out for the door and place it in the middle of one of the wires. Wrap the wire around the stick, about an inch from the bottom, and twist the wire once to secure it.


Do the same with the second wire about the an inch from the top of the stick. Continue adding sticks, one-by-one, wrapping and twisting the wires as you go.

When all the sticks are connected, hold the door in two hands and very gently squeeze the sticks together.


Cut the end of the wire, leaving about half an inch, and fold back the extra.


Next, have your child select a button for a door knob. L chose this cute lil heart button…probably not the one I would have chosen, but it was perfect for a fairy door! (Kids just know when it comes to these things.)


Thread the button onto a 4-inch piece of wire, twisting the wire a bit to secure it. Then, deciding where you’d like the door knob to be, wrap and twist the wire around one or two of the sticks.


To ensure that the button won’t slide down the door, you can thread the excess wire up and over the wire that holds the sticks in place as well.


Now the fun part…find a little piece of wall, fence, or a tree trunk to prop the door up against! Add some buttons, pennies, or broken tile pieces for lil fairy stepping stones… Adorable!


This project was so quick and easy, I think we’ll make another to sneak into our neighbor’s garden. He’s got the perfect tree for a fairy or gnome door…