Milk Carton Fairy Houses

Who knew milk cartons had so much potential??? They are perfect for making fairy houses and gnome homes! First off, a milk carton is just the right size for fairies…all it needs is a door and a few windows to make it feel like home. Milk cartons are also water-proof, providing adequate housing for both indoor and outdoor use. WB and L like to play with their fairy houses during the day and, at night, we tuck a little tea light inside to turn them into night lights! So sweet!


2016-10-06-14-00-32

Materials needed:

  • milk cartons
  • white primer spray paint
  • exacto knife
  • acrylic paints
  • hot glue gun
  • sticks, bark, moss, acorns, etc.
  • battery-operated tea lights

dsc_0005

First, spray your milk cartons with some primer. The surface of milk cartons is usually waxy and paint will have a hard time sticking. A coat or two of primer should do the trick!

dsc_0006

Next, using an exacto knife, carefully cut a door and windows into the house. And do not worry…the windows don’t need to be perfect! Fairy houses’ never are!

dsc_0344

Now the fun part for the kids, have your little ones paint and decorate the houses. Start with a solid color or two underneath.

dsc_0347

img_0240

Then add details like polka-dot doors and Fall pumpkins. For our pumpkins, the kids used a wine cork as a stamp!

dsc_0349

dsc_0353

While the paint dries, send the kids outside to collect nature materials to use for a roof.

dsc_0356

Before assembling the roof, you can easily flip the screw-top opening inwards. Just push it in with your fingers…it’s easier than you think!

dsc_0357

dsc_0358

Glue twigs or bark over the opening, and then add all sorts of nature findings. Each house will be unique!

dsc_0360

dsc_0359

To light your fairy houses up at night, place battery-operated tea lights inside. You could also use a string of lights in and around the houses for a magical display!

dsc_0373

dsc_0383

“Those who don’t believe in magic will never find it.” -Roald Dahl

dsc_0393

Rain Boot Wreath

I’ve seen old rain boots up-cycled into flower planters before, so I thought, “Why not use them for a Spring wreath!?” This RAIN BOOT WREATH was so quick and easy to put together and the outcome is adorable…perfect for Spring!

DSC_0169

I could’ve gone out and bought some new boots that weren’t dirty, worn, and broken in spots, but that required me to take the kids shopping and more money spent…not my idea of fun! I ended up making these with things we already had: L’s old rain boots and flowers we had leftover from other projects. Every time we walk in through the front door, the rain boots make me think of the many rainy, muddy adventures L went on during the first three years of her life. So much love!

Materials needed:

  • rain boots (kids’, adults’, old or new)
  • artificial flowers
  • rope and/or ribbon
  • scissors

DSC_0149

First, if your boots are dirty, clean and dry them.

DSC_0152

Next, lay out your flowers and decide how you’re going to split them up. When you arrange your flowers, start with the taller and/or leafy flowers first. Put the single, shorter, and more prominent flowers in last. Originally I thought I’d use wire cutters to trim my flowers, but I ended up just bending the wired stems in half, depending on the height I was looking for. This helped them take up room and stay put in each boot!

DSC_0155

DSC_0154

DSC_0156

DSC_0158

Once your boots are filled and arranged the way you like them, tie a rope or ribbon securely to each boot.

DSC_0159

DSC_0160

Now, take the boots to your door and see how they will hang. I ended up tying a knot in the rope down low, tying both halves together so the boots didn’t lean out too far from the door. I also shortened the rope a bit by wrapping and tying it around the wreath hanger.

DSC_0162

DSC_0161

To finish your fun and funky Spring wreath, tie a pretty ribbon in a simple bow around the top and you’re done! So easy, cute and fun!

DSC_0167

Happy Spring!!!

Naturally Dyed Easter Eggs (with Onion Skins & Cabbage)

How beautiful are these Easter eggs!?! Ever since I was a kid and read about dying eggs in onion skins in a nature-craft book, I’ve wanted to try it. I couldn’t believe how easy they were to make and how bright and colorful they turned out! The orange-brownish eggs were dyed in the onion skins, while the bluish ones were dyed using red cabbage. And no, you don’t need to buy a whole bunch of onions to get the skins. Just ask the nearest grocer at the store, and they’ll be happy to let you and the kids dig through the onion bin! You’ll find plenty there! It did not take long at all to dye the eggs in onion skins, while the ones dyed with red cabbage soaked over-night. Just takes a little patience!

DSC_0135

Materials needed:

  • white eggs
  • onion skins
  • red cabbage
  • medium-sized pot
  • water
  • small flowers, leaves, herbs
  • old pantyhose or knee highs
  • twist ties

DSC_0084

First, fill your pot up completely with onion skins. Then, fill with water, leaving a couple inches of space for the eggs.

DSC_0089

Do the same with the red cabbage, chopping the cabbage first.

DSC_0093


Next, put both pots on the stove and turn on high to boil. Let the water simmer for about 5 minutes, then turn the pots off. Let them sit and cool for 5 hours or overnight.

DSC_0095

DSC_0098

To prepare the eggs to dye, to get the beautiful nature prints on them, gather small leaves and flowers from your garden. We even used some weeds with interesting leaf shapes!

Cut your pantyhose or knee-highs in small sections. We used knee highs. I cut them in half and then with the top portion, I cut a slit up the side. With the bottom half, it was easy to just place the egg inside.

DSC_0107

Press a flower or leaf onto the egg and carefully wrap the pantyhose around it. Dipping the leaves in water first makes them stick to the eggs a bit easier.

DSC_0105

DSC_0102

DSC_0104


Twist the pantyhose in the back and secure with a twist tie.

DSC_0103

DSC_0110


Now to dye the eggs! Place your eggs into the pots, making sure they are completely submerged in the water.

DSC_0111

DSC_0115

Put the pots back onto the stove and bring them to a boil again. Turn down to low heat, and let the pots for 20-30 min.

After the water cools a bit, carefully remove the eggs soaking in the onion skins and dry them off a bit on a towel.

DSC_0118

Cut the pantyhose and the eggs will come out carefully. So cool!!!

DSC_0122

DSC_0119

DSC_0124

Place the pot with the red cabbage and eggs in your refrigerator and let them sit up to 24 hrs. Then do the same…removing them from the water and cutting the pantyhose off.

DSC_0129

To make your eggs shine, you can wet a paper towel with vegetable oil and gently rub it onto each egg. Such a naturally beautiful way to celebrate Spring, Easter, or Naw Ruz!!!

DSC_0140

DIY Toy Catapult

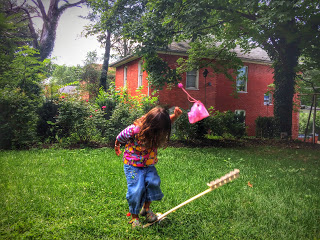
What kid (or adult) doesn’t love launching things through the air? This DIY TOY CATAPULT takes only minutes to put together and your kids will play with it for hours…days even! I love how kids naturally experiment while playing with this toy. Even as young as three, L was moving the can (the fulcrum) around, placing the balls in various slots, and went on to launch her toy parachute, as well as her shoes! So much fun!!!


Materials needed:

  • yard stick
  • can of food
  • egg carton
  • scissors
  • hot glue gun
  • permanent markers (optional)

 Things to launch:

  • ping pong balls
  • pom poms
  • -cotton balls
  • DIY Pocket Parachute
  • plastic figurines (fairies, dinosaurs, army men)
  • marshmallows or cereal (to catch in one’s mouth)

First, cut your egg carton in half.

Using a hot glue gun, glue the egg carton onto one end of your yard stick. (Don’t worry…when your kids are done playing with their catapult, the egg carton and glue should peel right off the yard stick! I take ours apart every time we’re finished playing with it!)


Next, number your egg carton slots and your ping pong balls. This step is optional, but it makes it easy to keep track of what ball goes the farthest and which slots you’re putting things into…especially if you’re launching multiple balls at once!


The set-up of your catapult is easy…just place the can on it’s side in the grass (keeps it from rolling) and place the yardstick on top. Fill the slots with your projectiles!


Now, time to play!!!

Launching balls…


 Parachutes…


 And L’s shoes…


What will you all send flying through the air???

If your kids like the catapult, they’ll definitely love making POCKET PARACHUTES…another “make something from nothing” craft! Enjoy!


Fairy Doors and Gnome Doors (#2)

After making a fairy door out of sticks and hiding it in our neighbor’s garden last Summer, L and I thought we’d spread the fairy love a little farther this year…we’ve been making FAIRY DOORS and GNOME DOORS and hiding them all around town! It’s so much fun surprising the young and the old — just imagine the look on anyone’s face when they’re out in the garden and suddenly discover a teeny, tiny door that wasn’t there before. Ha! These fairy doors are so simple to make and all you need is rocks, paint and clear sealant (which is optional). To draw a little more attention to the fairy doors, we like to leave a tiny button or painted rock trail as well.


Materials needed:

  • medium-sized rocks
  • acrylic paints
  • clear sealant spray (optional)

After cleaning any dirt off your rock, start by painting on a door.

Next, add some windows, if you have room.

If adding any glitter paint, apply that next. We like to paint a little glitter over our windows.

Next, outline the door and windows carefully with black paint. Add a doorknob as well.


Now for my favorite part, paint connecting black lines on the rock, resembling a stone wall.

If you’d like to add a flower pot or lil window box, add one now.

Finally, finish with some green vines, leaves, and flower details.


Once all your paint is dry, you can spray the rocks with a coat of clear sealant to make the fairy doors even more weather resistant. Permanent paint usually doesn’t wash away, but I always like to add a coat of sealant just in case.

Now for the real fun…time to hide your fairy doors and gnome doors. (Gnome doors go on trees, generally speaking.)


I like making some of our fairy doors to resemble our neighbor’s front porches and gardens…


Enjoy!!!


See also this DIY for fairy furniture!


Fairy Mud

I first saw a recipe for FAIRY MUD a year or two ago on a blog called Happy Hooligans. When L’s cousins came over to play on a hot day last summer it was the perfect activity! Fairy Mud is just as much fun for the kids to make as it is to squish between your fingers and play with! With the temperatures rising and our fairy garden in full bloom, we’ll be making it again this week!


Materials needed:

  • 1 1/2 bars of soap
  • 2 rolls of toilet paper
  • food coloring
  • 1.5 to 2 cups of WARM water
  • glitter, sequins, buttons, jewels, flower petals
  • cheese grater
  • 2 large bowls or tubs

First, grate the bars of soap into a large bowl. If you have older kids, they can certainly help with this process!


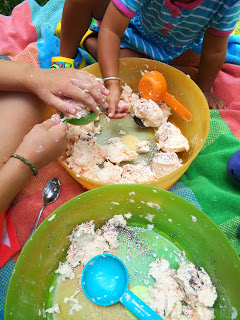
While you’re busy grating soap, have the little ones unravel 2 rolls of toilet paper. So silly, they’ll just love it! Gather the toilet paper into the second large bowl.


Once the soap is grated and the toilet paper unravelled, pour the WARM water into the bowl with the soap and add a few drops of food coloring as well. Squish and squeeze the soap shavings until you have some consistently melted and mushy soap blobs.


Pour the water and soap over the toilet paper in the second bowl and continue to mush and mold the fairy mud concoction.


While the kids are playing, add some glitter into the mix. Followed by jewels, flower petals, anything you and the kids can come up with!

Don’t forget to pull out some measuring cups, spoons, and muffin tins so you can make some fairy mud pies as well! Amazingly fun!!! Enjoy!


Doorknob Mushroom-Fairy Houses

Aren’t these DOORKNOB MUSHROOM-FAIRY HOUSES the cutest??? I originally planned to just make mushrooms out of these little wooden knobs, but I just had to paint a little door and window on too. They’re just so sweet! L painted hers knobs into multi-colored mushrooms today and they are already out in the garden! So easy and so much fun!


Materials needed:

  • small wooden knobs w/ screws
  • acrylic paint
  • sealant spray
  • egg carton (optional)

First, twist the screw into the knobs.

Next, paint your knobs. You can paint them to look like mushrooms or add a few extra details for a fairy house. Even a 3 year old can paint the knob to look like a cute, lil mushroom!


After your knobs are painted, set them aside to dry. I suggest using an egg carton to prop the knobs up. Next, take them outside to spray with a coat of sealant. (The egg carton works great for this step too!)

Now for the fun part…tuck them away into your fairy garden, in a flower pot or in a wreath. Keep the screws in, just push them into the ground. Adorable! Might as well make a couple extra for family and friends!


If you like this one, you’ll be sure to like our JAM JAR FAIRY HOUSES and GNOME HOMES too!

Jam Jar Fairy House / Jam Jar Gnome Home

The other night I had a hard time falling asleep because I couldn’t stop brainstorming about how to turn a jar into a fairy house. (Only me…I know.) I knew I wanted to make it so at night the windows and door would light up; the house needed to be sturdy enough to stand up to the elements outdoors; and I wanted to use craft materials we already had around the house. Finally I had a eureka moment…why not use my beloved hot glue gun!?! So many people think hot glue guns are just for gluing things together, but they can add texture and dimension to your work as well. I’m super excited to share with you this simple tutorial for making JAM JAR FAIRY HOUSES & GNOME HOMES! They really are adorable!


Materials needed:

  • jars
  • hot glue gun and glue
  • acrylic paints
  • preserved moss, tree bark, or dried leaves
  • dried flowers
  • a bead or button
  • tea lights (battery operated)


First, decide which direction you’d like your jar to stand. For instance, my smallest JAM JAR FAIRY HOUSE stands on its lid, but the larger one (made from an apple sauce jar) stands upright. Using your hot glue gun, “draw” a door and windows on your house. Then, fill in the walls of the house with vertical lines of your hot glue. Try to draw them on in long, fluid strokes, but the house by no means needs to be perfect. Each lil blip or quirk, will give your fairy house more character!


Next, paint the inside of the jar where your windows and door are located. Keep in mind that you’ll want some light to shine through at night, so don’t pick colors too dark or layer the paint too thick.


After you’ve painted the inside, paint the outside of the jar brown. Carefully go around each window and the doorway.


After the paint dries, the final step is gluing on dried moss and some tiny dried flowers. For our little jam jar fairy house, I glued moss on the top of the house (bottom of the jar) and along the edges of the lid. You can find preserved moss at your local craft store or, if you like, just use natural materials found in your own backyard…twigs, tree bark, fallen leaves, helicopter seeds, acorns.


You can display your fairy houses inside or outside. To light them up at night, just place a little, battery operated, tea light inside. Enjoy!


If you’re giving a JAM JAR FAIRY HOUSE away as a gift, don’t forget to include some fairies and some fairy furniture tucked away inside the jar!

DIY Fairy Folk

DIY Flower Fairies

Fairy Furniture

DIY Fairy Wands


The Mud Kitchen

Our MUD KITCHEN might just be my favorite kids’ project yet! I’ve been dreaming of building one for L since late last Summer and this Spring we went for it! Collecting things and building it was definitely fun for me…I love scouring antique shops and junk stores with an idea in mind. And now L has a blast playing in her MUD KITCHEN nearly every day! She’s always loved digging in her dirt pit, so we set the mud kitchen up right beside it.


Materials needed:

  • old pots and pans, muffin pan, mixing bowls, old tea set
  • cooking utensils and/or garden tools
  • old rags
  • shelving unit
  • DIRT!!!

The best places to find things for your MUD KITCHEN are yard sales, flea markets, antique and junk stores. If you find a water-proof set of shelves or little bench, that would work great! We ended up making ours out of some lumber and cinder blocks. L helped sand and paint the wood, I painted two lil burners on the top pieces, and we finished it off with a few coats of polyurethane. I love that L was able to make it her own!


We found this perfect mirror to attach to the kitchen for only $15 at a local antique store. I wanted a mirror for a bit of a “kitchen window” effect, plus it makes our tiny yard look a bit bigger! It was the only one I could find that had a wooden backing to it…most others were particle board or cardboard. Our mud kitchen is up against our house, a little bit protected by the weather, but when it pours rain the kitchen still gets wet. Make sure everything on your kitchen is more-or-less waterproof.

Along with the burners I painted on top of the mud kitchen, we also attached two lil knobs (to turn the stove and oven on, of course)! You can find knobs really cheap at your local Habitat for Humanity or at your local hardware store. Since ours were attached to solid wood, I just glued them on with some superglue. So far it’s worked great!

On the side of our mud kitchen, we attached two cute lil hooks. Again, we found them at a local antique/junk store for $1. They couldn’t be more perfect! L hangs her lil dish rags on there and when she’s all done playing with her kitchen each day, I have her clean it up. She brushes the dirt off with a dry rag, follows up with a wet rag, and she puts all her pots and pans away.


Like many activities like this, my biggest tip to you would be to withhold some of the kitchen supplies, giving your kids a lil more day by day. On the first day I gave L her pot, pan, and mixing bowls. On the second day, we added an empty milk carton, egg carton and vanilla bottle. After that, we threw in a muffin pan and some old silicon muffin cups. I have an old child’s tea set I’m saving for a special day as well. Keep things interesting and mix it up!


Sparkle bottles would be a fun addition to your mud kitchen too! Not to mention, making some potions out there as well. (Tell me I’m not the only one who mixed up “magic potions” with water, dirt, wild onions and herbs as a kid!)

How much would your child LOVE a mud kitchen??? Mmm…mmm…mud pies, mud spaghetti, dirt scrambled eggs, mud muffins…


DIY Ant Farm

I’m so super excited to share this project with you. ANT FARMS are fun to make and fascinating to observe with your little ones! L and I have been staring at our jar all day, reading kids books on insects, watching some National Geographic clips on ants, and we’ve found some fun facts along the way. Within the first 24 hrs of placing your ants inside your DIY ANT FARM, they will dig tunnels and make chambers right before your eyes!

The ants you collect will most likely be “worker ants” and all worker ants are female…pretty amazing! Most ant colonies contain one queen ant who lays all the eggs, male ants whose only job is to make babies with the queen, and worker ants who gather food, dig tunnels, and protect the colony. When collecting ants you want to be sure to only collect ants from one colony, otherwise the ants will fight to their death inside your jar.

Materials needed:

  • large jar (pickle jar)
  • small jar (jam jar or spice jar)
  • loose, sandy soil (Cactus/Citrus Soil works great!)
  • spoon
  • small jar or cup
  • jam or sugar water

To make your ant farm, place the small jar upside down, inside the larger jar.

Next, carefully spoon the soil into the jar. L would place a spoonful on the top of the little jar and then brush the soil down along the sides. It does not have to be packed tightly, just filled to the top.


To collect ants, put about one tsp. of sugar water or jam into a separate jar or cup and place it outside on its side. This is your ant trap. You may want to set a few ant traps around your garden and be patient. It can take a few days for the ants to discover your bait, but once they do many will follow!

After your ant farm is made and the ants have been caught, quickly and carefully dump your ants inside your ant farm and screw on the cap. You’ll want about 10-20 ants. I think we have about 5 ants in our jar…it takes a couple minutes to find them, but works just fine! They are busy digging all those tunnels and chambers all by themselves!


Once a week, open the lid to your jar and place a few drops of sugar water and/or a couple pieces of bird seed. You don’t want to feed them too much, once a week is plenty! When you open your jar to feed the ants, plenty of fresh oxygen will enter the jar as well…no need for holes! Keep your ant farm indoors, not too hot and not too cold, away from direct sunlight.

For more info on ants, check out some books at your local library and click here to see some fascinating photos and videos from National Geographic! Enjoy!!!