It’s Tea Time!!! Tea Party Ideas

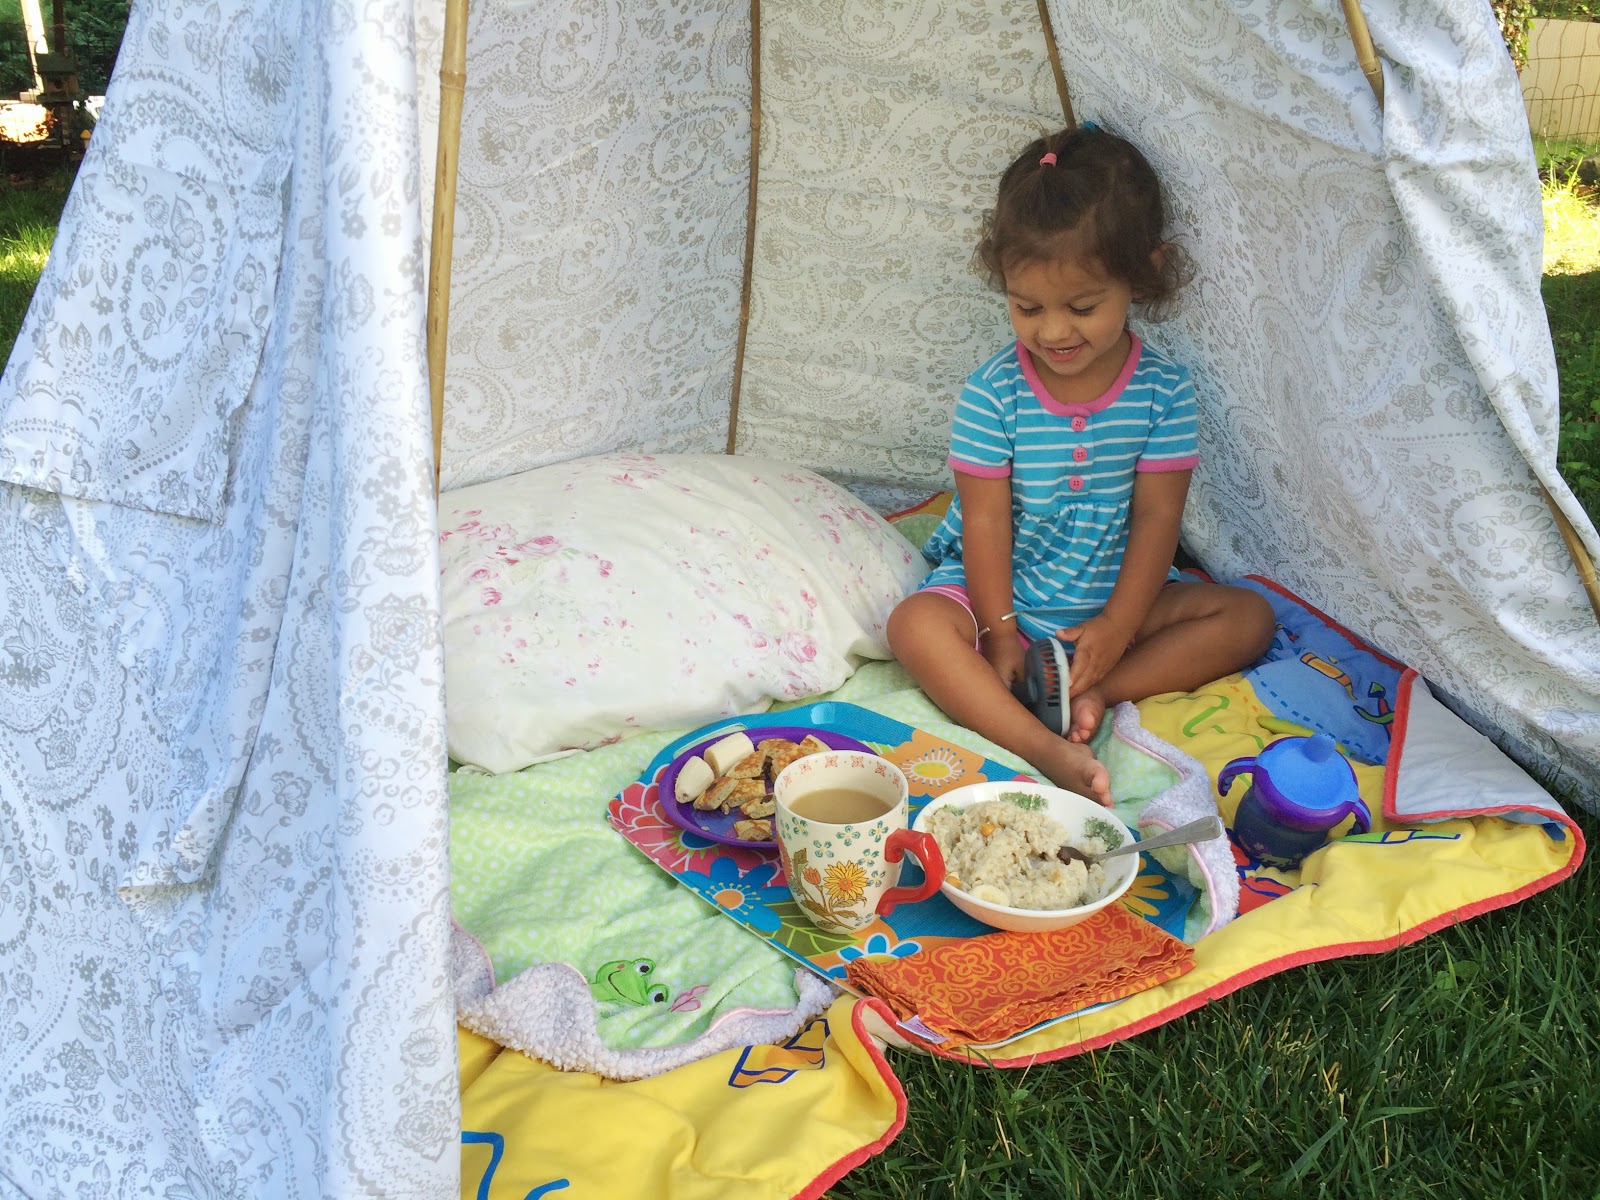
Over at Our Beautifully Messy House, we love a good TEA PARTY! We have breakfast tea parties and mid-afternoon tea parties, tea parties in a teepee outside, and tea parties on the kitchen floor! We have tea parties with friends and tea parties with fairies! There is only one rule in our house when it comes to having a tea party: Everyone must wear a hat! It doesn’t matter if you are still wearing your pajamas, everybody starts the tea party with a hat!


IMG_9142

IMG_9633

IMG_6466


If you’re planning ahead, you can make some “Floppy Newspaper Hats” for tea time! (DIY here.)

IMG_7266


Tea Ideas

Obviously you can steep any flavor of tea, but with little kids you may want to get creative! Sometimes I pour L half a cup of Blueberry Wild Child Tea, fill the rest with milk and she drinks it out of her fancy tea cup with a straw. Anything goes! Kids can drink water, milk, juice mixed with water, or hot chocolate…if it’s in a tea cup, it’s tea!


IMG_8855


Tea Cups

Tea cups don’t have to be fancy, but fancy is fun! The best place to find tea cups is at antique stores, yard sales and flea markets. Such places are filled with tea pots and cups and, at only a couple of dollars a piece, it’s no big deal if one breaks.


IMG_9635

Tea Party Treats

For breakfast tea parties, we make PANCAKE SANDWICHES with cream cheese and strawberry jam layered in-between two pancakes. To make them extra fancy, cut the pancakes with a heart cookie cutter and let the red, strawberry jam shine through!


IMG_8833

These Strawberry Jam Scones are perfect for tea time! Get the recipe here.

IMG_9157


No-Bake Acorn Treats are fun and yummy for your tea party outdoors! Get the quick and easy how-to here.

IMG_7737


If you’re just throwing together a tea party last minute, anything will do…a granola bar cut into bites, muffins, a bowl of popcorn. Your kids will love it!

A Tea Party for Fairies

IMG_9127


If you don’t have fairies and fairy furniture, you can easily make some!

IMG_9148

DIY Fairy Folk


IMAGE_1841

DIY Fairy Furniture

IMAGE_2311

Acorn Cap Treasures (aka Fairy Hats!)

Use cheerios to make FAIRY DONUTS. If you have a microwave, simply place one chocolate chip on top of a cheerio and zap it for a few seconds. Top with mini-sprinkles! We don’t have a microwave and melted the chocolate chips in a double-broiler on the stove-top and it worked just as well! For powdered fairy donuts, dip the cheerios in some maple syrup and then toss around in some powdered sugar. Silly, sweet, and so much fun!!!


IMG_8598

IMG_9123


If you don’t have a mini-tea set, you can use buttons for fairy plates and thimbles for the tea cups. Have the tea party on top of a box or a colorful pillow!

IMG_9131

IMG_9408


Please don’t think that if you have little boys that they can’t partake in your tea party fun! Everybody loves a party and if you must, call it a “picnic!” Enjoy!!!


IMG_8769


PVC Pipe Ball Drop / Water Run

We made this PVC PIPE BALL DROP / WATER RUN last Summer to take with us to the beach…beach houses usually have large windows and sliding doors so I knew it’d be the perfect place to test it out. We originally used corn kernels to drop through the tubes, which turned out to be a huge mess, but we had fun!!! As cabin fever set in this week with cold, snowy weather outside I decided to bring out the PVC PIPE BALL DROP / WATER RUN again! This time we used poof balls (as well as plastic fairies and frogs) to drop through the tubes and it worked great! You could also put this up in the shower and dump water through the tubing to make a water run…I think we’ll try that next! The materials for this project only cost about $10 and it provides hours of fun!


IMG_9538

IMG_9528


Materials needed:

  • PVC connectors and elbows
  • suction cups
  • drill
  • flathead screw driver
  • poof balls, beans, feathers, pennies…

We found these suction cups at the craft store and they were perfect…just remove the little, metal hook.

 IMG_9455


First, drill a hole in the middle of one side of each PVC connector. Compare the suction cup piece with the drill bits to figure out the right size to use…you can always drill a bigger hole if need be, so start with the smaller bit if you’re deciding between two. Using the flat head screw driver, pry and poke the suction cup into the PVC connector.

IMG_9456

IMG_9452

IMG_9453


Now, time to play!!! Press the tubes onto a sturdy glass door or window and let the fun begin! It’s fun letting the kids experiment with placement of the tubes!


IMG_9480

IMG_9464


If your “Ball Drop” has two starting places, it’s fun to race the balls down…see whose comes out first!

 IMG_9471

IMG_9490


To mix things up, give your kid a spoon or tongs to pick the balls up and drop them down!

 IMG_9552

IMG_9559


Get crazy! Have fun! Enjoy!!!

DIY Planetarium for Kids

Have your kids ever daydreamed about going to the moon? To Mars or the Milky Way? By making a PLANETARIUM FOR KIDS you can take them to outer space without even leaving your house!


2015-06-01 20.56.05

IMG_9221


Last week L and I turned our dining room into a PLANETARIUM complete with the all the planets of our solar system, constellations, “telescopes,” MOON DOUGH!, Glow-in-the-Dark Glitter Bottles, Sprinkle Star Sugar Cookies and more! Once you get going on this project the possibilities are endless…your kids will be entertained, playing and learning for days on end!

IMG_9243


First, start by making the planets in our solar system. Find a good picture of the solar system, in a book or online, and talk about the planets. Depending on the age of your kids, you can keep the research brief or stretch it out, talking about the facts and properties of each planet. (I included Pluto when teaching L about our solar system…it was always my favorite planet and last I heard, it was back in the solar system!) Next, cut out circles of construction paper to resemble the sun and each planet. Have your lil one color them!


 IMG_9203

Tape your planets to the underside of a table! Depending on what your child is interested in, feel free to add the moon (made out of tin foil), some constellations…anything you all think is important and fun! Having a good time learning about outer space is the most important part here, so if your lil one wants stars all over in random places, go with it! Why not!? Among our randomly placed stars we included the Big Dipper and Cassiopeia.

IMG_9221


Hang some foil stars from the sides of your table for a lil extra pizzaz as well. This was WB’s favorite part!


IMG_9245

Throw a blanket and some pillows under the table, grab a flashlight and get ready to star gaze! “It’s a real campout!” L exclaimed.


IMG_9227

IMG_9237


Having a flashlight is a must! You can put some SENSORY BAGS (click here) over the flashlight to change colors.


IMG_9208

IMG_9209

Make some sparkle bottles as well! The GLOW-IN-THE-DARK BOTTLES (DIY here) were a lot of fun with this activity! How many stars can you count? Can you see any constellations in the bottle?


IMG_9325

IMG_9204

IMG_9308


Make a “TELESCOPE” too!


IMG_9242

Materials needed: 

  • paper towel tube (or paper rolled up)
  • clear plastic (sandwich bag works well)
  • star stickers
  • rubber bands


IMG_9232

Cut the plastic sandwich bag into a small square. Stick some star stickers on top. Place the plastic over the cardboard tube and secure it with two small rubber bands. Looking out the window or at a light with the “telescope,” your child will see stars! Maybe even a constellation!


IMG_9234

IMG_9241


You can also do the reverse…punch some holes out of construction paper (best if they are in the form of a constellation), and shine the flashlight through! The stars will appear upon the wall!


IMG_9360

Getting hungry? Make some SPRINKLE STAR SUGAR COOKIES (recipe here) with your kids! It’s a quick and easy sugar cookie recipe and perhaps you’ll find more constellations as you snack!


IMG_9619


Another fun mess to make as you’re exploring outer space is MOON DOUGH! (recipe here) One of our favorites…the silky powder can be molded into shapes and forms and only includes 2 ingredients!


IMG_9358

Have fun with this one!!! What else will you all come up with as you venture out, past our atmosphere???

IMG_9213


Sock Puppets

This craft is as old and simple as they come, but so much fun!!! We often forget about SOCK PUPPETS, though I’m sure most of us played with them as kids! L and I made these sock puppets last week to give away as party favors at our girls’ birthday party. We made two for each kid and they were a big hit!


IMG_8741

IMG_8745


Materials:

  • socks
  • buttons, googlie eyes, sequins, felt, pompoms, bells…
  • hot glue gun and glue

IMG_8733


First, empty your sock drawer! Your kids will love this step, digging and swimming through your socks. Pick out a few pairs that you don’t wear…it’s definitely a bonus if they’re bright and colorful, but plain ol’ white socks work just as well.


IMG_8718

IMG_8730


Next, decorate! We made unicorns, dogs and million-eyed monsters this time around! Get creative and have fun! It’s nearly impossible to mess this one up!


IMG_8741

IMG_8743

IMG_8734

IMG_8750


A fun craft to follow this one, especially with older kids, is decorating some cardboard for a backdrop and putting on a sock puppet play! So much fun!!!

DIY Soap Crayons

Here’s another fun craft for your kids to help make and to play with…L had a ball with her DIY SOAP CRAYONS! They’re a little different than the bath crayons you’ll find at the store…these ones wash off the bath and shower walls easily with water. L likes to color with these ones in the shower before I turn the water on, then she makes a nice soapy, colorful mess once the water is on. They’re fun for coloring on your skin too…just add warm water and it washes right off!

Materials needed:

  • bar of white soap
  • cheese grater
  • food coloring
  • 2 to 4 tablespoons hot water
  • fork and spoon
  • ice cube tray, muffin tin, paper cups or candy mold

First, grate the bar of soap into a large bowl. Grate the entire bar, making about 2 cups of soap shavings.


Add 2-4 tablespoons of hot tap water to the soap and mix-mash with a fork or spoon. Continue mixing until the soap has formed a semi-liquid consistency without any big lumps.


Spoon the soap into your molds. Add about 5 drops of food coloring to each one and mix carefully with a spoon. We found that a baby spoon worked great for this step!


Once your soap crayons are all mixed and colorful, carefully push the soap down evenly into the molds. Set them aside to dry for a full week.

After a week has passed and the crayons have hardened, carefully turn the molds over and pop the crayons out. If their underside is still a little soft, let them finish drying for a few more hours.


(We saved all the little colorful crumbs too…added to a bubble bath or some shaving cream, they will make a beautiful rainbow mess!)


Now for the fun part…time to color and play with your own homemade soap crayons!!! Enjoy!!!


3 Secrets for Decorating Your Christmas Tree

I always feel like our Christmas tree is a miniature version of the one I grew up with…I’m sure as our ornament collection grows over the years, so will our tree. Many of our ornaments are ones that hung on my family’s tree when I was a kid and hold such special memories to me. Isn’t that one of the best, yet bittersweet parts of Christmas…all those memories? The exciting thing is that now we have the chance to make memories with our own children…some new and some borrowed from our own childhoods. I feel like our Christmas tree is just that!


Popcorn Garland

My parents’ Christmas tree still dons the garland my brothers, sisters and I made when we were kids some 20-30 years ago. If you make it right and store it well, it will obviously last a very long time.


One of the most important tips is using plain popcorn, popped in a hot air popcorn machine. Also, if you plan ahead and have the time, letting your popcorn sit overnight and become slightly stale helps in stringing it…it won’t break as easily. To string the popcorn just use a piece of thread (or dental floss) and a sewing needle. You don’t have to make one super long string at once, make 4 or 5 foot long ones and tie them together.


When storing the popcorn, first start by adding a bright ribbon to both ends of your garland. That will make finding the end easier next year. Find a medium-large container and coil it around inside the container, much like you do a garden hose. We use a plastic tupperware-like container, but a large popcorn tin works very well too.


Tree Skirt

If you’re like me and like a homey, vintage looking tree skirt you don’t have to look far. I bought this cheap Christmas blanket one year at a thrift store and we wrap and fold it around the bottom of our tree. I do wish it was actually a quilt and not a look-alike-quilt, but nobody would ever know the difference and it achieves the look I’m going for. You could do the same with a table cloth or any large piece of fabric.


Tree Topper

Don’t be afraid to use a non-traditional tree topper. I love decorating for Christmas, but even more I love adding magical little twists to our decorations…keeping things unpredictable and slightly quirky. I found this glittery butterfly clip at a local floral shop years ago and attached some florist wire to the back to help secure it to the tree. So much fun!


Happy decorating everyone!

Scavenger Hunt

SCAVENGER HUNTS are lots of fun for kids (and adults) of all ages! They only take a couple minutes to throw together and can be done just about anywhere…outside on a beautiful day, inside on a rainy day, in your backyard, on a walk around town, at an art museum or the grocery store. At times when kids may become impatient or get the wiggles, a scavenger hunt can be a great way to keep them entertained!

Basically all you need is a list of things to look for and a small bag to collect your finds. It’s that easy!

Our  “around town” scavenger hunt last weekend included the following: an orange leaf, a yellow leaf, a rock, a stick, a feather, a button, a flag, an acorn, a pumpkin, a scarecrow, books, a man wearing a hat, a dog, a flower, and berries. We put the small items that we found in our little bag, while the things that were too big (like a man wearing a hat) were just checked off the list.

You can make a scavenger hunt for long car rides too! Obviously you won’t be filling a bag with things, but your kids can check items they see off a list…or, even better, put it into a “BINGO” type format and you have a car game! See who fills their card first!

Another variation: Leave a trail of clues, leading your kids to a surprise in the end! We like to do this one around the house, sending L upstairs, then downstairs, into cabinets, and under pillows, all to find a hershey kiss tucked into one of her shoes at the end. It takes a little more prep time, but is oh so fun!!!

Where will your SCAVENGER HUNT take you?

Reclaiming Quiet-Time

Over the past few months the afternoons have brought upon a lot of change in our house. L essentially dropped her afternoon nap when she turned 2…she took about one or two a month. We stuck to routine and put her in her crib everyday for at least an hour. Most day’s L bounced around for the entire hour and a few days she’d bounce herself to sleep. Then came the change out of her crib (so WB could use it) and into a “big girl bed.”


For a month or two she stayed in her “big girl bed” or at least in her room playing quietly for an hour, but then she learned how to open her door. We put a child lock on the door and it took her about 5 minutes to learn how to take that off. For a week or two “quiet time” became the very worst hour of the day, every day. I would spend the hour marching L back up the stairs and into her room…I tried threatening to take toys away. I tried rewarding her with stickers or special activities to follow quiet time. I tried holding the door shut so she’d think it was locked. None of it worked and none of it seemed like the right thing to do. We’d have a great day all day, but when quiet time came it’d end with us both in tears and doubly-stressed out. So I took a step back and I thought about it…and I came up with a plan.

I realized that naps were definitely long gone. L really does fine without a nap and it results in an earlier bedtime…7 PM and both girls are sound asleep. (Yay for this exhausted mom at the end of the day!) I also realized that really the #1 reason L wanted out of her room was that she just wanted to be with me. If I’m trying to hold the door closed or lock her in there and she’s just miserable, what’s the point? And if it makes me miserable on the other side of the door and/or wakes her sleeping sister up, truly what’s the point? Quiet time is to give us all a break. A mental break if nothing else.

So I came up with some new rules and some new activities to keep L occupied while I clean dishes, reply to emails, read the paper, fold laundry…whatever I need to do for 30 quiet minutes. If I keep an open-door-policy with L, so she can go in and out of her room, up and down the stairs, there are no more arguments and she tends to stay in her room longer! I’ve also come up with a number of ACTIVITY BAGS to keep her quietly occupied.

The following are some of L’s “quiet time activity bags.” You can make your own just by going through your drawers, recycling basket, and your craft supplies and look for safe materials that will keep a little one entertained. I give L an activity bag a few days a week, rotating them so they always seem new to her. On days when she’s already happy playing with blocks or coloring, I just let her keep to herself while I get my own chores done.

Paper bag, 2 paper cups, egg carton, sheet of felt, poof balls, googlie eyes, feathers, straw, buckeyes

Paper bag, snack container full of beads, shoe lace (for stringing beads), pipe cleaners, silicone muffin cups, painted buckeye, hopping frog toy

Shoe box, cardboard tubes, cotton balls, tissue paper, Little People, colored craft sticks

Paper bag, I Spy book, straw, pipe cleaners, feather, spools, slinky

foam floor puzzle/mats, Water Wow book, Magna Doodle

The following two activities take a little more prep time, but it’s a fun surprise to keep your kid occupied!

Tea Party set-up: cardboard box, blanket, tea set, empty honey bottle, pretend cupcake, poof balls and spoon, napkins

Teepee…everything’s better in a teepee (DIY No Sew Teepee)

Notice all the bags include lots of creative possibilities. Beads can be strung on a shoelace or on pipe cleaners, feathers can be put into straws; cotton balls can be blown across the floor with a straw; things can be sorted or dumped from cup to cup; the cardboard box under the tea party can be flipped over and become a rocket ship! For more ideas, check out the Imagination Box too! Like always, you know your child, make sure anything you leave in your child’s room is SAFE for them to play with unattended or semi-unattended! (I still turn the video monitor on when I leave L with beads in her room!)

What do you think? Do you have this problem in your house? Has quiet time and nap time become a disaster? What do you all do to make it through the afternoon with a toddler who won’t nap?

DIY Story Stones

This is one of my favorite “games” that I’ve made for our girls, as well as one of my favorite gifts to make for other children. It’s such a versatile, quirky activity for kids (or adults) of any age and the possibilities of play are endless. We take them on long car trips, pull them out when friends are over, and use them during quiet-time when WB is sleeping.


I’ve read before that “story stones” come from the Waldorf school of thought, believing that it is far more important to teach children how to creatively weave a story at a young age than it is to teach them how to read and write. After the directions for making story stones, read on for various ways of how to play with them!


Materials needed:

  • colored pencils and paper
  • sticker book (optional)
  • old workbooks with lots of little pictures (optional)
  • scissors
  • smooth stones (found at the dollar store)
  • Mod Podge and sponge-brush

First, spend some time doodling little pictures on white paper. Think about what pictures would make up a good story…include people and animals, active words, weather, vehicles, houses, etc. Try to keep some of your pictures a little bit vague. For instance, instead of drawing a plate of spaghetti you could draw a fork, knife and spoon and the child playing could imagine any kind of meal. A picture of a foot could lead to putting on socks and shoes or it could be used for walking/running. A swirly doodle could be used for wind, but it could also be used for music, dancing, painting, water, etc.

Next, cut out each of your little doodles. If you don’t want to draw your pictures, or you’d like to use various mediums as I do, you can also cut pictures out of old workbooks or children’s dictionaries, or use a sticker book. I tend to look for such books whenever I’m browsing a flea market, antique store, or the dollar store.

After the pictures are cut out and ready, go ahead and wash and dry your rocks. Working one stone at a time, apply a little bit of Mod Podge to the smoothest surface of the rock then lay a picture in place. Apply more Mod Podge over top of the picture, making sure you smooth down all edges and avoid any wrinkles in the paper. Mod Podge dries pretty quickly. After the stones are all dry, I like to go over them all with another thin layer of Mod Podge to give them an even smoother look.


Once the stones are all dry, you’re ready to play!


(In case you want story stones the really easy way and you live in the Winchester area, Steamy’s Cafe on Piccadilly St currently sells story stones…1 for $1 and 20 for $15! They make great gifts!)

Ideas for Play:

SOLO STORY-BUILDING: Take turns building your own stories.

DICTATING STORIES: This is a good one especially with young children…take turns telling a story, while the other person finds the stones and puts them in order.

PARTNER OR GROUP STORIES: Take turns, picking stones and adding to the story.

RANDOM SELECTION – MYSTERY STORY: Turn all the stones over and take turns randomly selecting a stone to build a story.

ONE STONE STORY: Select only one stone at random and make up a whole story revolving around the stone. Or tell a silly sentence using the stone in the sentence.

CLASSIFYING: Put the stones into groups based on theme, color, likes and dislikes, etc.

EXPLORING: Let your child use the stones while playing with blocks or trucks or coloring or playing house. The stones can become pets, cars, food, etc. If the children are having fun imagining, just let them go with it!

What other ways have you found to play with your story stones? Please share with us in the comments below!

Playing Monet

Ever since I was a kid and was given the book “Linnea in Monet’s Garden,” Claude Monet has been one of my very favorite painters. When L found my old book last week, I immediately thought of our melted crayon art and thought that we could try to make our own impressionist, water lily artwork. We used a different technique to melt the crayons this time, and we used materials found in the recycling basket for a “canvas.” I was thrilled to be able to teach L a little bit about Monet and his phenomenal paintings…and in such a fun way too!


Materials Needed:

  • empty cereal or cracker box
  • acrylic paints
  • crayons
  • oven

First, I cut the cereal boxes to make nice little “canvases” to paint on. I left the side flaps intact, making the artwork easier to move while working, using the flaps as handles. You can cut them off at the end.

Next, looking at Monet’s painting we talked about what colors to paint the background, representing the water. We chose two colors of green and two of blue to use. I let L paint the cardboard canvas however she pleased, encouraging her to cover the entire thing.


After the paint dried, it was time to create the lily pads and flowers. I made crayon shavings by simply cutting up crayons into little shavings or pieces. You can use a cheese grater if you like, but a sharp knife works just fine! (The crayon shavings pictured here are from another piece of work…hence the orange, yellows and reds. For Monet’s water lilies, I made shaving from three different green crayons, as well as some pinks, yellows and white.)

Now, using one color at a time, L sprinkled the crayon shavings onto her canvas. We started with the greens for the lily pads, putting the shavings into little piles, and followed it with the pink and white for flowers.


Next is the really fun part…melting the crayons, transforming the artwork! With the oven set to 200 degrees F, I lay the cardboard on a cookie sheet and placed it in the oven for 5 minutes. L loved watching the crayons melt!

Once the shavings were all melted, we removed the artwork from the oven to cool. Be very careful not to tilt or shake the artwork at this point…for the first minute or two before the melted crayon cools, it’s very liquid and will drip or move-mix around. After a couple minutes, the crayon is dried and the art ready to show off and display!


I hope you have as much fun with this one as we did! If you have a favorite impressionist painter, other than Monet, I’m sure the melted-crayon technique would work to mimic their work too! Enjoy!