I love this super cute, jelly fish craft for so many reasons. Our TIN FOIL JELLY FISH were inspired by a trip to the Baltimore Aquarium and the girls’ fascination with “The Jelly Fish Invasion” exhibit. (Super cool…if you are anywhere near Baltimore, go see it!!!) I love that this craft costs nearly nothing to make and L learned all about textures and rubbings while coloring the foil. And I LOVE the way our jelly fish look hanging in our kitchen window. If you can, place them near an air vent…when the air kicks on the jelly fish will come to life, dancing and swimming in the sun!
“The Jelly Fish Invasion” at the Baltimore Aquarium…
Materials needed:
- tin foil
- permanent markers
- egg cartons
- other small, plastic containers (think applesauce, olives, etc.)
- string or fishing line
- painted stick
- tape
- scissors
- paperclips
- nail or sharp-tipped tool
First, cut your egg carton into little jelly fish shapes.
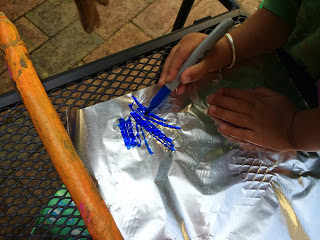
Next, take a few sheets of tin foil and have your children color them. This is a great opportunity to make rubbings. L colored on the patio furniture and bricks, over tree bark, on the textured sidewalk and on her slide. Not entirely necessary, but why not!? Your kids can also try making different patterns if coloring on a flat surface…stripes, dots, swirls, anything goes!
Cut the tin foil into little squares and have your kids wrap the egg carton cut outs with the foil. You may have to help them smooth down the outer edges.
If you have some small, plastic containers to use as well, first poke a hole in the center. Next, cover the containers with the foil too.
Cut strips of tin foil and tape the strips, 2 or 3 at a time, to the inside of your jelly fish.
Using a nail or sharp tool, poke a hole into the top of each jelly fish.
Now, it’s time to hang your jelly fish up. I knew ours would go in our kitchen window, so we hung the jelly fish along a painted stick. You could also make one large jelly fish and hang the smaller ones underneath. That method would be cute if hanging your jelly fish up under a light, in the center of a room.
We hung our jelly fish by stringing them onto fishing line and tying the line to a paperclip underneath each one. Some hung on their own, while others had a second jelly fish hanging underneath. Get creative and have fun with it!
When doing projects like this, it’s definitely easier to have the jelly fish hanging while you are tying them on rather than laying flat on the ground.
Put them up to display and enjoy!!!


