Color Changing Carnations

The latest experiment in Our Beautifully Messy House is one of the most colorful ones yet – Color Changing Carnations! It’s pretty simple to throw together and you will start to see results within a day! You can do this experiment with any white flowers…daisies, roses, even Queen Anne’s Lace…but carnations are cheap and abundant in our local grocery store these days. I was able to use this experiment to show L and WB how chemicals get into the food we eat, especially the food we grow. L knows why we always try to find organic fruits and veggies at the grocery, but now she can see why we do too!


Materials needed:

  • jars or vases
  • white flowers
  • scissors
  • water
  • food coloring

First, trim your flowers’ stems. It’s best to cut flowers at an angle and to remove any leafage near the bottom. Leaves trapped underneath the water’s surface become moldy and cause your water to go bad sooner.

Next, put about 10-20 drops of food coloring into each jar. The bigger the jar, the more food coloring you’ll need. Then, add the water.

Finally, put a flower or two into each vase and wait a day or two for the magic to happen!

The results are fun and exciting to see! Even I couldn’t wait to see what our flowers looked like with each passing hour.

To take this experiment to the next level, you can try making bi-colored carnations. Carefully split a flower stem down the middle and put each stem half into a different jar of colored water. We tried to make a half-yellow, half-red flower. Our “red” jar didn’t have quite enough food coloring in it, but the flower was clearly half-yellow! We’re still working on this one!

Enjoy!


Mushroom Spore Prints

Did you ever make MUSHROOM SPORE PRINTS as a kid? They’re super-easy to make and super-beautiful! Lately the girls and I have found lots of mushrooms around the yard, at L’s school, and when out hiking in the woods! Mushroom spore prints are so mush fun to make…you’ll be out looking for mushrooms everywhere you go! When looking for mushrooms, you’ll want to find some that are fresh (just a day or two old), before they’ve dropped their spores. Mushroom spores are no bigger than a speck of dust and the wind scatters them all around. As you probably assumed, the spores are mushrooms’ “seeds.” In making spore prints on paper, you’ll be amazed at how many just one mushroom has!

2016-10-26-21-13-14


While it’s fun to poke and prod at mushrooms, investigating them and marveling at their unique beauty, be sure to remind your kids that we NEVER eat a mushroom that we find outdoors. Only experts know the difference between ones that are deadly and ones that are okay to eat.


Materials needed:

  • mushrooms
  • sharp knife
  • dark paper or card stock
  • a large bowl or container


First, find a good mushroom or two. Mushrooms come in all shapes and sizes…you’ll want a typical dome-shaped mushroom cap, though it doesn’t matter what color.

dsc_0397

After you’ve carefully removed the mushroom from the soil, cut off the stem close to the top of the mushroom.

dsc_0399

Flip the mushroom onto a dark piece of paper.

dsc_0401

Cover it with a large bowl or container, and let the mushroom sit for a few hours or overnight.

dsc_0403

Carefully remove the container and lift the mushroom off the paper without smudging the spore print.

dsc_0407

dsc_0408

Fascinating and beautiful!!!

2-Ingredient Slime

This SLIME recipe has to be the quickest and easiest sensory-dough-goop we’ve ever made in Our Beautifully Messy House! It was perfect for a cold, rainy afternoon…a perfect excuse to keep the t.v. off as well! Both girls loved squishing and stretching our slime and I’m sure they’ll be asking for it first thing tomorrow morning!

DSC_0057

DSC_0071

Ingredients:

  • one bottle, glitter glue
  • 1/4 cup, liquid starch

DSC_0029

I’ve seen various recipes for this slime and it looks like all types of liquid, non-toxic glue will work: white (Elmer’s) glue + food coloring; clear glue + food coloring + glitter. I thought just using the glitter glue would take out the extra steps of adding coloring and glitter, and it worked great! No dyed fingers and no glitter mess to boot!

First, empty an entire bottle of glitter glue into a plastic container or bowl.

DSC_0030

Next, add the liquid starch a little at a time. Stir for a minute or two, until the slime congeals together and is semi-solid.

DSC_0036

DSC_0037

Dump the slime out on a hard surface and squish with your hands. (After this step, my hands and the plastic mat were a little wet. I simply dried them off, and after that, the slime was virtually mess-free!)

DSC_0047

Time to play!!! L and WB enjoyed squishing plastic figurines into their slime this afternoon. They made a bed for some jawas to nap on, a dinosaur taco, and a sparkly potion for the fairies. Let their imaginations soar!!!

DSC_0051


DSC_0068

DSC_0082

An extra-fun quality of this slime is the inappropriate “FlAaArP!!!” sound it makes when you squash it into a plastic cup with your fingers. Haha! There was so much laughter to be had with that one!!!

DSC_0072

Store your slime in a sealed container and it should last for at least a couple months! Enjoy!!!

DSC_0076

Hidden Fairy Bath Bombs

Have you ever bought bath bombs for yourself or for your kids? Bath bombs were originally intended for adults to use in the bath…their scents make the water smell wonderful and many times the bath bombs contain epsom salts to soften and refresh your skin. The thing that many people don’t know is that kids LOVE them too!!! The fizzy, bubbly, sizzling chemical reaction is just too cool! In the past, we’ve bought bath bombs and given them to our girls in their stockings at Christmas or for their birthdays…but now, we’ll never buy them again! These bath bombs are so quick and easy to make and there’s a surprise hidden inside each one! I found inspiration for this DIY on a fellow blogger’s site; she makes “Hidden Train Bath Bombs” for her little boys…adorable and genius!

DSC_0574

Materials needed:

  • 2 cups baking soda
  • 1 cup citric acid
  • food coloring
  • essential oil
  • water in a spray bottle (not pictured)
  • plastic fairies (flowers, dinosaurs, cars…)
  • silicone molds or a muffin tin

DSC_0547

First, mix two cups of baking soda and 1 cup of citric acid together in a large bowl.

DSC_0548

Next, add about 10-15 drops of food coloring and some essential oil, and mix. You can add more coloring and oil to suit your preference. I used a “sweet orange” oil and yellow food coloring. Even though the bath bombs themselves were not super-vibrant in color, the bath water certainly was! The kids loved it!

DSC_0553


Now, spray your mixture with water and mix quickly! I would give our mixture about 3 squirts, mix, then repeat. The baking soda and citric acid will start to fizz a bit, but once you mix, it will stop. Repeat this process until the mixture clumps together like breadcrumbs.

DSC_0554

Spoon the mixture into your silicone molds. Fill about halfway and pack it down firmly with your hands.

DSC_0555

DSC_0557

Now, add your fairies. We added a silk flower to one of ours as well.

DSC_0560

Fill the molds the rest of the way with the baking soda-citric acid mixture and pack it down firmly. Once the bath bombs set, they will expand. The next time I make bath bombs, I may not fill them all the way up to the top…or I may do so purposely and make them look like frosted cupcakes!

DSC_0563

DSC_0564

Let your bath bombs set up for a few hours until they are hard. (Can you believe how ours expanded and “grew”!?!) Flip the bath bombs over and gently pop them out of the molds.

DSC_0565

DSC_0566

Now for the fun part, surprise your kids with the bath bombs! The chemical reaction is just so cool!!!

DSC_0576

DSC_0586

They will be doubly-surprised to find fairies hidden inside!

DSC_0582

The walls, tile and bathtub in our bathroom are all white…the bath water was so, so yellow the whole bathroom glowed!!!

DSC_0601

DSC_0584

DSC_0603

This recipe can easily make 7-8 bath bombs…plenty for you and a friend! Enjoy!!!


DIY Toy Catapult

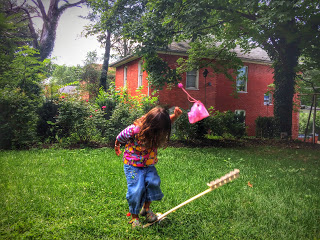
What kid (or adult) doesn’t love launching things through the air? This DIY TOY CATAPULT takes only minutes to put together and your kids will play with it for hours…days even! I love how kids naturally experiment while playing with this toy. Even as young as three, L was moving the can (the fulcrum) around, placing the balls in various slots, and went on to launch her toy parachute, as well as her shoes! So much fun!!!


Materials needed:

  • yard stick
  • can of food
  • egg carton
  • scissors
  • hot glue gun
  • permanent markers (optional)

 Things to launch:

  • ping pong balls
  • pom poms
  • -cotton balls
  • DIY Pocket Parachute
  • plastic figurines (fairies, dinosaurs, army men)
  • marshmallows or cereal (to catch in one’s mouth)

First, cut your egg carton in half.

Using a hot glue gun, glue the egg carton onto one end of your yard stick. (Don’t worry…when your kids are done playing with their catapult, the egg carton and glue should peel right off the yard stick! I take ours apart every time we’re finished playing with it!)


Next, number your egg carton slots and your ping pong balls. This step is optional, but it makes it easy to keep track of what ball goes the farthest and which slots you’re putting things into…especially if you’re launching multiple balls at once!


The set-up of your catapult is easy…just place the can on it’s side in the grass (keeps it from rolling) and place the yardstick on top. Fill the slots with your projectiles!


Now, time to play!!!

Launching balls…


 Parachutes…


 And L’s shoes…


What will you all send flying through the air???

If your kids like the catapult, they’ll definitely love making POCKET PARACHUTES…another “make something from nothing” craft! Enjoy!


Fizzy Ice Chalk Fun

After we made “Homemade Sidewalk Chalk” the other day, I couldn’t wait to make some FIZZY ICE CHALK as well! I looked around online and found all kinds of recipes and methods for ice-chalk and fizzy or erupting ice-chalk. L and I experimented and tried all the tricks…we added some of our own variations, and I’m happy to share those that worked best! I suggest making FIZZY ICE CHALK in the morning on a hot summer day, let it set-up for a few hours, and bring it outside to play with in the afternoon. We have a few batches sitting in our freezer right now, just waiting for a lull in the action so we can bring it outside to play with again. This time we made lots so there’d be plenty for the neighborhood kids to play with as well! We can’t wait!


Materials needed:

  • 1/2 cup cornstarch
  • 1/2 cup baking soda
  • food coloring (or tempera paint)
  • 1 cup water
  • measuring cup
  • silicone molds (or ice tray)
  • spoon
  • toothpicks
  • vinegar
  • spray bottle, squirt bottle, or infant medicine dropper

Using a measuring cup, combine 1/2 cup cornstarch with 1/2 cup baking soda. Mix together with a fork or spoon.

Add 1 cup water and mix gently, but thoroughly.

Next, carefully pour your mixture into the silicone molds or into your ice tray. If you don’t have either available, you could use paper cups as well!

Add a few drops of food coloring or a squirt of tempera paint to each mold. (We tried both…the food coloring mixed better, but both worked fine!)


Using toothpicks, carefully mix each color.


Put the molds into the freezer for a few hours, til they set-up completely.

Before bringing the ice chalk out to play with, prepare your vinegar. You can put it into spray bottles, into squirt bottles (empty dish soap bottles work great), or pour the vinegar into small cups paired with a medicine dropper. All are great for little hands and developing motor skills…L’s favorite is the medicine dropper method!

After the ice chalk is thoroughly frozen, bring it outside to play! One page online suggested painting the sidewalk first with water…we tried it, but didn’t see much benefit in having the pavement wet. We had more fun coloring with the chalk on dry pavement! Experiment with it though…see what works for you!


After the kids are finished coloring (if they can wait that long!), it’s time to bring out the vinegar. Spray or squirt the vinegar onto the ice-chalk and the ice-chalk pictures to watch it sizzle, fizz and erupt! This is definitely everyone’s favorite part!


Take a moment to talk to your kids about chemical reactions and the result of a base (the baking soda) and an acid (the vinegar) coming together. L always likes to taste how salty the baking soda is compared to the sour smell of the vinegar. Summer science fun…I just love it! Enjoy!!!

DIY Pocket Parachute

What kid doesn’t love throwing a toy parachute around?!! And what parent doesn’t love a toy that costs nothing, takes less than 5 minutes to make, and entertains your kids for hours on end?!! I made this DIY POCKET PARACHUTE for L on a rainy day last week…as soon as there was a break in the weather, we were out the door throwing the parachute all around town. L dropped the parachute off the steps of the old courthouse, a church, the library, a little pavilion stage, and she climbed up a tree and dropped it down as well. This pocket parachute is so simple, so easy, and so much fun!!!


Materials needed:

  • plastic bag
  • food pouch cap
  • string
  • scissors
  • an awl (or screwdriver)

If you don’t have a food pouch cap, a toy wheel, some safety pins, paper clips or a wine cork could be used as well…get creative with what you have on hand!

First, cut the plastic bag into a square at least 12×12 inches.

Cut your string into 4 equal pieces, all approximately 15 inches long.

Using the awl, carefully poke a hole through the center of the food pouch cap.

Also, poke holes into each corner of the square you cut from the plastic bag. Make each hole 1/2 an inch from the edges.

Tie a piece of string onto each corner, using a double knot.


Next, gather all the strings together and tie them together with one overhand knot, about 3 inches from the end.


Thread two of the strings through the center of the food pouch cap and thread the other two through the side. Tie the ends together with a double knot.


Too easy, right? Now time to play!!! It’s just as much fun trying to catch the parachute as it is to throw it!


If your kids are older, they can experiment by making various parachutes…some out of bigger pieces of plastic, longer strings and cutting a hole in the center parachute as well. Enjoy!!!

Fairy Mud

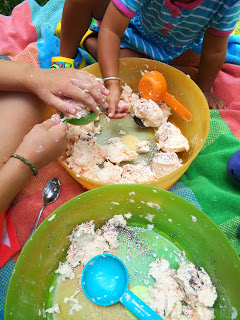
I first saw a recipe for FAIRY MUD a year or two ago on a blog called Happy Hooligans. When L’s cousins came over to play on a hot day last summer it was the perfect activity! Fairy Mud is just as much fun for the kids to make as it is to squish between your fingers and play with! With the temperatures rising and our fairy garden in full bloom, we’ll be making it again this week!


Materials needed:

  • 1 1/2 bars of soap
  • 2 rolls of toilet paper
  • food coloring
  • 1.5 to 2 cups of WARM water
  • glitter, sequins, buttons, jewels, flower petals
  • cheese grater
  • 2 large bowls or tubs

First, grate the bars of soap into a large bowl. If you have older kids, they can certainly help with this process!


While you’re busy grating soap, have the little ones unravel 2 rolls of toilet paper. So silly, they’ll just love it! Gather the toilet paper into the second large bowl.


Once the soap is grated and the toilet paper unravelled, pour the WARM water into the bowl with the soap and add a few drops of food coloring as well. Squish and squeeze the soap shavings until you have some consistently melted and mushy soap blobs.


Pour the water and soap over the toilet paper in the second bowl and continue to mush and mold the fairy mud concoction.


While the kids are playing, add some glitter into the mix. Followed by jewels, flower petals, anything you and the kids can come up with!

Don’t forget to pull out some measuring cups, spoons, and muffin tins so you can make some fairy mud pies as well! Amazingly fun!!! Enjoy!


Giant Bubble Wands and a Homemade Bubble Solution Recipe

Did you ever make these GIANT BUBBLES when you were a kid? My siblings and I loved making them way back when! Recently, we had a bubble kit given to us with a wand included, but it was too big for L to do on her own…so, of course, I had to brainstorm and make a wand she could use as well! The best part about it was we already had all the materials we needed. If you don’t have two rulers to use, two large mixing spoons or spatulas would probably work great too…anything with a hole at the end of the handle. Be sure to scroll down to the bottom for the HOMEMADE BUBBLE SOLUTION RECIPE. It’s better than any store-bought variety and takes only a minute to make!

Materials Needed:

  • 2 plastic rulers
  • yarn, 3-6 feet long
  • binder ring, shower curtain ring, or a keychain ring
  • homemade bubble solution (See below)

First, cut the string to suit your size…the shorter the person, the shorter the string!

Next, thread the ring onto the string and tie both ends together with an overhand knot.

Thread a loop of yarn through the hole on one end of a ruler. Bring the loop up and over the opposite end of the ruler and pull it tight. (See pictures.)


Attach the other ruler the same way, leaving about 1 to 2 feet of yarn between the two rulers.

With the bubble solution in a large bowl or container, gently lower the yarn into the liquid. Make sure the yarn is soaked through.

Next, carefully lift the yarn out of the bubble solution. Slowly and steadily, spread the rulers apart while walking backwards. If there is a breeze, make sure the wind is blowing on your back.

To close the ginormous bubble, carefully bring the rulers together again. So cool!!!


HOMEMADE BUBBLE SOLUTION RECIPE

Ingredients:

  • warm water
  • sugar
  • dish soap

Materials:

  • measuring cup
  • Tablespoon measuring spoon
  • medium bowl or container
  • spoon

Put one Tablespoon of sugar into your bowl or container. Pour 200 ml of warm water on top of the sugar and mix until all the sugar is dissolved. Add 50 ml of dish soap (30 ml if using ultra dish-washing detergent) and mix. Finally, add 300 ml of warm water to the mixture and mix.

That’s it! This bubble solution is the best we’ve ever made!


Have fun!!!

Be sure to check out our BUBBLE BLOBS & BUBBLE WORMS page too!


DIY Ant Farm

I’m so super excited to share this project with you. ANT FARMS are fun to make and fascinating to observe with your little ones! L and I have been staring at our jar all day, reading kids books on insects, watching some National Geographic clips on ants, and we’ve found some fun facts along the way. Within the first 24 hrs of placing your ants inside your DIY ANT FARM, they will dig tunnels and make chambers right before your eyes!

The ants you collect will most likely be “worker ants” and all worker ants are female…pretty amazing! Most ant colonies contain one queen ant who lays all the eggs, male ants whose only job is to make babies with the queen, and worker ants who gather food, dig tunnels, and protect the colony. When collecting ants you want to be sure to only collect ants from one colony, otherwise the ants will fight to their death inside your jar.

Materials needed:

  • large jar (pickle jar)
  • small jar (jam jar or spice jar)
  • loose, sandy soil (Cactus/Citrus Soil works great!)
  • spoon
  • small jar or cup
  • jam or sugar water

To make your ant farm, place the small jar upside down, inside the larger jar.

Next, carefully spoon the soil into the jar. L would place a spoonful on the top of the little jar and then brush the soil down along the sides. It does not have to be packed tightly, just filled to the top.


To collect ants, put about one tsp. of sugar water or jam into a separate jar or cup and place it outside on its side. This is your ant trap. You may want to set a few ant traps around your garden and be patient. It can take a few days for the ants to discover your bait, but once they do many will follow!

After your ant farm is made and the ants have been caught, quickly and carefully dump your ants inside your ant farm and screw on the cap. You’ll want about 10-20 ants. I think we have about 5 ants in our jar…it takes a couple minutes to find them, but works just fine! They are busy digging all those tunnels and chambers all by themselves!


Once a week, open the lid to your jar and place a few drops of sugar water and/or a couple pieces of bird seed. You don’t want to feed them too much, once a week is plenty! When you open your jar to feed the ants, plenty of fresh oxygen will enter the jar as well…no need for holes! Keep your ant farm indoors, not too hot and not too cold, away from direct sunlight.

For more info on ants, check out some books at your local library and click here to see some fascinating photos and videos from National Geographic! Enjoy!!!