Homemade Sugar Skulls

Sugar Skulls aren’t a typical Halloween craft and that’s because they’re not one! Calaveras de azúcar,  as they are pronounced in Spanish, are a sweet decoration originating from the Latino celebration los días de los muertos or “The Days of the Dead.” Celebrated from October 31 until November 2, many Latinos remember their loved ones who have passed by setting up altars, having late-night parades through the streets and picnics in the cemetery. It is an extremely colorful and lively time of the year, sharing memories of their antepasados. A Day of the Dead altar is not complete without sugar skulls, and what better way to show your love than making your own!


DSC_0381


I first made SUGAR SKULLS years ago when I taught Spanish at a local elementary and middle school. My students couldn’t wait until they were in 6th grade and got to make them with me! The hardest thing to find for this craft will be the skull molds, but I have seen them at craft stores this time of year…both at Hobby Lobby and at Michael’s. Meringue powder is easy to find at craft stores as well!

Materials needed:

  • plastic skull molds
  • mixing bowl and spoon
  • 2 cups granulated sugar
  • 2 teaspoons meringue powder
  • 2 teaspoons water
  • paper plates, silicone mats, cutting board
  • gel food coloring/icing
  • toothpicks
  • sequins


DSC_0325


First, mix the dry ingredients together in the bowl. Sprinkle in the water and continue to mix until the sugar is completely moistened and becomes the consistency of wet sand.


DSC_0328


Scoop some of the mixture into the mold and pack it evenly and firmly. Scrape off any excess.


DSC_0329

DSC_0342

DSC_0333


Next, place a small silicon mat or paper plate over the mold. Carefully flip the mold over.


DSC_0334


If you want to keep it on a paper plate, just carefully lift the mold. Otherwise, gently remove the silicon mat and lift the mold, leaving the skulls on a cutting board until they set up! Let the skulls dry and harden for 24 hours.


DSC_0335

DSC_0336

DSC_0338


After the skulls have hardened completely, it’s time for the fun part…decorating! I used a plastic lid as a palate for L, and squirted a bit of every color out for her to use. Then she used toothpicks to decorate her skulls. The more colorful, the more beautiful!


DSC_0344

DSC_0348

DSC_0354


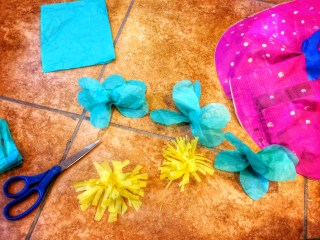
Flowers play a big part in the Days of the Dead celebrations, so I was sure to add some to our skulls as well!


DSC_0363

DSC_0365


DSC_0374


Now for the question you are all wondering: Can you eat the sugar skulls? Technically, yes. But even with my 6th graders, they realized that it’s basically a rock of sugar and nobody tried eating them. If you keep your skulls in a safe place, the same ones will last for years! My dad has some that I made at least 7 or 8 years ago…he pulls them out as decorations every Halloween! Check out your local library for some beautifully illustrated books on The Days of Dead!


DSC_0376


Pumpkin Suncatchers

How sweet are these PUMPKIN SUNCATCHERS? They brighten up our kitchen windows and, hung beside some glue ghosts, they’ve quickly become my favorite Halloween decoration in the house!


DSC_0307


This project evolved while L and I were making it. (I love when that happens!) Originally we were just going to paint some mason jar lids, tie a ribbon on and call them “pumpkins.” Once I realized they’d be hanging in the kitchen window, I had a eureka moment…I knew that turning our pumpkins into suncatchers would be too easy and too perfect! I just love the bright and sunny colors!


DSC_0303

DSC_0304


Materials needed:

  • mason jar lids
  • orange acrylic paint
  • plastic container (berry containers work great!)
  • Sharpie markers
  • green ribbon
  • green pipe cleaners
  • scissors
  • hot glue gun

*Notice the plastic container, hot glue gun, and markers are not pictured here…they surprised us in becoming “needed materials” half-way through the project!


DSC_0245


First, have your little ones paint the mason jar lids orange.


DSC_0247


After the lids have dried, tie a ribbon in a double-knot around the lid.


DSC_0270


Next, cut a pipe cleaner in half. Wrap it around a thin marker or pen to make a curlicue.


DSC_0272

DSC_0273

DSC_0275


Gently wrap the pipe cleaner curlicue around the knot at the base of the ribbon.


DSC_0276


Now for the suncatcher part! Cut the lid off your plastic container and remove the label if there is one.


DSC_0265


Have your little one color the plastic lid with Sharpie markers. L did some in solely “pumpkin colors” while the others she colored freely, using every color of the rainbow. (It’s important to use permanent markers, washable will rub right off and won’t work!)


DSC_0278


DSC_0281


Use the center part of a jar lid to trace rounds on the colored-plastic. Cut the rounds out and make sure they fit into the pumpkin lids. You may have to trim the sides a bit and cut a piece out where the ribbon will lie.


DSC_0282

DSC_0283

DSC_0284


Next, with just a few dabs of hot glue, glue the colored-plastic in place. All done!


DSC_0286


Hang your PUMPKIN SUNCATCHERS up in a bright and sunny window where everyone can enjoy them! Adorable!!!


DSC_0308


Pumpkin Jar Craft

I am so excited that October is finally here and we can start doing some Halloween crafts around our house! This PUMPKIN JAR CRAFT was inspired by the Jam Jar Fairy Houses we made last Spring. It’s a very similar concept! While many people think hot glue guns are just for gluing things together, we like to use them to add texture to our crafts as well. The hot glue gives our pumpkin jars a true, warty pumpkin appearance! I love the way they look with and without jack-o-lantern faces, in the day and at night! Too cute!!!


2015-10-01 20.22.19


Materials needed:

  • jars, various sizes
  • hot glue gun and glue
  • acrylic paint
  • green, glitter spray paint
  • battery-operated tea lights


DSC_0106


First, decide whether or not you’d like jack-o-lantern faces on your jars. I really liked our mixed…two with, one without. If you’re putting a face on your jar, carefully do that first with the hot glue gun. One great thing about hot glue gun glue: if you make a mistake, simply let the glue cool completely, then peel it off and start again!


DSC_0108


Next, fill in the spaces and go around the jar with long, vertical stripes of hot glue. It certainly doesn’t need to be perfect…no two pumpkins are ever alike!


DSC_0111


After the glue has cooled completely, paint the inside of the jar yellow, where the face shines through.


DSC_0157

DSC_0161


Now, paint the exterior of the jar orange. We painted ours with a mix of yellow and orange to give the pumpkins varying hues. Be careful around the face!


DSC_0162

DSC_0164

DSC_0175


The pumpkins without jack-o-lantern faces are perfect for your littles to paint!


DSC_0167

DSC_0171


As the jars dry, spray your lids with glittery, green spray paint. Do this outside or in a well-ventilated area. If you don’t have spray paint, green acrylics would work fine too!


DSC_0179


After the lids have dried, screw them on top your jars and your pumpkin jars are complete! Now for the fun part…find a place to display your pumpkins for everyone to enjoy! At nighttime, place a battery-operated tea light inside each jar to bring your pumpkins to life!


DSC_0224

DSC_0190

DSC_0192


Are they cute or what? Enjoy!!!

DIY Floppy Newspaper Hats

Oh, we had so much fun making these FLOPPY NEWSPAPER HATS today! I thought I’d write up this tutorial this weekend, but I just couldn’t wait…they’re just so much fun! If you have little boys in your messy house, please don’t think you can’t make these with them…a hat’s a hat! A floppy hat’s a floppy hat! I’m sure they’ll love them just as much as any girls will! Do it! There will be lots of giggling for sure.

Materials needed:

  • newspaper
  • acrylic paint
  • painters tape
  • tissue paper, poof balls, feathers, etc.
  • white glue

First, prepare your painting area. I taped some trash bags to the floor to protect it from paint…not usually necessary for painting, but the newspaper sheets are just so large.

Next, paint, paint, paint! Paint an entire sheet of newspaper, just one side though. Don’t worry if some  of the newspaper can be seen through the paint, nobody will notice when the hat is finished! Allow the paint to dry completely.


After the paint is dry, lay the paper overtop of another sheet of newspaper…two sheets will make the hat a little more durable. Fold the papers twice, once in each direction, and cut the paper so when you open them back up, you have a circle. The circle really doesn’t have to be perfect, it’ll look great when you’re done!


Next is the tricky part because kids tend to wiggle…lay the paper over your child’s head and scrunch fold it into shape. As you go around, use painters tape to hold the the folds in place. The great thing about painter’s tape is that you can fix any little mistakes and it won’t tear up the paint or paper.


In making WB’s orange hat, I just shaped it around my knee and it worked just fine. I also experimented and used a stapler instead of the painters tape. Stapling worked great and looks fantastic, but it is a little trickier to do. The paper tears a little easier with staples in it too.

Now to decorate your hat! You can cut flowers out of tissue paper or just cut squares and scrunch them up. If you layer the tissue paper a bit, the flowers are a little fluffier and prettier. You can also glue on poof balls, jewels, feathers, anything you can think of and find around your house!


Super cute, huh!? Forget Easter bonnets, we’ll be wearing these to Thanksgiving dinner!!! That is if they survive a month’s worth of tea parties…


Wouldn’t these be adorable for a birthday party? You could make the hats beforehand and let the kids decorate them at the party…so many fun possibilities! Enjoy!


The Best Pumpkin Seed Recipe Ever!

Store-bought pumpkin seeds don’t even compare to freshly roasted ones made right in your own home! This year I think I made ours too good…they barely lasted a weekend, most didn’t even make it out of the pan and into a serving bowl before they were devoured! I know Halloween is over, but you may have some un-carved pumpkins sitting on your front porch still full of seeds… Those seeds are calling your name…

Ingredients:

  • 1 1/2 cups pumpkin seeds
  • 2 teaspoons olive oil
  • salt

Plus any or all of the following:

  • garlic powder
  • chili powder
  • paprika
  • roasted cumin
  • cayenne

Preheat the oven to 300 degrees F.

First, rinse the seeds under water washing away any pumpkin guts.

Pour the seeds out on a towel and gently pat them dry. (They don’t have to be perfectly dry.)

In a small bowl, toss the seeds with the olive oil and salt. Add your spices and toss some more to thoroughly coat the seeds. Make them to suit your preferences…if you like really spicy snacks, add more cayenne. Paprika is one of my favorite spices…kinda sweet, kinda smoky and a little spicy.

For little or no mess, line a baking pan with tinfoil. Spread the seeds out in a single layer.

Bake for about 45 minutes, stirring every 15 minutes, until golden brown.

Delish!!! (This handful of seeds was all that was left by the time I got my camera out to take a picture! They are just too good!) Enjoy!!!

Leaf “Glitter” Art

As the girls and I were crunching our way through leaves this week, this leaf “glitter” project came to mind. The leaves in our neighborhood are changing yet again…this time from their vibrant reds and oranges to dried-up, crunchy browns. No fear though, we can get one more craft out them!

Materials Needed:

  • crunchy leaves
  • paper (look in the recycling basket first!)
  • white glue
  • a small container or bowl

First, crumble the leaves into the tiniest pieces possible and collect them in a small dish.

Next, draw a Fall picture on the paper with the white glue. Feel free to draw some for your little ones, but let them scribble a glue picture too!


Now, as you would do with glitter, sprinkle the leaf dust all over the glue. This was definitely L’s favorite part.


Once the glue is all covered, gently shake the excess leaf “glitter” off and reveal your masterpiece!


Pumpkin Seed Necklaces

There’s a lot of pumpkin carving going on this week, so I thought I’d hurry and get this one out there! Have you ever turned your pumpkin seeds into jewelry? The key to stringing pumpkin seeds with ease is to make sure that they’re fresh…no baked or thoroughly dried pumpkin seeds here! This year we tried dying some seeds before stringing them too. This craft is super easy and so much fun!

Materials needed:

  • fresh pumpkin seeds
  • dental floss, embroidery floss, or thread
  • sewing needle

For colored seeds you’ll also need:

  • food coloring
  • vinegar
  • boiling water

As you carve your jack-o-lanterns, separate the pumpkin seeds from the pulp. Rinse the seeds in some water to get any excess pumpkin guts off.


If you’d like some colored seeds, boil a cup of water. Add 1-2 tsp of vinegar and lots of food coloring. (I basically followed the directions for dying eggs on the food coloring box, adjusting it a little bit.) Let the water mixture boil for 5 minutes.

Turn the stove off and add your pumpkin seeds. Let them sit for 15-20 minutes, stirring the seeds a couple times, until you achieve the color you like.

Pour your seeds into a colander to drain them and run some cold water over the seeds briefly. Spread the seeds out on some cardboard to dry a bit. You can pat them dry with a paper towel too if needed.

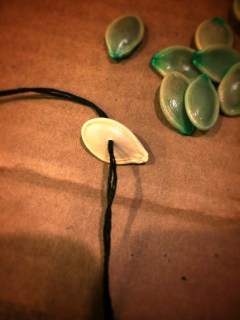
Now, time to make some necklaces! Using the needle and thread (or dental floss), string the seeds on one at a time. If the seeds are a little tough, you can lay them flat on cardboard and push the needle through.


This is a great time to talk to your kids about patterns! Have your little ones pick out seeds and lay them in order to help you string. When you’re finished threading seeds, tie the ends in a knot or two to complete! Enjoy!


Some early morning necklace-making in our pajamas in Our Beautifully Messy House…


DIY Mason Jar Lid Pumpkins

This pumpkin craft is one of the simplest and sweetest of the season.  It’s not only cute for Halloween, but you can keep it up all the way through to Thanksgiving. The “mason-jar-lid pumpkin” could even be used to brighten up your Thanksgiving table centerpiece…your guests will adore it!


Materials needed:

  • about 20 mason jar lids (found in the grocery store)
  • glitter spray paint (orange, gold, silver)
  • cord or string
  • scissors
  • cinnamon sticks
  • decorative, floral wire (optional)

Outside or in a well-ventilated area, lay all the lids out on a flat surface. Spray half the lids with the orange spray paint, a quarter of them gold and the last quarter silver. (You can always change up your colors and do something different than what I did…all orange, all gold, no paint…it’s up to you!)


Let the lids dry overnight. Next, cut a piece of string about 2-3 feet long. Thread all your lids on the string, making sure they all face the same direction.


Pull the string tight and then tie a double-knot to secure the mason jar lids.

Move the lids around, arranging them into a pumpkin shape. Place 6 or 7 cinnamon sticks in the center for the pumpkin stem and (optional) add a curlicue of florist wire.


How cute is that!? And easy too! Now that I’ve made one for our house, I’ll be making a few more this week to give away as gifts. Enjoy!

Have you seen our DIY Witch Legs??? That’s another one you’ll be sure to love!!!

Glue Ghosts

Did you ever make these “glue ghosts” when you were a kid? They were always one of my favorites! This must be one of the simplest Halloween crafts out there! L and I made extras this year so we’d have plenty to make a ghost garland decoration and to make ghost necklaces.

Materials needed:

  • wax paper
  • Elmer’s glue
  • googlie eyes (or permanent markers)
  • paperclips (optional)
  • needle and thread, string or dental floss

First, spread out a piece of wax paper over your working surface. You may want to do this on a silicone cutting board or a tray so it can be moved. (I had no idea that wax paper was slightly porous…when we did this craft the glue seeped through the wax paper a bit and stuck to our kitchen counter. It was no problem, cause Elmer’s glue washes off easily, but the project was stuck to our counter for a few days while we waited for the ghosts to dry. Ha! Just another beautiful mess!)

Next, have your little one squeeze out blobs of glue into ghost shapes.


Wait a few hours for the glue to dry a bit and then gently press in some googlie eyes. If you don’t have googlie eyes, don’t worry…you can always draw a face on the ghosts after they dry with a permanent marker.


At this point, you can also cut a paperclip and press the wire into the ghosts to make hooks. We experimented with this and I personally like the ghosts better without the paperclip-hooks. Instead, you can just use a needle to poke a hole through the ghosts after they’re dried. It’s up to you though..both methods work great!


Now for the waiting-game…wait 2 or 3 days for the ghosts to dry completely before gently peeling them off the wax paper. If you didn’t use paperclip-hooks, now is the time to use a sewing needle to thread some string or floss through your ghosts.


All done! Super easy, huh? Will you wear your “glue ghosts” on a necklace or hang them up in a doorway this Halloween? Enjoy!!!


DIY Witch Legs

So I looked around for a tutorial online for how to make “Witch Legs” and they were all much more complicated than they needed to be! People using irrigation tubing, tube socks with sand and tape, mannequin legs, etc… I don’t know about you, but I’m all for cheap and easy! So I tried it my way, fingers-crossed that it’d work out, and it did! I just love our witch legs…costing under $10, they took about 15-20 minutes to make!

Materials needed:

  • heeled, sparkly shoes (find them at a thrift store!)
  • kids, knit halloween tights
  • poly fil stuffing
  • hot glue gun and glue
  • scissors

(I originally thought I’d decorate the shoes with some pipe cleaner curlicues, but they ended up looking best without! That’s why the pipe cleaners are pictured here, if you’re wondering.)

First, stuff the tights with the poly fil. Leave about 4-5 inches at the top not stuffed.

Next, cut the legs off the tights, as far to the top as possible. Then tie a knot in each.


Position one foot into a shoe to have a good idea how it will set. Then, starting with the toes, glue each foot into the shoe. It’s okay if the “foot” is smaller than the shoe…it probably will be because they’re adult shoes and kid’s tights. You can continue pushing the leg down into the shoe just past the heel and nobody will be able to tell the difference.


And now for the fun part…find the perfect spot to display your witch legs and surprise the neighbors! If you have an overhanging porch on your house or a large bush in the yard, you can hide the ends underneath. There’s about a half-inch gap between the siding of our house and the front porch that I was able to wedge the ends down into. A big flower pot set on top would work too! Get creative and have fun! Ding-dong the wicked witch it dead!!!