Oh, we had so much fun making these FLOPPY NEWSPAPER HATS today! I thought I’d write up this tutorial this weekend, but I just couldn’t wait…they’re just so much fun! If you have little boys in your messy house, please don’t think you can’t make these with them…a hat’s a hat! A floppy hat’s a floppy hat! I’m sure they’ll love them just as much as any girls will! Do it! There will be lots of giggling for sure.
Materials needed:
- newspaper
- acrylic paint
- painters tape
- tissue paper, poof balls, feathers, etc.
- white glue
First, prepare your painting area. I taped some trash bags to the floor to protect it from paint…not usually necessary for painting, but the newspaper sheets are just so large.
Next, paint, paint, paint! Paint an entire sheet of newspaper, just one side though. Don’t worry if some of the newspaper can be seen through the paint, nobody will notice when the hat is finished! Allow the paint to dry completely.
After the paint is dry, lay the paper overtop of another sheet of newspaper…two sheets will make the hat a little more durable. Fold the papers twice, once in each direction, and cut the paper so when you open them back up, you have a circle. The circle really doesn’t have to be perfect, it’ll look great when you’re done!
Next is the tricky part because kids tend to wiggle…lay the paper over your child’s head and scrunch fold it into shape. As you go around, use painters tape to hold the the folds in place. The great thing about painter’s tape is that you can fix any little mistakes and it won’t tear up the paint or paper.
In making WB’s orange hat, I just shaped it around my knee and it worked just fine. I also experimented and used a stapler instead of the painters tape. Stapling worked great and looks fantastic, but it is a little trickier to do. The paper tears a little easier with staples in it too.
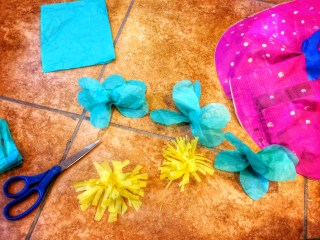
Now to decorate your hat! You can cut flowers out of tissue paper or just cut squares and scrunch them up. If you layer the tissue paper a bit, the flowers are a little fluffier and prettier. You can also glue on poof balls, jewels, feathers, anything you can think of and find around your house!
Super cute, huh!? Forget Easter bonnets, we’ll be wearing these to Thanksgiving dinner!!! That is if they survive a month’s worth of tea parties…
Wouldn’t these be adorable for a birthday party? You could make the hats beforehand and let the kids decorate them at the party…so many fun possibilities! Enjoy!


