Homemade Granola (Gluten Free)

Is there anything better this time of year than HOMEMADE GRANOLA, fresh out of the oven? It’s warm, a little chewy, and crunchy too. This granola is sweet and a bit salty, with a just a hint of cinnamon. Oh, how I love homemade granola!

I came up with this granola recipe years ago (a combination of Alton Brown’s, my mom’s, plus a few of my own additions) and I’ll warn you, it’s highly-addictive. The great thing about granola is that you can add or substitute some ingredients to make it your own. You could switch out some of the nuts with walnuts or peanuts, add a pinch of nutmeg or pumpkin pie spice. I like to use Pure Maple Syrup with this recipe, but if I have Apple Syrup from the farmer’s market on hand, it’s a delicious substitution! Granola is a wonderful gift for family and friends and this recipe makes plenty enough for two families. After it’s cooled completely just put half of the granola in a large mason jar with a ribbon tied around the lid and it’s ready to share! Enjoy!


Ingredients:

  • 6 cups of oats (I use Bob’s Red Mill, Gluten-Free, Rolled Oats)
  • 1 cup almonds, sliced
  • 1 cup pecan pieces
  • 1 cup cashews, raw
  • 1/2 cup sunflower seeds
  • 1 1/2 cups coconut
  • 3/4 cup brown sugar
  • 3/4 cup maple syrup
  • 1/2 cup vegetable oil
  • 1 1/2 tsp salt
  • cinnamon
  • honey
  • 1 cup raisins
  • 1 cup dried cranberries


Preheat the oven to 250 degrees F.


In a large bowl, mix together the oats, almonds, pecans, cashews, sunflower seeds, coconut, and brown sugar.


In a smaller bowl (or in a measuring cup!) mix together the maple syrup, vegetable oil and salt. If you have kids in the kitchen, they’ll enjoy seeing how the syrup and oil separate in the glass measuring cup before you mix it all up!


Pour the syrup-oil-salt mixture overtop the oats and nuts. Mix until everything is evenly and thorough coated. Spread the granola out into a large baking pan, or what I prefer…a large, non-stick roasting pan used usually for cooking turkeys or hams. Place in the oven. The total cooking time will be about 2.5 hours for such a large amount of granola, mixing every 15-30 minutes with a large spoon or spatula. Here is the schedule I tend to follow:


Cook 30 min. Mix.

Cook 30 min. Mix again.

Cook 30 min. Mix. Add HONEY in a zigzag, all over pattern.

Cook 15 min. Mix. Add more HONEY and sprinkle CINNAMON on top too.

Cook 15 min. Mix.

Cook 15 min. Mix.

Cook 15 min. Mix. Enjoy some hot and fresh!

Allow to cool for 15 min. Mix in RAISINS and DRIED CRANBERRIES.


Enjoy!!! And share!!!


DIY Floppy Newspaper Hats

Oh, we had so much fun making these FLOPPY NEWSPAPER HATS today! I thought I’d write up this tutorial this weekend, but I just couldn’t wait…they’re just so much fun! If you have little boys in your messy house, please don’t think you can’t make these with them…a hat’s a hat! A floppy hat’s a floppy hat! I’m sure they’ll love them just as much as any girls will! Do it! There will be lots of giggling for sure.

Materials needed:

  • newspaper
  • acrylic paint
  • painters tape
  • tissue paper, poof balls, feathers, etc.
  • white glue

First, prepare your painting area. I taped some trash bags to the floor to protect it from paint…not usually necessary for painting, but the newspaper sheets are just so large.

Next, paint, paint, paint! Paint an entire sheet of newspaper, just one side though. Don’t worry if some  of the newspaper can be seen through the paint, nobody will notice when the hat is finished! Allow the paint to dry completely.


After the paint is dry, lay the paper overtop of another sheet of newspaper…two sheets will make the hat a little more durable. Fold the papers twice, once in each direction, and cut the paper so when you open them back up, you have a circle. The circle really doesn’t have to be perfect, it’ll look great when you’re done!


Next is the tricky part because kids tend to wiggle…lay the paper over your child’s head and scrunch fold it into shape. As you go around, use painters tape to hold the the folds in place. The great thing about painter’s tape is that you can fix any little mistakes and it won’t tear up the paint or paper.


In making WB’s orange hat, I just shaped it around my knee and it worked just fine. I also experimented and used a stapler instead of the painters tape. Stapling worked great and looks fantastic, but it is a little trickier to do. The paper tears a little easier with staples in it too.

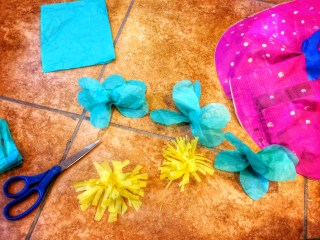
Now to decorate your hat! You can cut flowers out of tissue paper or just cut squares and scrunch them up. If you layer the tissue paper a bit, the flowers are a little fluffier and prettier. You can also glue on poof balls, jewels, feathers, anything you can think of and find around your house!


Super cute, huh!? Forget Easter bonnets, we’ll be wearing these to Thanksgiving dinner!!! That is if they survive a month’s worth of tea parties…


Wouldn’t these be adorable for a birthday party? You could make the hats beforehand and let the kids decorate them at the party…so many fun possibilities! Enjoy!


The Best Pumpkin Seed Recipe Ever!

Store-bought pumpkin seeds don’t even compare to freshly roasted ones made right in your own home! This year I think I made ours too good…they barely lasted a weekend, most didn’t even make it out of the pan and into a serving bowl before they were devoured! I know Halloween is over, but you may have some un-carved pumpkins sitting on your front porch still full of seeds… Those seeds are calling your name…

Ingredients:

  • 1 1/2 cups pumpkin seeds
  • 2 teaspoons olive oil
  • salt

Plus any or all of the following:

  • garlic powder
  • chili powder
  • paprika
  • roasted cumin
  • cayenne

Preheat the oven to 300 degrees F.

First, rinse the seeds under water washing away any pumpkin guts.

Pour the seeds out on a towel and gently pat them dry. (They don’t have to be perfectly dry.)

In a small bowl, toss the seeds with the olive oil and salt. Add your spices and toss some more to thoroughly coat the seeds. Make them to suit your preferences…if you like really spicy snacks, add more cayenne. Paprika is one of my favorite spices…kinda sweet, kinda smoky and a little spicy.

For little or no mess, line a baking pan with tinfoil. Spread the seeds out in a single layer.

Bake for about 45 minutes, stirring every 15 minutes, until golden brown.

Delish!!! (This handful of seeds was all that was left by the time I got my camera out to take a picture! They are just too good!) Enjoy!!!

Reclaiming Quiet-Time

Over the past few months the afternoons have brought upon a lot of change in our house. L essentially dropped her afternoon nap when she turned 2…she took about one or two a month. We stuck to routine and put her in her crib everyday for at least an hour. Most day’s L bounced around for the entire hour and a few days she’d bounce herself to sleep. Then came the change out of her crib (so WB could use it) and into a “big girl bed.”


For a month or two she stayed in her “big girl bed” or at least in her room playing quietly for an hour, but then she learned how to open her door. We put a child lock on the door and it took her about 5 minutes to learn how to take that off. For a week or two “quiet time” became the very worst hour of the day, every day. I would spend the hour marching L back up the stairs and into her room…I tried threatening to take toys away. I tried rewarding her with stickers or special activities to follow quiet time. I tried holding the door shut so she’d think it was locked. None of it worked and none of it seemed like the right thing to do. We’d have a great day all day, but when quiet time came it’d end with us both in tears and doubly-stressed out. So I took a step back and I thought about it…and I came up with a plan.

I realized that naps were definitely long gone. L really does fine without a nap and it results in an earlier bedtime…7 PM and both girls are sound asleep. (Yay for this exhausted mom at the end of the day!) I also realized that really the #1 reason L wanted out of her room was that she just wanted to be with me. If I’m trying to hold the door closed or lock her in there and she’s just miserable, what’s the point? And if it makes me miserable on the other side of the door and/or wakes her sleeping sister up, truly what’s the point? Quiet time is to give us all a break. A mental break if nothing else.

So I came up with some new rules and some new activities to keep L occupied while I clean dishes, reply to emails, read the paper, fold laundry…whatever I need to do for 30 quiet minutes. If I keep an open-door-policy with L, so she can go in and out of her room, up and down the stairs, there are no more arguments and she tends to stay in her room longer! I’ve also come up with a number of ACTIVITY BAGS to keep her quietly occupied.

The following are some of L’s “quiet time activity bags.” You can make your own just by going through your drawers, recycling basket, and your craft supplies and look for safe materials that will keep a little one entertained. I give L an activity bag a few days a week, rotating them so they always seem new to her. On days when she’s already happy playing with blocks or coloring, I just let her keep to herself while I get my own chores done.

Paper bag, 2 paper cups, egg carton, sheet of felt, poof balls, googlie eyes, feathers, straw, buckeyes

Paper bag, snack container full of beads, shoe lace (for stringing beads), pipe cleaners, silicone muffin cups, painted buckeye, hopping frog toy

Shoe box, cardboard tubes, cotton balls, tissue paper, Little People, colored craft sticks

Paper bag, I Spy book, straw, pipe cleaners, feather, spools, slinky

foam floor puzzle/mats, Water Wow book, Magna Doodle

The following two activities take a little more prep time, but it’s a fun surprise to keep your kid occupied!

Tea Party set-up: cardboard box, blanket, tea set, empty honey bottle, pretend cupcake, poof balls and spoon, napkins

Teepee…everything’s better in a teepee (DIY No Sew Teepee)

Notice all the bags include lots of creative possibilities. Beads can be strung on a shoelace or on pipe cleaners, feathers can be put into straws; cotton balls can be blown across the floor with a straw; things can be sorted or dumped from cup to cup; the cardboard box under the tea party can be flipped over and become a rocket ship! For more ideas, check out the Imagination Box too! Like always, you know your child, make sure anything you leave in your child’s room is SAFE for them to play with unattended or semi-unattended! (I still turn the video monitor on when I leave L with beads in her room!)

What do you think? Do you have this problem in your house? Has quiet time and nap time become a disaster? What do you all do to make it through the afternoon with a toddler who won’t nap?

Leaf “Glitter” Art

As the girls and I were crunching our way through leaves this week, this leaf “glitter” project came to mind. The leaves in our neighborhood are changing yet again…this time from their vibrant reds and oranges to dried-up, crunchy browns. No fear though, we can get one more craft out them!

Materials Needed:

  • crunchy leaves
  • paper (look in the recycling basket first!)
  • white glue
  • a small container or bowl

First, crumble the leaves into the tiniest pieces possible and collect them in a small dish.

Next, draw a Fall picture on the paper with the white glue. Feel free to draw some for your little ones, but let them scribble a glue picture too!


Now, as you would do with glitter, sprinkle the leaf dust all over the glue. This was definitely L’s favorite part.


Once the glue is all covered, gently shake the excess leaf “glitter” off and reveal your masterpiece!


Pumpkin Seed Necklaces

There’s a lot of pumpkin carving going on this week, so I thought I’d hurry and get this one out there! Have you ever turned your pumpkin seeds into jewelry? The key to stringing pumpkin seeds with ease is to make sure that they’re fresh…no baked or thoroughly dried pumpkin seeds here! This year we tried dying some seeds before stringing them too. This craft is super easy and so much fun!

Materials needed:

  • fresh pumpkin seeds
  • dental floss, embroidery floss, or thread
  • sewing needle

For colored seeds you’ll also need:

  • food coloring
  • vinegar
  • boiling water

As you carve your jack-o-lanterns, separate the pumpkin seeds from the pulp. Rinse the seeds in some water to get any excess pumpkin guts off.


If you’d like some colored seeds, boil a cup of water. Add 1-2 tsp of vinegar and lots of food coloring. (I basically followed the directions for dying eggs on the food coloring box, adjusting it a little bit.) Let the water mixture boil for 5 minutes.

Turn the stove off and add your pumpkin seeds. Let them sit for 15-20 minutes, stirring the seeds a couple times, until you achieve the color you like.

Pour your seeds into a colander to drain them and run some cold water over the seeds briefly. Spread the seeds out on some cardboard to dry a bit. You can pat them dry with a paper towel too if needed.

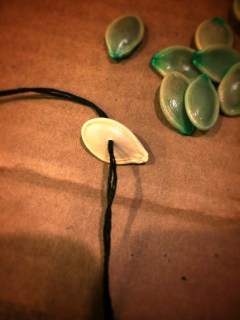
Now, time to make some necklaces! Using the needle and thread (or dental floss), string the seeds on one at a time. If the seeds are a little tough, you can lay them flat on cardboard and push the needle through.


This is a great time to talk to your kids about patterns! Have your little ones pick out seeds and lay them in order to help you string. When you’re finished threading seeds, tie the ends in a knot or two to complete! Enjoy!


Some early morning necklace-making in our pajamas in Our Beautifully Messy House…


Pine Cone Flowers

Have I mentioned before how much I love Fall?! So many things to find and create with…like these mini-pine cones! I’ve been thinking of making “pine cone flowers” for months now, and when L and I found these miniature ones it was a done deal.

Materials needed:

  • miniature pine cones
  • twigs (the more lil knobs and branches the better)
  • acrylic paints
  • hot glue gun and glue

First, choose what colors you’d like your “flowers” to be…we choose multi-colored! Paint each little pine cone as you like. Set aside to dry.


Next, paint your twigs a mixture of dark and light greens. Allow to dry.


Once everything is dry, you can assemble your pine cone flowers. Using a hot glue gun, put a little dab of glue on the tip of a twig. Quickly press and hold a pine cone in place. Repeat until all your pine cones are used up.


So cute, huh!? Arranged in a little, antique bottle they make a sweet gift for a child or an adult.

Water Lens

I don’t know a kid (or an adult) who doesn’t love playing with a magnifying glass. They’re just mesmerizing! The “water lens” experiment is such a fun activity that allows kids to not only play with a magnifying glass, but it shows kids how to make one too. So much discovering going on here!

Materials needed:

  • a plastic bucket (we used a large coffee container)
  • marker
  • knife and/or scissors
  • clear, plastic material (a dry-cleaners bag is best, but plastic wrap would work too!)
  • large rubber band
  • water
  • small objects

First, draw three large circles on your bucket or plastic container. They need to be big enough to get one’s hand in-and-out easily. Our coffee container had a funky handle part, so we just drew and cut a rectangle shape around it. Modify your circles however you need to to make it work!


Using your knife and/or scissors, cut the circles out. Try making smooth edges so no little hands get cut going in-and-out.

Next, lay the plastic material loosely over the bucket and secure it with the large rubber band. If you don’t have a rubber band big enough, you could always cut and tie a couple together to make it work.


Since water is involved, it’s best to do this activity outside, in the bath tub or in a water-safe area. We put a beach towel down on our kitchen floor and put our water lens inside a baking pan to catch any splashes…worked great!

Pour warm water onto the plastic material…as much as will fit without spilling over. And now your water lens is ready for play!

Have your kids take turns holding various objects underneath the “magnifying glass.” They can experiment by moving their hands up and down, and by adjusting the amount of water in the lens. So simple to make, but so much fun!


Make sure the water you use is warm…if you use cold water the lens will fog up quickly! We made that mistake for you! Ha!

L had a ball with this one today! Tomorrow morning we plan to venture outside and collect more flowers, sticks, snail shells, leaves, etc. to examine up close with our homemade magnifying glass! Where will this discovering activity take you? Enjoy!!!

Leaf Prints…Pillowcases and T-Shirts

Ever since we put up L’s “big girl bed” a couple months ago I’ve been looking for the perfect pillow sham. I finally decided, “Why not just make one!?” And that’s exactly what we did today! I love the outcome…it turned out even better than I imagined it would! The pillow cover will last for years and we can always look back on this perfect Autumn day. We followed it up by making some matching Fall shirts for the girls as well!


Pillow Cover

Materials needed:

  • pillowcase, ironed if needed
  • a few scraps of cardboard
  • paper towels
  • acrylic paints
  • brushes and palettes (we use old, plastic lids)
  • leaves


Before you start painting, prepare your area. You’ll need a piece of cardboard to paint the leaves on top of and a piece of cardboard to slide into the middle of the pillowcase, so no paint seeps through. If the cardboard inside the pillowcase is ridged, you may want to add an old, silicone cutting board or piece of card stock underneath as well. You wouldn’t want the ridges to effect the leaf prints.

Starting with the larger of your leaves, paint the underside of the leaf and then carefully press it onto the pillowcase. Repeat with different colors, different shades and different sizes until you’re happy with your final project. We started with various shades of orange and then added a few reds, yellows and greens. Likewise, we started with large leaves and ended with a few tiny ones.


T-Shirts

Materials needed:

  • t-shirts, ironed if needed
  • a few scraps of cardboard
  • paper towels
  • acrylic paints
  • brushes and palettes (we use old, plastic lids)
  • leaves

You will basically make leaf prints onto your t-shirt in a similar manner as with the pillowcase above. The only difference is that you’ll want smaller cardboard pieces to slide into the shirt and one really narrow piece to slide into the sleeve. As you can see, after printing leaves on the center of the shirt I added one tiny, falling leaf to the sleeve.


Cute, huh!? And easy! What else will you make leaf prints on? I think an Autumn table runner would be beautiful as well! There are so many possibilities! Enjoy!

DIY Mason Jar Lid Pumpkins

This pumpkin craft is one of the simplest and sweetest of the season.  It’s not only cute for Halloween, but you can keep it up all the way through to Thanksgiving. The “mason-jar-lid pumpkin” could even be used to brighten up your Thanksgiving table centerpiece…your guests will adore it!


Materials needed:

  • about 20 mason jar lids (found in the grocery store)
  • glitter spray paint (orange, gold, silver)
  • cord or string
  • scissors
  • cinnamon sticks
  • decorative, floral wire (optional)

Outside or in a well-ventilated area, lay all the lids out on a flat surface. Spray half the lids with the orange spray paint, a quarter of them gold and the last quarter silver. (You can always change up your colors and do something different than what I did…all orange, all gold, no paint…it’s up to you!)


Let the lids dry overnight. Next, cut a piece of string about 2-3 feet long. Thread all your lids on the string, making sure they all face the same direction.


Pull the string tight and then tie a double-knot to secure the mason jar lids.

Move the lids around, arranging them into a pumpkin shape. Place 6 or 7 cinnamon sticks in the center for the pumpkin stem and (optional) add a curlicue of florist wire.


How cute is that!? And easy too! Now that I’ve made one for our house, I’ll be making a few more this week to give away as gifts. Enjoy!

Have you seen our DIY Witch Legs??? That’s another one you’ll be sure to love!!!