Mixed-media Fall Art

We have some glorious October weather in Virginia this week…cool mornings, sunny days, and brilliant leaves falling from our trees! L’s been painting outside these days, in a world of October color! Yesterday she made a beautiful fall tree using acrylics, melted crayons, and a sprinkle of “leaf glitter” (tiny pieces of actually leaves). The outcome is beautiful!!! I made a similar piece last year that I also adore…the process is as much fun as the piece of art itself!

2015-10-21 06.43.21

Materials needed:

  • canvas (you could do this on cardboard too!)
  • acrylic paints (blues, white, brown)
  • crayons (oranges, yellows, and red)
  • knife and cutting board
  • oven

*A tip when buying crayons for this project…when you’re looking for orange crayons, buy a box of 24 crayons. The larger boxes contain more crayons, but not any more orange and yellows!!! We always seem to run out of orange crayons this time of year!

First, have your child paint their canvas blue. We like to use some darker and some lighter blues, mixing them all together.

DSC_0494

DSC_0496

Next, have them paint a few white, fluffy clouds.

DSC_0500

As the sky is drying, sit back and look at the trees with your child. Point out how the trunk is usually straight and thick. As you move up the tree, the branches get smaller and smaller, and they get more squiggly!

DSC_0498

As you continue to discuss trees and their features, lay out a few various-sized paintbrushes. Have your child put them in order from biggest to smallest. Now they know which paintbrush to use for their tree’s trunk and all its branches!

DSC_0504

Time to paint the tree!

DSC_0508

DSC_0516

DSC_0522

The next step is a little “out of the box,” but that’s what makes it so great! Have your child pick out which crayons are the colors of the fall leaves before them. Using a sharp knife and a cutting board, remove the paper off the crayons and chop the crayons up into tiny pieces. I think we used half a lime-green crayon, one yellow, three or four oranges, and one red crayon.

DSC_0523

Lay the painting down on a flat surface and have your little one sprinkle the crayon shavings all over the trees branches. L also crumbled up an actual leaf from the yard and sprinkled some of it among the crayon pieces. It’s a minor detail, but it’s my favorite. I’ll always remember this day and where L made her Fall Tree.

DSC_0529

DSC_0538

DSC_0541

Once the crayon shavings are all dispersed, put your painting into the oven at 200 degrees for about 3-5 minutes. Watch the pieces as they melt. (Our painting was too big to fit in the oven this time, so I carefully held it under the broilers with the oven set on broil. I did one end, then turned it around and did the opposite.) When you remove the artwork from the oven, be careful to hold it flat and steady…until the crayon wax hardens, the wax will drip if it is tilted at all.

DSC_0542

Isn’t the outcome gorgeous? It’s perfectly imperfect…just like a fall leaf.

DSC_0544

If you think this is just a craft for kids, you’re wrong…you can totally do this as well! “Mixed-media Fall Art” is fun for anyone and everyone! Enjoy!!!

IMG_5687

IMG_5689

IMG_5691

Candy Corn Candles

I was so excited when I saw some “candy corn candles” online the other day, I couldn’t wait to make them! The candles were so cute, but when I read the tutorial, I discovered that they were just white candles painted to look like candy corn! What a disappointment! I figured, “How hard could it be to actually make CANDY CORN CANDLES?” And so I did just that! I’ve made all types of candles before and each time is an experiment. They are a lot of fun to play around with! Give yourself some time and patience when you’re making candles…they are definitely worth it! These candy corn candles may be my favorite yet! They’re seasonal and adorable! My suggestion is to make a few at a time…one for you to keep and a couple to give away as gifts!

DSC_0442

Materials needed:

  • large pot with 1-2 in. water inside
  • metal pouring-pot or large metal can
  • paraffin wax
  • crayons (yellow, orange and white)
  • mason jars
  • primed wicks
  • pencils
  • paper towels
  • wax paper (to protect your counter top)
  • wooden skewer or stick
  • candle thermometer

DSC_0388

First, place your metal pouring pot (or large can) into the large pot of water. Place 2-3 blocks of paraffin wax into the pouring pot. Turn the stove on high, bringing the water to a boil, then turn it down a bit so the water doesn’t boil over.

DSC_0390

As your wax melts, peel the paper off of two orange crayons. The easiest way to do this is to carefully slice the paper down the side with a sharp knife.

DSC_0410

If you have a candle thermometer, continue to heat the wax until it reaches 180 degrees. Usually once all the wax is melted it is at or near 180 degrees. Now, add the two orange crayons. Using a wooden skewer or a stick, mix the color and wax together.

DSC_0396

DSC_0400

Carefully pour the orange wax into your three mason jars. If you have any excess wax, you can pour it into a disposable bread pan and save the wax for later. (I poured mine into a cheap coffee mug and made an additional candle in a mug!)

DSC_0412

The next step is a little tricky, but take your time…wax doesn’t harden immediately, so relax and stay calm! Place your candle wick into the middle of the candle and wrap the extended portion around a pencil. Lay the pencil across the jar to keep the wick in place. You may have to move the pencil around a bit to get the wick right where you want it. Sometimes the wick likes to move within the first few minutes, so keep an eye on it!

DSC_0414

Let the wax set for at least 30 min to an hour, but not much more. While you’re waiting, reheat the few drops of wax that remain in the pouring pot and, careful not to burn yourself, wipe the pot out with a paper towel.

After the wax has set, it’s time to do the exact same thing, but this time making yellow candle wax! Heat the paraffin wax in the pouring pot or large can. After it melts, throw in two yellow crayons. Mix the wax with the other end of your wooden skewer. Carefully pour the wax into your three jars. Let it set 30 min to an hour and wipe out your pouring pot.

DSC_0416

And last, but not least…time to do the same with the white wax. If your paraffin is semi-translucent before it melts, I’d add a white crayon or two. Some paraffin wax that is designed specifically for candle-making is very white to begin with…you don’t have to add any crayons to this type.

DSC_0418

Now, let your candles set for a few hours! Sometimes when making candles a little well develops around the wick as it sets. If this happens, melt some more white wax and carefully pour it into the well to top it off. For the first time in making candles myself, this didn’t happen with my candy corn candles! Once set, the tops were just as flat as when I poured the wax in. Trim the wicks down to about half an inch. Enjoy!!!

DSC_0443

Some tips I learned the hard way:

  • You definitely need at least 2 crayons to color the wax. When the wax sets, the color will appear much lighter than it looks when poured. If the orange color appears too light for your taste, you can carefully place the jar into hot or boiling water to re-melt the wax and stir in another crayon piece. Best to avoid this step altogether though, and put enough color in at the start!
  • When making these layered, candy corn candles, let the wax set for an hour in-between pouring layers, but not much more! When I made these, I poured the orange and yellow wax at night and then I waited til morning to add the final, white layer. I totally forgot that the wax can shrink a bit when it completely sets, causing it to separate from the jar a little. When I went to pour the white wax onto the top, in two of my candles the white wax seeped down the edges, covering up the yellow a little bit. Oops! So let the wax set, but not for over an hour before adding the next layer!


DSC_0441


Enjoy this adorable craft! They are just too cute!

Pumpkin Suncatchers

How sweet are these PUMPKIN SUNCATCHERS? They brighten up our kitchen windows and, hung beside some glue ghosts, they’ve quickly become my favorite Halloween decoration in the house!


DSC_0307


This project evolved while L and I were making it. (I love when that happens!) Originally we were just going to paint some mason jar lids, tie a ribbon on and call them “pumpkins.” Once I realized they’d be hanging in the kitchen window, I had a eureka moment…I knew that turning our pumpkins into suncatchers would be too easy and too perfect! I just love the bright and sunny colors!


DSC_0303

DSC_0304


Materials needed:

  • mason jar lids
  • orange acrylic paint
  • plastic container (berry containers work great!)
  • Sharpie markers
  • green ribbon
  • green pipe cleaners
  • scissors
  • hot glue gun

*Notice the plastic container, hot glue gun, and markers are not pictured here…they surprised us in becoming “needed materials” half-way through the project!


DSC_0245


First, have your little ones paint the mason jar lids orange.


DSC_0247


After the lids have dried, tie a ribbon in a double-knot around the lid.


DSC_0270


Next, cut a pipe cleaner in half. Wrap it around a thin marker or pen to make a curlicue.


DSC_0272

DSC_0273

DSC_0275


Gently wrap the pipe cleaner curlicue around the knot at the base of the ribbon.


DSC_0276


Now for the suncatcher part! Cut the lid off your plastic container and remove the label if there is one.


DSC_0265


Have your little one color the plastic lid with Sharpie markers. L did some in solely “pumpkin colors” while the others she colored freely, using every color of the rainbow. (It’s important to use permanent markers, washable will rub right off and won’t work!)


DSC_0278


DSC_0281


Use the center part of a jar lid to trace rounds on the colored-plastic. Cut the rounds out and make sure they fit into the pumpkin lids. You may have to trim the sides a bit and cut a piece out where the ribbon will lie.


DSC_0282

DSC_0283

DSC_0284


Next, with just a few dabs of hot glue, glue the colored-plastic in place. All done!


DSC_0286


Hang your PUMPKIN SUNCATCHERS up in a bright and sunny window where everyone can enjoy them! Adorable!!!


DSC_0308


Pumpkin Jar Craft

I am so excited that October is finally here and we can start doing some Halloween crafts around our house! This PUMPKIN JAR CRAFT was inspired by the Jam Jar Fairy Houses we made last Spring. It’s a very similar concept! While many people think hot glue guns are just for gluing things together, we like to use them to add texture to our crafts as well. The hot glue gives our pumpkin jars a true, warty pumpkin appearance! I love the way they look with and without jack-o-lantern faces, in the day and at night! Too cute!!!


2015-10-01 20.22.19


Materials needed:

  • jars, various sizes
  • hot glue gun and glue
  • acrylic paint
  • green, glitter spray paint
  • battery-operated tea lights


DSC_0106


First, decide whether or not you’d like jack-o-lantern faces on your jars. I really liked our mixed…two with, one without. If you’re putting a face on your jar, carefully do that first with the hot glue gun. One great thing about hot glue gun glue: if you make a mistake, simply let the glue cool completely, then peel it off and start again!


DSC_0108


Next, fill in the spaces and go around the jar with long, vertical stripes of hot glue. It certainly doesn’t need to be perfect…no two pumpkins are ever alike!


DSC_0111


After the glue has cooled completely, paint the inside of the jar yellow, where the face shines through.


DSC_0157

DSC_0161


Now, paint the exterior of the jar orange. We painted ours with a mix of yellow and orange to give the pumpkins varying hues. Be careful around the face!


DSC_0162

DSC_0164

DSC_0175


The pumpkins without jack-o-lantern faces are perfect for your littles to paint!


DSC_0167

DSC_0171


As the jars dry, spray your lids with glittery, green spray paint. Do this outside or in a well-ventilated area. If you don’t have spray paint, green acrylics would work fine too!


DSC_0179


After the lids have dried, screw them on top your jars and your pumpkin jars are complete! Now for the fun part…find a place to display your pumpkins for everyone to enjoy! At nighttime, place a battery-operated tea light inside each jar to bring your pumpkins to life!


DSC_0224

DSC_0190

DSC_0192


Are they cute or what? Enjoy!!!

Craft Stick Fairy Doors

It’s no secret that we LOVE making fairy/gnome things at Our Beautifully Messy House…fairy houses, fairy furniture, fairy doors, gnome doors, flower fairies, fairy folk…need I go on? We just can’t help it! What I love the most about making fairy doors and gnome doors is surprising people with them! L and I made an abundance of CRAFT STICK FAIRY DOORS this week as we prepare to spread them around the neighborhood. Of course we enjoy surprising our friends and close neighbors, but what I really love is putting them on strangers’ front porches and sneaking them into their gardens! We rarely get to see people discover the fairy and gnome doors, but the surprise, the magic in it all makes L and I giggle for days! We’ve had a great time making these craft stick fairy doors…aren’t they the cutest!?!

Materials needed:

  • crafts sticks (big, small, colored, any or all)
  • wood glue
  • Q-tips
  • buttons

Optional materials:

  • acrylic paint
  • sealant spray
  • wire & nails

First, lay out your craft sticks in a door shape. If you have colored sticks, your kids will enjoy playing with patterns!


Using a Q-tip, put wood glue onto a small craft stick and carefully lay it across your door. If you don’t have small craft sticks, you can always cut a normal-sized one in half! It’s best to put at least 2 sticks across, but you can play with the angles and directions that you put them. Remember, fairy doors don’t have to be perfect!


If you don’t plan to paint your door, you can glue a button-handle on now too!

After the glue has dried a good bit, flip your doors over and smear wood glue all across the back for extra support. Let them dry for a few hours or overnight.


Next, if your craft sticks are plain and you want to, paint the doors. We especially like to add glitter paint to ours…helps the fairies and gnomes find the doors of course.


After the paint has dried, glue on button-handles if you have not done so yet. We like to spray our doors with some acrylic sealant as well…makes the wood a little more durable outdoors and gives them a more finished look.

Now for the fun part, hide them around town…or give them to friends! These would make an adorable party favor for both kids and adults! Enjoy!!!


Other posts you may like:

Jam Jar Fairy House /Jam Jar Gnome Home
Doorknob Mushroom-Fairy Houses
Fairy Furniture
DIY Fairy Door…Gnome Door
Fairy Doors & Gnome Doors #2

DIY Citrus Stamps

How cute are these DIY CITRUS STAMPS we made this week? They really were simple to make and the outcome is adorable…perfect for Summer! L and I stamped t-shirts, tea towels, and a pillow case for her bed. Just think of the possibilities… You could use this stamping technique to brighten-up party invitations, gift bags, skirts, shorts, a tablecloth, shower curtain…the possibilities are endless (and sweet)!


Materials needed:

  • an orange, lemon, & lime
  • tea towels, t-shirts, etc.
  • knife
  • acrylic or fabric paints
  • flat, plastic lids or plates
  • paper towels
  • parchment paper

If you need to, iron your tea towels or t-shirts first! Protect your work area with parchment paper. (Usually I use cardboard or old newspapers for projects, but with this one I didn’t want the texture of the cardboard to effect the stamping and I didn’t want newspaper to discolor my cloth. Parchment paper was perfect!)

Next, cut your orange, lemon and lime in half with a sharp knife. If you like to, cut a little “handle” in each fruit half…makes stamping easier, especially for kids!


Turn the fruit over onto a paper towel, to soak up some of the juice from the fruits.

Next, squirt your paints onto plastic lids or plates.

Dip the sliced fruit into the paint. Blot it onto a paper towel, if there appears to be too much paint.


And press the fruit gently onto your cloth. Too easy, right!?


We experimented and made some of our tea towels patterned, while others we stamped randomly. The random was definitely our favorite…a little more carefree, like all things “summer” should be!

If you have some prints that are more solid looking (a bit too much paint), don’t fret…just overlap another fruit in another color on top! It will look like you planned it that way all along!


Instead of stamping an entire tablecloth, you can just stamp tea towels and overlap them as we did here. Looks great on their own or with a solid tablecloth underneath!

Too cute, huh!?! Enjoy!!!


Fairy Doors and Gnome Doors (#2)

After making a fairy door out of sticks and hiding it in our neighbor’s garden last Summer, L and I thought we’d spread the fairy love a little farther this year…we’ve been making FAIRY DOORS and GNOME DOORS and hiding them all around town! It’s so much fun surprising the young and the old — just imagine the look on anyone’s face when they’re out in the garden and suddenly discover a teeny, tiny door that wasn’t there before. Ha! These fairy doors are so simple to make and all you need is rocks, paint and clear sealant (which is optional). To draw a little more attention to the fairy doors, we like to leave a tiny button or painted rock trail as well.


Materials needed:

  • medium-sized rocks
  • acrylic paints
  • clear sealant spray (optional)

After cleaning any dirt off your rock, start by painting on a door.

Next, add some windows, if you have room.

If adding any glitter paint, apply that next. We like to paint a little glitter over our windows.

Next, outline the door and windows carefully with black paint. Add a doorknob as well.


Now for my favorite part, paint connecting black lines on the rock, resembling a stone wall.

If you’d like to add a flower pot or lil window box, add one now.

Finally, finish with some green vines, leaves, and flower details.


Once all your paint is dry, you can spray the rocks with a coat of clear sealant to make the fairy doors even more weather resistant. Permanent paint usually doesn’t wash away, but I always like to add a coat of sealant just in case.

Now for the real fun…time to hide your fairy doors and gnome doors. (Gnome doors go on trees, generally speaking.)


I like making some of our fairy doors to resemble our neighbor’s front porches and gardens…


Enjoy!!!


See also this DIY for fairy furniture!


Tin Foil Jelly Fish Craft

I love this super cute, jelly fish craft for so many reasons. Our TIN FOIL JELLY FISH were inspired by a trip to the Baltimore Aquarium and the girls’ fascination with “The Jelly Fish Invasion” exhibit. (Super cool…if you are anywhere near Baltimore, go see it!!!) I love that this craft costs nearly nothing to make and L learned all about textures and rubbings while coloring the foil. And I LOVE the way our jelly fish look hanging in our kitchen window. If you can, place them near an air vent…when the air kicks on the jelly fish will come to life, dancing and swimming in the sun!


“The Jelly Fish Invasion” at the Baltimore Aquarium…

Materials needed:

  • tin foil
  • permanent markers
  • egg cartons
  • other small, plastic containers (think applesauce, olives, etc.)
  • string or fishing line
  • painted stick
  • tape
  • scissors
  • paperclips
  • nail or sharp-tipped tool

First, cut your egg carton into little jelly fish shapes.

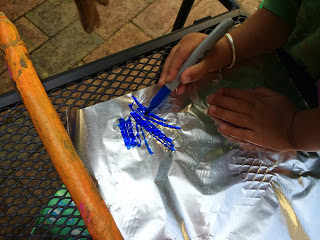
Next, take a few sheets of tin foil and have your children color them. This is a great opportunity to make rubbings. L colored on the patio furniture and bricks, over tree bark, on the textured sidewalk and on her slide. Not entirely necessary, but why not!? Your kids can also try making different patterns if coloring on a flat surface…stripes, dots, swirls, anything goes!


Cut the tin foil into little squares and have your kids wrap the egg carton cut outs with the foil. You may have to help them smooth down the outer edges.


If you have some small, plastic containers to use as well, first poke a hole in the center. Next, cover the containers with the foil too.


Cut strips of tin foil and tape the strips, 2 or 3 at a time, to the inside of your jelly fish.


Using a nail or sharp tool, poke a hole into the top of each jelly fish.

Now, it’s time to hang your jelly fish up. I knew ours would go in our kitchen window, so we hung the jelly fish along a painted stick. You could also make one large jelly fish and hang the smaller ones underneath. That method would be cute if hanging your jelly fish up under a light, in the center of a room.

We hung our jelly fish by stringing them onto fishing line and tying the line to a paperclip underneath each one. Some hung on their own, while others had a second jelly fish hanging underneath. Get creative and have fun with it!


When doing projects like this, it’s definitely easier to have the jelly fish hanging while you are tying them on rather than laying flat on the ground.

Put them up to display and enjoy!!!


Doorknob Mushroom-Fairy Houses

Aren’t these DOORKNOB MUSHROOM-FAIRY HOUSES the cutest??? I originally planned to just make mushrooms out of these little wooden knobs, but I just had to paint a little door and window on too. They’re just so sweet! L painted hers knobs into multi-colored mushrooms today and they are already out in the garden! So easy and so much fun!


Materials needed:

  • small wooden knobs w/ screws
  • acrylic paint
  • sealant spray
  • egg carton (optional)

First, twist the screw into the knobs.

Next, paint your knobs. You can paint them to look like mushrooms or add a few extra details for a fairy house. Even a 3 year old can paint the knob to look like a cute, lil mushroom!


After your knobs are painted, set them aside to dry. I suggest using an egg carton to prop the knobs up. Next, take them outside to spray with a coat of sealant. (The egg carton works great for this step too!)

Now for the fun part…tuck them away into your fairy garden, in a flower pot or in a wreath. Keep the screws in, just push them into the ground. Adorable! Might as well make a couple extra for family and friends!


If you like this one, you’ll be sure to like our JAM JAR FAIRY HOUSES and GNOME HOMES too!

Jam Jar Fairy House / Jam Jar Gnome Home

The other night I had a hard time falling asleep because I couldn’t stop brainstorming about how to turn a jar into a fairy house. (Only me…I know.) I knew I wanted to make it so at night the windows and door would light up; the house needed to be sturdy enough to stand up to the elements outdoors; and I wanted to use craft materials we already had around the house. Finally I had a eureka moment…why not use my beloved hot glue gun!?! So many people think hot glue guns are just for gluing things together, but they can add texture and dimension to your work as well. I’m super excited to share with you this simple tutorial for making JAM JAR FAIRY HOUSES & GNOME HOMES! They really are adorable!


Materials needed:

  • jars
  • hot glue gun and glue
  • acrylic paints
  • preserved moss, tree bark, or dried leaves
  • dried flowers
  • a bead or button
  • tea lights (battery operated)


First, decide which direction you’d like your jar to stand. For instance, my smallest JAM JAR FAIRY HOUSE stands on its lid, but the larger one (made from an apple sauce jar) stands upright. Using your hot glue gun, “draw” a door and windows on your house. Then, fill in the walls of the house with vertical lines of your hot glue. Try to draw them on in long, fluid strokes, but the house by no means needs to be perfect. Each lil blip or quirk, will give your fairy house more character!


Next, paint the inside of the jar where your windows and door are located. Keep in mind that you’ll want some light to shine through at night, so don’t pick colors too dark or layer the paint too thick.


After you’ve painted the inside, paint the outside of the jar brown. Carefully go around each window and the doorway.


After the paint dries, the final step is gluing on dried moss and some tiny dried flowers. For our little jam jar fairy house, I glued moss on the top of the house (bottom of the jar) and along the edges of the lid. You can find preserved moss at your local craft store or, if you like, just use natural materials found in your own backyard…twigs, tree bark, fallen leaves, helicopter seeds, acorns.


You can display your fairy houses inside or outside. To light them up at night, just place a little, battery operated, tea light inside. Enjoy!


If you’re giving a JAM JAR FAIRY HOUSE away as a gift, don’t forget to include some fairies and some fairy furniture tucked away inside the jar!

DIY Fairy Folk

DIY Flower Fairies

Fairy Furniture

DIY Fairy Wands