Craft Stick Fairy Doors

It’s no secret that we LOVE making fairy/gnome things at Our Beautifully Messy House…fairy houses, fairy furniture, fairy doors, gnome doors, flower fairies, fairy folk…need I go on? We just can’t help it! What I love the most about making fairy doors and gnome doors is surprising people with them! L and I made an abundance of CRAFT STICK FAIRY DOORS this week as we prepare to spread them around the neighborhood. Of course we enjoy surprising our friends and close neighbors, but what I really love is putting them on strangers’ front porches and sneaking them into their gardens! We rarely get to see people discover the fairy and gnome doors, but the surprise, the magic in it all makes L and I giggle for days! We’ve had a great time making these craft stick fairy doors…aren’t they the cutest!?!

Materials needed:

  • crafts sticks (big, small, colored, any or all)
  • wood glue
  • Q-tips
  • buttons

Optional materials:

  • acrylic paint
  • sealant spray
  • wire & nails

First, lay out your craft sticks in a door shape. If you have colored sticks, your kids will enjoy playing with patterns!


Using a Q-tip, put wood glue onto a small craft stick and carefully lay it across your door. If you don’t have small craft sticks, you can always cut a normal-sized one in half! It’s best to put at least 2 sticks across, but you can play with the angles and directions that you put them. Remember, fairy doors don’t have to be perfect!


If you don’t plan to paint your door, you can glue a button-handle on now too!

After the glue has dried a good bit, flip your doors over and smear wood glue all across the back for extra support. Let them dry for a few hours or overnight.


Next, if your craft sticks are plain and you want to, paint the doors. We especially like to add glitter paint to ours…helps the fairies and gnomes find the doors of course.


After the paint has dried, glue on button-handles if you have not done so yet. We like to spray our doors with some acrylic sealant as well…makes the wood a little more durable outdoors and gives them a more finished look.

Now for the fun part, hide them around town…or give them to friends! These would make an adorable party favor for both kids and adults! Enjoy!!!


Other posts you may like:

Jam Jar Fairy House /Jam Jar Gnome Home
Doorknob Mushroom-Fairy Houses
Fairy Furniture
DIY Fairy Door…Gnome Door
Fairy Doors & Gnome Doors #2

Tin Foil Jelly Fish Craft

I love this super cute, jelly fish craft for so many reasons. Our TIN FOIL JELLY FISH were inspired by a trip to the Baltimore Aquarium and the girls’ fascination with “The Jelly Fish Invasion” exhibit. (Super cool…if you are anywhere near Baltimore, go see it!!!) I love that this craft costs nearly nothing to make and L learned all about textures and rubbings while coloring the foil. And I LOVE the way our jelly fish look hanging in our kitchen window. If you can, place them near an air vent…when the air kicks on the jelly fish will come to life, dancing and swimming in the sun!


“The Jelly Fish Invasion” at the Baltimore Aquarium…

Materials needed:

  • tin foil
  • permanent markers
  • egg cartons
  • other small, plastic containers (think applesauce, olives, etc.)
  • string or fishing line
  • painted stick
  • tape
  • scissors
  • paperclips
  • nail or sharp-tipped tool

First, cut your egg carton into little jelly fish shapes.

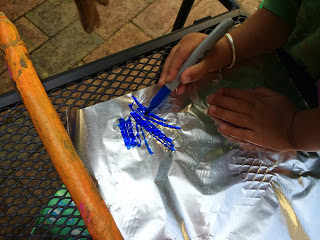
Next, take a few sheets of tin foil and have your children color them. This is a great opportunity to make rubbings. L colored on the patio furniture and bricks, over tree bark, on the textured sidewalk and on her slide. Not entirely necessary, but why not!? Your kids can also try making different patterns if coloring on a flat surface…stripes, dots, swirls, anything goes!


Cut the tin foil into little squares and have your kids wrap the egg carton cut outs with the foil. You may have to help them smooth down the outer edges.


If you have some small, plastic containers to use as well, first poke a hole in the center. Next, cover the containers with the foil too.


Cut strips of tin foil and tape the strips, 2 or 3 at a time, to the inside of your jelly fish.


Using a nail or sharp tool, poke a hole into the top of each jelly fish.

Now, it’s time to hang your jelly fish up. I knew ours would go in our kitchen window, so we hung the jelly fish along a painted stick. You could also make one large jelly fish and hang the smaller ones underneath. That method would be cute if hanging your jelly fish up under a light, in the center of a room.

We hung our jelly fish by stringing them onto fishing line and tying the line to a paperclip underneath each one. Some hung on their own, while others had a second jelly fish hanging underneath. Get creative and have fun with it!


When doing projects like this, it’s definitely easier to have the jelly fish hanging while you are tying them on rather than laying flat on the ground.

Put them up to display and enjoy!!!


Pine Cone Flowers

Have I mentioned before how much I love Fall?! So many things to find and create with…like these mini-pine cones! I’ve been thinking of making “pine cone flowers” for months now, and when L and I found these miniature ones it was a done deal.

Materials needed:

  • miniature pine cones
  • twigs (the more lil knobs and branches the better)
  • acrylic paints
  • hot glue gun and glue

First, choose what colors you’d like your “flowers” to be…we choose multi-colored! Paint each little pine cone as you like. Set aside to dry.


Next, paint your twigs a mixture of dark and light greens. Allow to dry.


Once everything is dry, you can assemble your pine cone flowers. Using a hot glue gun, put a little dab of glue on the tip of a twig. Quickly press and hold a pine cone in place. Repeat until all your pine cones are used up.


So cute, huh!? Arranged in a little, antique bottle they make a sweet gift for a child or an adult.

The Buckeye Zoo (and Other Fall Seed Creations)

I just love this time of year! One of my favorite things to do since I was a kid and now with my own kids is collecting the Fall leaves, nuts, and seeds. L says she likes to be a “thing finder” like Pippi Longstocking on our nature walks. This year, as we’ve been foraging, we’ve also begun gluing some of our buckeyes and other nuts and seeds together into animals.

Materials needed:

  • buckeyes
  • acorns
  • helicopter seeds
  • whatever other nuts and seeds you can find
  • feathers
  • twigs
  • glue (I used a hot glue gun, but let L use wood glue.)
  • acrylic paint
  • sealant

Before you start gluing, it’s important to make sure that all your findings are bug-free and that they’re dry. Put a layer of tinfoil on a baking sheet or pan and spread your nuts and seeds out on top. With your oven set to 200 degrees, bake your acorns, walnuts and buckeyes for about 1.5 to 2 hours. Turn the seeds over about every half an hour to prevent burning. With some of the spiky or more delicate seeds, bake them at a lower temperature…around 180 degrees…for an hour or so.

After the seeds are baked and cooled, you can start gluing together your creatures. I prefer using a hot glue gun…it’s quick and holds the buckeyes and other seeds together nicely. I let L glue some of her own with some standard “wood glue” though. It takes longer to dry, but it’s much safer for a 2 year old to use on her own!


The elephant was the first member of our Buckeye Zoo…definitely L’s idea! She looooves elephants!


Here’s a little bunny rabbit…I think tomorrow I’ll make some flop-eared bunnies for a dear friend of mine. So simple, but so cute!


I thought this one was gonna be a porcupine or hedgehog, but L said it looked most like a sheep. I agree!

And I just love this bird. We’ll be making him/her a nest by gluing together twigs later this week.


While most of our creatures were complete after gluing, we chose to paint others…like L’s caterpillar and the turtle and dragonfly we made together.


What Buckeye creatures will you and your kids make this year? We’d love to see your creations shared here in the comment section…there are so many possibilities! Have fun collecting and creating!!!

Stick Shapes Game

Do your kids do this? Lately L makes shapes and pictures with everything stick-like…markers, crayons, toothpicks, straws, hot glue gun sticks, chopsticks, everything! It’s a great learning activity though and can be a lot of fun! It’s also something you all can play anywhere at any time…think restaurant, waiting forever for dinner to come…


Materials:

  • markers (or anything stick-like)

L always initiates this game, usually by making triangles and squares.

We do some letters.

Make some snakes…be careful, this one bites!


Sometimes I tell L which shape to build. Other times we can take turns building shapes, having the other person guess what it is. I made this one and L proclaimed, “Like a stop sign!”


And still, other times we make pictures and shapes together.

You can also practice colors and counting with this game too. It’s so simple, yet so much fun for a two year old or older! Sometimes simple really is best. What little games like this does your family play?

DIY Rustic Spinning Stars

I love these Rustic Spinning Stars. When I first saw something similar here on the “happy hooligans” blog I just knew we had to make them! They’re fun to make with the kids and are beautiful hanging inside or outside. We have ours spinning on our front porch, while my dad hung his (which we gave him for Father’s Day) in their kitchen. I think the stars would be really fun hanging, spinning from the branches of a big tree too!


Materials needed:

  • sticks
  • glue gun and glue
  • white acrylic paint and brushes
  • colored ribbon scraps, string, raffia
  • florist wire

First, have your little ones collect sticks. You can make big stars with big sticks or use little twigs, like we did, to make little 3 to 5-inch stars.

Use the hot glue gun to glue five sticks together into the shape of a star. The stars don’t all have to be the same size and they certainly don’t have to be perfect…any imperfections give your stars more character! Don’t worry about the glue showing either, in the next step the paint will cover it up.

Next, have your kids help you paint each star with white acrylic paint. This is a great painting project for little ones, since any missed spots give the stars their rustic appearance.


After the paint dries, tie one end of your ribbon to the center of the star and wrap it around. Again, no need to be perfect here…another great task for your kids to help you do! After the star is wrapped, tie the end in a knot around one of the star’s arms.

You can attach the stars to each other with string or wire. We used green florist wire, which is weather resistant and sturdy. If you link two pieces of wire together, between each star, the stars will spin a little more than if you use only one wire. We tried both ways…both did the job and look great, so it’s up to you!

Now for the fun part, find the perfect spot to hang your Rustic Spinning Stars! Enjoy!

Fairy Furniture

It wouldn’t be fair for me to tell you how to make a “fairy door” without showing you how to make some fairy furniture to add to your garden as well! These tables and chairs are super easy and quick to make and, like most of my favorite crafts, they can be made with things you already have!


 Materials needed:

  • bottle caps
  • little sticks and twigs
  • scissors
  • hot glue gun and glue

First, have your kids help you collect sticks out of your yard and select some colorful bottle caps. (Bottle caps are another item we hoard in our house…they can be used for so many crafts!)


Using your scissors, cut a stick into four equal pieces…each about an inch long. These will be the legs of your chair.


Turn a bottle cap upside down and glue the four legs into place. You can either put the glue onto the leg and push it into the bottle cap, or put the glue directly onto the cap and push the stick in. Whichever method you decide on, make sure you do it quickly so the chair legs are super-secure!


Cut two more sticks, about an inch and a half to two inches long. These ones do not have to be exactly equal in length or straight! Cut two or three more sticks about an inch in length.

These sticks will resemble a ladder-back chair. One by one, glue the inch-long sticks to the longer ones, attaching the two. (Easier to see in the pictures below than to explain!) I prefer the small, horizontal sticks to be a little crooked…gives the chair more character!


Once all the sticks are attached and the glue has dried, flip the chair over and decide which side will be the front and which will be the back. Glue the back of the chair to the seat with two more dots of glue. All done!!!


If you’ve made the chair, the table is super easy…essentially it’s a back-less chair!


I just love the color and character the bottle caps give the fairy furniture! Have fun playing with this one! They are so quick and easy to make, you might as well make a few for your neighbor’s garden as well.


DIY Tin Can Bird Feeder

I think what I love most about the Tin Can Bird Feeder is that you’re essentially making something from nothing! It’s also such a fun way to teach kids how to reuse and recycle! We just made the bird feeder on a whimsy for our own backyard, but it would make a terrific gift too.


Materials needed:

  • tin can and its lid
  • pliers
  • hot glue gun and glue
  • sticks
  • string
  • a few small rocks


First, make sure your can has been thoroughly cleaned and remove the paper label.


Next, being careful not to cut yourself, fold the lid in half using your pliers. Our lid was one of the pull-top ones, which made it a little tricky, but we were still able to make it work!


Now, using the hot glue gun, put a little bit of glue around half of the rim of the can and set the lid inside. Try your best to hide the glue, so it’s not so visible from the outside.


While you’re folding and gluing the top, go ahead and send the little ones off to find sticks in the backyard.


Find one or two thicker, sturdier sticks and glue them to the bottom of the bird feeder…this is where the birds can perch while they snack.


Now, go around the can gluing sticks side-by-side until the entire can has been covered. We broke the sticks so they were all roughly the same length, but by no means perfect. If one stick is curved and leaves a substantial gap, go ahead and glue a small stick in to fill the hole.


On the bottom of the can, glue a few rocks in place…these probably won’t be seen, but will help balance out the bird feeder so it doesn’t tip too far forward.


Lastly, tie a string around the bird feeder and fill with bird seed. Hang it up where you and the kids can see it from a window…maybe on a nearby branch or off of your porch. Now, sit back and wait for the birds!


We decorated our bird feeder with sticks from the yard, but you can certainly get creative and mix things up a bit. Your kids can paint the tin can, wrap string around the can, or glue buttons on it…anything you all are inspired to do to make it unique!

DIY Fairy Door…Gnome Door…

In our garden the fairies and gnomes live amongst each other. Their village spreads around the yard with lil houses, patios and ponds hidden beneath the flowers. Throughout the year, L and I like to collect and make things to add to our garden…this morning we made a lil fairy door.

Materials needed:

  • sticks
  • florist wire
  • a button


First, have your kids collect some sticks and twigs around the yard. Sort through the sticks, finding ones that are particularly straight. Lay these sticks side-by-side, getting an idea of what your door will look like.


Next, cut two pieces of florist wire about 2-ft long each. Fold them in half.


Take the first stick you have laid out for the door and place it in the middle of one of the wires. Wrap the wire around the stick, about an inch from the bottom, and twist the wire once to secure it.


Do the same with the second wire about the an inch from the top of the stick. Continue adding sticks, one-by-one, wrapping and twisting the wires as you go.

When all the sticks are connected, hold the door in two hands and very gently squeeze the sticks together.


Cut the end of the wire, leaving about half an inch, and fold back the extra.


Next, have your child select a button for a door knob. L chose this cute lil heart button…probably not the one I would have chosen, but it was perfect for a fairy door! (Kids just know when it comes to these things.)


Thread the button onto a 4-inch piece of wire, twisting the wire a bit to secure it. Then, deciding where you’d like the door knob to be, wrap and twist the wire around one or two of the sticks.


To ensure that the button won’t slide down the door, you can thread the excess wire up and over the wire that holds the sticks in place as well.


Now the fun part…find a little piece of wall, fence, or a tree trunk to prop the door up against! Add some buttons, pennies, or broken tile pieces for lil fairy stepping stones… Adorable!


This project was so quick and easy, I think we’ll make another to sneak into our neighbor’s garden. He’s got the perfect tree for a fairy or gnome door…