Milk Carton Fairy Houses

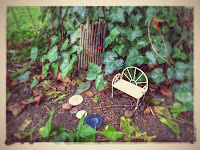
Who knew milk cartons had so much potential??? They are perfect for making fairy houses and gnome homes! First off, a milk carton is just the right size for fairies…all it needs is a door and a few windows to make it feel like home. Milk cartons are also water-proof, providing adequate housing for both indoor and outdoor use. WB and L like to play with their fairy houses during the day and, at night, we tuck a little tea light inside to turn them into night lights! So sweet!


2016-10-06-14-00-32

Materials needed:

  • milk cartons
  • white primer spray paint
  • exacto knife
  • acrylic paints
  • hot glue gun
  • sticks, bark, moss, acorns, etc.
  • battery-operated tea lights

dsc_0005

First, spray your milk cartons with some primer. The surface of milk cartons is usually waxy and paint will have a hard time sticking. A coat or two of primer should do the trick!

dsc_0006

Next, using an exacto knife, carefully cut a door and windows into the house. And do not worry…the windows don’t need to be perfect! Fairy houses’ never are!

dsc_0344

Now the fun part for the kids, have your little ones paint and decorate the houses. Start with a solid color or two underneath.

dsc_0347

img_0240

Then add details like polka-dot doors and Fall pumpkins. For our pumpkins, the kids used a wine cork as a stamp!

dsc_0349

dsc_0353

While the paint dries, send the kids outside to collect nature materials to use for a roof.

dsc_0356

Before assembling the roof, you can easily flip the screw-top opening inwards. Just push it in with your fingers…it’s easier than you think!

dsc_0357

dsc_0358

Glue twigs or bark over the opening, and then add all sorts of nature findings. Each house will be unique!

dsc_0360

dsc_0359

To light your fairy houses up at night, place battery-operated tea lights inside. You could also use a string of lights in and around the houses for a magical display!

dsc_0373

dsc_0383

“Those who don’t believe in magic will never find it.” -Roald Dahl

dsc_0393

DIY Ragtag Fairy Skirts (No Sew!!!)

These Ragtag Fairy Skirts are so easy to make, I almost feel silly writing a post on them. They are so cute though!!! I figured if you didn’t know how to make them already, you need to learn! Like all my projects that involve fabric, my suggestion to you is to check out the secondhand stores in your area first. We have an old antique/junk store in town that has a huge selection of funky fabrics from the 80s and 90s…they’re just perfect for crafts like this. And they only cost $1-$3 for pieces 3-6 yards long! If you already have a nice pile of fabric scraps, you’re all set…it doesn’t take much!

DSC_0195 (2)

Materials needed:

  • fabric
  • elastic
  • scissors

DSC_0172

First cut the fabric into strips, about 1-2 inches wide and 12-20 inches long. Varying lengths make the skirt fun…it definitely doesn’t have to be perfect!

DSC_0177

Next, cut a piece of elastic long enough to go around your child’s waist, with enough left over for a bow or knot. Tie on each piece of fabric as pictured. First, fold the fabric in half. Then, put the folded loop under the elastic. Flip the ends of the fabric up and over the elastic and through the loop of folded fabric. Pull gently to tighten and secure.

DSC_0175

DSC_0176

DSC_0174

DSC_0173

Repeat this process until the skirt is full. Although the lengths of the fabric can vary (makes the skirt more fun and free), I would try to make each “knot” face the same direction.

DSC_0180

DSC_0179

Once all the fabric strips are secure, simply tie the skirt in a bow around your child’s waist. So easy and too cute!!!

DSC_0181

DSC_0187

DSC_0192

Elf Donuts, Fairy Donuts, Wee Folk Donuts

What kid wouldn’t love making these teeny, tiny “donuts” for the fairies, gnomes, and Santa’s elves? They’re just too cute! L and I make chocolate-sprinkle donuts, powdered sugar donuts, and cinnamon sugar donuts; because, you know…it’s nice to give the wee folk some options after all. We make these “donuts” throughout the year for L and her fairy tea parties, but we also like to whip up a batch at Christmastime and leave them alongside Santa’s cookies and the reindeer’s carrots on Christmas Eve…we wouldn’t want any elf to be left out! They’re rather simple to make and your kids will go nuts when they see them! Sometimes it’s the littlest things (literally)!

DSC_0768

Ingredients:

  • O-shaped cereal
  • chocolate chips or baker’s chocolate
  • syrup (or honey)
  • powdered sugar
  • brown sugar
  • mini-sprinkles

DSC_0712

Materials needed:

  • small bowls
  • toothpicks
  • double-broiler (or microwave)


DSC_0737

Chocolate-Sprinkle Donuts

First, melt your chocolate in either a double-broiler or in the microwave.

DSC_0727

Next, carefully dip your O-shaped cereal into the chocolate.

DSC_0729

And L’s favorite step, cover in sprinkles!

DSC_0736

DSC_0742

Yumm!!!


DSC_0766

Powdered Sugar Donuts & Cinnamon Sugar Donuts

These donuts are super easy to make. First, dip the O-shaped cereal into a little bowl of syrup or honey.

DSC_0716

Next, remove the cereal with a toothpick, and toss around in either a bowl of powdered sugar…

DSC_0720

…or a bowl of brown sugar.

DSC_0722

It’s that simple, but oh so sweet!

A few weeks ago, L gave two of her classmates homemade fairy sets for their birthdays. Sure enough, we included some fairy donuts in little, folded-paper boxes!

DSC_0771

IMG_9142

Sometimes you really do have to make your own magic! Enjoy!!!

Hidden Fairy Bath Bombs

Have you ever bought bath bombs for yourself or for your kids? Bath bombs were originally intended for adults to use in the bath…their scents make the water smell wonderful and many times the bath bombs contain epsom salts to soften and refresh your skin. The thing that many people don’t know is that kids LOVE them too!!! The fizzy, bubbly, sizzling chemical reaction is just too cool! In the past, we’ve bought bath bombs and given them to our girls in their stockings at Christmas or for their birthdays…but now, we’ll never buy them again! These bath bombs are so quick and easy to make and there’s a surprise hidden inside each one! I found inspiration for this DIY on a fellow blogger’s site; she makes “Hidden Train Bath Bombs” for her little boys…adorable and genius!

DSC_0574

Materials needed:

  • 2 cups baking soda
  • 1 cup citric acid
  • food coloring
  • essential oil
  • water in a spray bottle (not pictured)
  • plastic fairies (flowers, dinosaurs, cars…)
  • silicone molds or a muffin tin

DSC_0547

First, mix two cups of baking soda and 1 cup of citric acid together in a large bowl.

DSC_0548

Next, add about 10-15 drops of food coloring and some essential oil, and mix. You can add more coloring and oil to suit your preference. I used a “sweet orange” oil and yellow food coloring. Even though the bath bombs themselves were not super-vibrant in color, the bath water certainly was! The kids loved it!

DSC_0553


Now, spray your mixture with water and mix quickly! I would give our mixture about 3 squirts, mix, then repeat. The baking soda and citric acid will start to fizz a bit, but once you mix, it will stop. Repeat this process until the mixture clumps together like breadcrumbs.

DSC_0554

Spoon the mixture into your silicone molds. Fill about halfway and pack it down firmly with your hands.

DSC_0555

DSC_0557

Now, add your fairies. We added a silk flower to one of ours as well.

DSC_0560

Fill the molds the rest of the way with the baking soda-citric acid mixture and pack it down firmly. Once the bath bombs set, they will expand. The next time I make bath bombs, I may not fill them all the way up to the top…or I may do so purposely and make them look like frosted cupcakes!

DSC_0563

DSC_0564

Let your bath bombs set up for a few hours until they are hard. (Can you believe how ours expanded and “grew”!?!) Flip the bath bombs over and gently pop them out of the molds.

DSC_0565

DSC_0566

Now for the fun part, surprise your kids with the bath bombs! The chemical reaction is just so cool!!!

DSC_0576

DSC_0586

They will be doubly-surprised to find fairies hidden inside!

DSC_0582

The walls, tile and bathtub in our bathroom are all white…the bath water was so, so yellow the whole bathroom glowed!!!

DSC_0601

DSC_0584

DSC_0603

This recipe can easily make 7-8 bath bombs…plenty for you and a friend! Enjoy!!!


DIY Toy Sail Boat

One evening this summer, while we were getting ready for bath time, L pulled a wine cork out of her pocket. She had been saving it all day to float it around and play with in the bath tub. That got me thinking…I knew with a few toothpicks and some leaves we could turn her wine cork into a little sail boat! Leaves work great for this project, because they’re naturally water-proof and easily replaceable!

IMG_3614

IMG_3642

Materials needed:

  • 2 wine corks
  • 4 toothpicks
  • 2 leaves
  • old pencil
  • scissors

IMG_3574

Take one of the wine corks and stick three toothpicks into it, all pointing in the same direction in a line.

IMG_3576

Next, push the second wine cork into the opposite ends of the toothpicks.

IMG_3577

Stick one more toothpick vertically into the middle of one of the corks.

IMG_3578

Find a medium-sized leaf and weave it through the bottom toothpicks. We used a balloon flower leaf. This step isn’t necessary, but it makes a nice lil bed for anything you may want to sail on top…a bug, a rock, a fairy friend.

IMG_3585

IMG_3579

Next, find a slightly larger leaf and thread it onto the vertical toothpick, making a sail. We found the hosta leaves to work best for this, though any thick and sturdy leaf will do!

IMG_3582

To make the sail boat safer for little hands, twist an eraser off the top of an old pencil. Cut it in half with scissors and push it onto the top of the sail.

IMG_3580


IMG_3581


IMG_3584

Now, time to play! L had hours of fun blowing her boats around our rain barrel!

IMG_3589


IMG_3609


IMG_3613

The boats may not seem like much, but ours withstood some submarine plunges under the water and lasted through two nights of bath time play! Tomorrow, we’ll replace the leaves and keep sailing!

IMG_3656


IMG_3662


IMG_3659

Enjoy!!!

White Picket Fairy Fence

Well, I couldn’t show you how to make a Craft Stick Fairy Door without telling you how to make a WHITE PICKET FAIRY FENCE to go with it! The fence is simple to make and looks adorable out in the fairy garden!

IMG_3404

IMG_3406

Materials needed:

  • small craft sticks
  • regular-sized craft sticks
  • wood glue
  • Q-tips
  • white acrylic paint
  • acrylic sealant

IMG_3371

First, lay out your sticks…4 small craft sticks in the middle with 2 regular-sized ones on the ends. If you don’t have small craft sticks, just cut some regular-sized one’s in half. The two craft sticks on the ends are left long, so that you can easily stick them into the ground, keeping the fence upright!

IMG_3372

Next, think about where two craft sticks that will lie across the other ones will be and use a Q-tip to put wood glue in those spots across each stick. Lay the craft sticks on top of the glue and press to secure.

IMG_3374

IMG_3375

After the glue has dried, paint the picket fairy fence white.

IMG_3399

Finish up with a coat of acrylic sealant spray.

IMG_3400

Now for the fun part…while sneaking a fairy door into your neighbor’s garden, add a little white picket fairy fence as well! Gently push the ends of the fence into the soil. Enjoy!!!

IMG_3402

Craft Stick Fairy Doors

It’s no secret that we LOVE making fairy/gnome things at Our Beautifully Messy House…fairy houses, fairy furniture, fairy doors, gnome doors, flower fairies, fairy folk…need I go on? We just can’t help it! What I love the most about making fairy doors and gnome doors is surprising people with them! L and I made an abundance of CRAFT STICK FAIRY DOORS this week as we prepare to spread them around the neighborhood. Of course we enjoy surprising our friends and close neighbors, but what I really love is putting them on strangers’ front porches and sneaking them into their gardens! We rarely get to see people discover the fairy and gnome doors, but the surprise, the magic in it all makes L and I giggle for days! We’ve had a great time making these craft stick fairy doors…aren’t they the cutest!?!

Materials needed:

  • crafts sticks (big, small, colored, any or all)
  • wood glue
  • Q-tips
  • buttons

Optional materials:

  • acrylic paint
  • sealant spray
  • wire & nails

First, lay out your craft sticks in a door shape. If you have colored sticks, your kids will enjoy playing with patterns!


Using a Q-tip, put wood glue onto a small craft stick and carefully lay it across your door. If you don’t have small craft sticks, you can always cut a normal-sized one in half! It’s best to put at least 2 sticks across, but you can play with the angles and directions that you put them. Remember, fairy doors don’t have to be perfect!


If you don’t plan to paint your door, you can glue a button-handle on now too!

After the glue has dried a good bit, flip your doors over and smear wood glue all across the back for extra support. Let them dry for a few hours or overnight.


Next, if your craft sticks are plain and you want to, paint the doors. We especially like to add glitter paint to ours…helps the fairies and gnomes find the doors of course.


After the paint has dried, glue on button-handles if you have not done so yet. We like to spray our doors with some acrylic sealant as well…makes the wood a little more durable outdoors and gives them a more finished look.

Now for the fun part, hide them around town…or give them to friends! These would make an adorable party favor for both kids and adults! Enjoy!!!


Other posts you may like:

Jam Jar Fairy House /Jam Jar Gnome Home
Doorknob Mushroom-Fairy Houses
Fairy Furniture
DIY Fairy Door…Gnome Door
Fairy Doors & Gnome Doors #2

Fairy Doors and Gnome Doors (#2)

After making a fairy door out of sticks and hiding it in our neighbor’s garden last Summer, L and I thought we’d spread the fairy love a little farther this year…we’ve been making FAIRY DOORS and GNOME DOORS and hiding them all around town! It’s so much fun surprising the young and the old — just imagine the look on anyone’s face when they’re out in the garden and suddenly discover a teeny, tiny door that wasn’t there before. Ha! These fairy doors are so simple to make and all you need is rocks, paint and clear sealant (which is optional). To draw a little more attention to the fairy doors, we like to leave a tiny button or painted rock trail as well.


Materials needed:

  • medium-sized rocks
  • acrylic paints
  • clear sealant spray (optional)

After cleaning any dirt off your rock, start by painting on a door.

Next, add some windows, if you have room.

If adding any glitter paint, apply that next. We like to paint a little glitter over our windows.

Next, outline the door and windows carefully with black paint. Add a doorknob as well.


Now for my favorite part, paint connecting black lines on the rock, resembling a stone wall.

If you’d like to add a flower pot or lil window box, add one now.

Finally, finish with some green vines, leaves, and flower details.


Once all your paint is dry, you can spray the rocks with a coat of clear sealant to make the fairy doors even more weather resistant. Permanent paint usually doesn’t wash away, but I always like to add a coat of sealant just in case.

Now for the real fun…time to hide your fairy doors and gnome doors. (Gnome doors go on trees, generally speaking.)


I like making some of our fairy doors to resemble our neighbor’s front porches and gardens…


Enjoy!!!


See also this DIY for fairy furniture!


Homemade Sidewalk Chalk

Making SIDEWALK CHALK is so fun and easy, I doubt we’ll ever buy it from a store again! I’ve seen multiple DIYs on making chalk, but they all seem to use toilet paper rolls lined with wax paper or foil…some big complicated mess. I decided to use our silicone molds (the ones we only use for crafts) and the chalk popped out easily, plus it took on some fun and funky shapes! HOMEMADE SIDEWALK CHALK can be made in less than 10 minutes, but it takes 2-3 days to set completely…so give yourself plenty of time!


Materials needed:

  • Plaster of Paris
  • tempera paints
  • water
  • silicone molds
  • paper or plastic cups
  • plastic spoons or craft sticks

First, protect your working area with some newspaper.

The recipe for sidewalk chalk is pretty simple: 50% plaster of paris, 50% liquid (water + paint).

You can measure it out precisely: 1 cup plaster, 3/4 cup water, 1/4 cup paint; or you can do what we did and just “eye ball” it.

Fill up your disposable cups about halfway with plaster.

Add a good squirt of paint.

Then add water. And mix.


Once you have all your chalk mixed up, carefully pour it into the silicone molds.

If you want to mix colors, making a funky tie-dye effect, fill your mold about halfway with one color. Then carefully pour other colors on top.

Set your sidewalk chalk aside for a full day to dry. I suggest placing it near an air vent in your house to speed up the process.


After a day has passed and the chalk looks dry, gently flip the molds over and release the chalk onto some wax paper. (If the chalk is still moist, you can try drying the chalk with a hair dryer too.)

Once the chalk has been removed from the molds, put it aside for another day or two for the chalk to set-up and dry completely. (As you can see, our yellow mixture may have been a little too moist on our first try…it was still sticky when we took it out of the molds. We let the yellow dry for a day longer than the rest, and it colored just fine!)

Now, time to play!!! Aren’t the colors beautiful? Brighter than any sidewalk chalk I’ve ever seen!


Enjoy!!!


Fairy Mud

I first saw a recipe for FAIRY MUD a year or two ago on a blog called Happy Hooligans. When L’s cousins came over to play on a hot day last summer it was the perfect activity! Fairy Mud is just as much fun for the kids to make as it is to squish between your fingers and play with! With the temperatures rising and our fairy garden in full bloom, we’ll be making it again this week!


Materials needed:

  • 1 1/2 bars of soap
  • 2 rolls of toilet paper
  • food coloring
  • 1.5 to 2 cups of WARM water
  • glitter, sequins, buttons, jewels, flower petals
  • cheese grater
  • 2 large bowls or tubs

First, grate the bars of soap into a large bowl. If you have older kids, they can certainly help with this process!


While you’re busy grating soap, have the little ones unravel 2 rolls of toilet paper. So silly, they’ll just love it! Gather the toilet paper into the second large bowl.


Once the soap is grated and the toilet paper unravelled, pour the WARM water into the bowl with the soap and add a few drops of food coloring as well. Squish and squeeze the soap shavings until you have some consistently melted and mushy soap blobs.


Pour the water and soap over the toilet paper in the second bowl and continue to mush and mold the fairy mud concoction.


While the kids are playing, add some glitter into the mix. Followed by jewels, flower petals, anything you and the kids can come up with!

Don’t forget to pull out some measuring cups, spoons, and muffin tins so you can make some fairy mud pies as well! Amazingly fun!!! Enjoy!