Patricia Polacco’s THUNDER CAKE RECIPE

“Grandma looked at the horizon, drew a deep breath and said, ‘This is Thunder Cake baking weather, all right. Looks like a storm coming to me.'”

 IMG_3498

If you haven’t read the book “Thunder Cake” by Patricia Polacco, get yourself to the library or a local book store and get your hands on a copy pronto…you and your kids will love it! The story centers around the author and her grandmother (her Babushka) and the summer storms she feared as a little girl, at her grandmother’s farm in Michigan. I’ve loved reading this book ever since I was a little girl and now L adores it as well.

With the summer heat and thunderstorms we’ve been having lately, I decided it was definitely time to try our hand at baking some real Thunder Cake for ourselves! It’s fun to make memories with your little ones and read this book as your Thunder Cake is baking in the oven…the perfect activity for a lazy, stormy, summer afternoon. It really seems like magic to smell the chocolaty cake baking in your own home as the little girl and her Babushka are putting theirs into the oven as well!

The recipe calls for 1 cup of shortening; we used what we had — 2 sticks of butter  — and the result was still wonderful! With the secret ingredient of pureed tomatoes, the flavor of this chocolate cake is very unique, but very moist and delectable as well. I suggest serving your Thunder Cake with extra strawberries…they pair so well with the hint of tomato and make the desert complete!

As instructed in the book:

Cream together, one at a time…

  • 1 cup shortening (or 2 sticks of softened butter)
  • 1 3/4 cup sugar
  • 1 teaspoon vanilla
  • 3 eggs, separated (Blend yolks in. Beat whites until they are stiff, then fold in after the tomatoes.)
  • 1 cup cold water
  • 1/3 cup fresh, pureed tomatoes

Sift together…

  • 2 1/2 cups cake flour (We used all-purpose, Gluten Free flour.)
  • 1/2 cup dry cocoa
  • 1 1/2 teaspoon baking soda
  • 1 teaspoon salt

Mix dry mixture into creamy mixture.
Bake in two greased and floured 8 1/2-inch round pans at 350 degrees for 35 to 40 minutes.
Frost with chocolate butter frosting. Top with strawberries.

IMG_2246

We used this chocolate buttercream frosting recipe because I had all the ingredients on hand and it was quick and easy. Feel free to use your favorite chocolate buttercream recipe in its place!

Enjoy!!!

Polacco, Patricia. “Thunder Cake.” New York: Scholastic Inc., 1990. Print.


DIY Pool Toys / DIY Bath Toys

With the pools opening last weekend and the last day of school yesterday, Summertime is here!!! These are some fun DIY POOL TOYS that take just minutes to make. We like to throw ours around, splat them on the pavement and L likes to soak hers in water, then draw with it on the pavement. If you don’t have a pool nearby, just fill up some buckets of water, toss in these fun and funky toys and play a wet and refreshing game of catch in the backyard. So much fun! (Be sure to scroll down to the bottom for some other DIY POOL TOY ideas too!)


Materials needed:

  • 3 sponges
  • 1 elastic hair band
  • scissors

First, cut the sponges long-ways into 3 equal sections.

Next, stack them up.

And lastly, tie a hair band around the pile.


Too easy and so much fun!!!

Other fun and easy pool toy ideas? 

A large paintbrush! Your kids will have a blast painting with water on the pool deck or even outside on the sidewalk.

We love playing with these sensory bottles in the water too! Both the “baby sensory bottles” and the “sparkle bottles” are fun to bounce around. They are quick and easy to make and are fantastic pool toys for the little ones!

Tin Foil Jelly Fish Craft

I love this super cute, jelly fish craft for so many reasons. Our TIN FOIL JELLY FISH were inspired by a trip to the Baltimore Aquarium and the girls’ fascination with “The Jelly Fish Invasion” exhibit. (Super cool…if you are anywhere near Baltimore, go see it!!!) I love that this craft costs nearly nothing to make and L learned all about textures and rubbings while coloring the foil. And I LOVE the way our jelly fish look hanging in our kitchen window. If you can, place them near an air vent…when the air kicks on the jelly fish will come to life, dancing and swimming in the sun!


“The Jelly Fish Invasion” at the Baltimore Aquarium…

Materials needed:

  • tin foil
  • permanent markers
  • egg cartons
  • other small, plastic containers (think applesauce, olives, etc.)
  • string or fishing line
  • painted stick
  • tape
  • scissors
  • paperclips
  • nail or sharp-tipped tool

First, cut your egg carton into little jelly fish shapes.

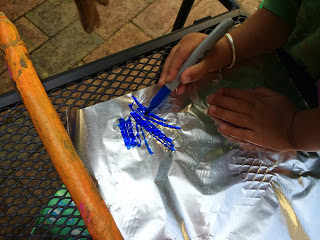
Next, take a few sheets of tin foil and have your children color them. This is a great opportunity to make rubbings. L colored on the patio furniture and bricks, over tree bark, on the textured sidewalk and on her slide. Not entirely necessary, but why not!? Your kids can also try making different patterns if coloring on a flat surface…stripes, dots, swirls, anything goes!


Cut the tin foil into little squares and have your kids wrap the egg carton cut outs with the foil. You may have to help them smooth down the outer edges.


If you have some small, plastic containers to use as well, first poke a hole in the center. Next, cover the containers with the foil too.


Cut strips of tin foil and tape the strips, 2 or 3 at a time, to the inside of your jelly fish.


Using a nail or sharp tool, poke a hole into the top of each jelly fish.

Now, it’s time to hang your jelly fish up. I knew ours would go in our kitchen window, so we hung the jelly fish along a painted stick. You could also make one large jelly fish and hang the smaller ones underneath. That method would be cute if hanging your jelly fish up under a light, in the center of a room.

We hung our jelly fish by stringing them onto fishing line and tying the line to a paperclip underneath each one. Some hung on their own, while others had a second jelly fish hanging underneath. Get creative and have fun with it!


When doing projects like this, it’s definitely easier to have the jelly fish hanging while you are tying them on rather than laying flat on the ground.

Put them up to display and enjoy!!!


Tin Foil River and DIY Boats

This morning the girls and I went to an awesome, little program for kids where we learned about the waterways in our town and L got to make her own toy boat. When we came home I decided to make our own “waterway” in the backyard with some tin foil. Too easy and so much fun!!! All you need is some aluminum foil, water, and some toy boats to float along! I mean, seriously…who wouldn’t like a TIN FOIL RIVER in their yard?


Boat ideas and links:


First, decide which direction you’d like your TIN FOIL RIVER to flow. If your yard or driveway is on a slope, it’s pretty easy to figure out how to get the water to flow…start at the top and end at the bottom. If you yard is flat, you can prop some of the river up or make it in a donut shape. We decided to make ours interesting, starting the river on the slide, having it flow under a chair, and bend and twist across the yard.


Making the waterway is pretty simple…you can be a perfectionist about it and try to make all the sides even or just wham-bam make it, play with it. We tore large strips of aluminum foil and double-layered the foil to prevent any leaks. Fold the sides up. At any joints (places where you’re attaching two sections of foil) you can add another layer of foil underneath. Same with the end of your river…we tried making our sides a little higher and extra-sturdy at the end.


If you need to, you can weigh your foil down with some smooth rocks. Makes fun little obstacles too! If a side of your river starts to sag, it’s pretty easy to prop it up with a brick or flower pot…whatever you have handy. The TIN FOIL RIVER allows for some terrific problem solving and experimenting with your little ones! I can’t wait to see what L comes up with next for our backyard waterway!


Enjoy!


Fairy Mud

I first saw a recipe for FAIRY MUD a year or two ago on a blog called Happy Hooligans. When L’s cousins came over to play on a hot day last summer it was the perfect activity! Fairy Mud is just as much fun for the kids to make as it is to squish between your fingers and play with! With the temperatures rising and our fairy garden in full bloom, we’ll be making it again this week!


Materials needed:

  • 1 1/2 bars of soap
  • 2 rolls of toilet paper
  • food coloring
  • 1.5 to 2 cups of WARM water
  • glitter, sequins, buttons, jewels, flower petals
  • cheese grater
  • 2 large bowls or tubs

First, grate the bars of soap into a large bowl. If you have older kids, they can certainly help with this process!


While you’re busy grating soap, have the little ones unravel 2 rolls of toilet paper. So silly, they’ll just love it! Gather the toilet paper into the second large bowl.


Once the soap is grated and the toilet paper unravelled, pour the WARM water into the bowl with the soap and add a few drops of food coloring as well. Squish and squeeze the soap shavings until you have some consistently melted and mushy soap blobs.


Pour the water and soap over the toilet paper in the second bowl and continue to mush and mold the fairy mud concoction.


While the kids are playing, add some glitter into the mix. Followed by jewels, flower petals, anything you and the kids can come up with!

Don’t forget to pull out some measuring cups, spoons, and muffin tins so you can make some fairy mud pies as well! Amazingly fun!!! Enjoy!


Giant Bubble Wands and a Homemade Bubble Solution Recipe

Did you ever make these GIANT BUBBLES when you were a kid? My siblings and I loved making them way back when! Recently, we had a bubble kit given to us with a wand included, but it was too big for L to do on her own…so, of course, I had to brainstorm and make a wand she could use as well! The best part about it was we already had all the materials we needed. If you don’t have two rulers to use, two large mixing spoons or spatulas would probably work great too…anything with a hole at the end of the handle. Be sure to scroll down to the bottom for the HOMEMADE BUBBLE SOLUTION RECIPE. It’s better than any store-bought variety and takes only a minute to make!

Materials Needed:

  • 2 plastic rulers
  • yarn, 3-6 feet long
  • binder ring, shower curtain ring, or a keychain ring
  • homemade bubble solution (See below)

First, cut the string to suit your size…the shorter the person, the shorter the string!

Next, thread the ring onto the string and tie both ends together with an overhand knot.

Thread a loop of yarn through the hole on one end of a ruler. Bring the loop up and over the opposite end of the ruler and pull it tight. (See pictures.)


Attach the other ruler the same way, leaving about 1 to 2 feet of yarn between the two rulers.

With the bubble solution in a large bowl or container, gently lower the yarn into the liquid. Make sure the yarn is soaked through.

Next, carefully lift the yarn out of the bubble solution. Slowly and steadily, spread the rulers apart while walking backwards. If there is a breeze, make sure the wind is blowing on your back.

To close the ginormous bubble, carefully bring the rulers together again. So cool!!!


HOMEMADE BUBBLE SOLUTION RECIPE

Ingredients:

  • warm water
  • sugar
  • dish soap

Materials:

  • measuring cup
  • Tablespoon measuring spoon
  • medium bowl or container
  • spoon

Put one Tablespoon of sugar into your bowl or container. Pour 200 ml of warm water on top of the sugar and mix until all the sugar is dissolved. Add 50 ml of dish soap (30 ml if using ultra dish-washing detergent) and mix. Finally, add 300 ml of warm water to the mixture and mix.

That’s it! This bubble solution is the best we’ve ever made!


Have fun!!!

Be sure to check out our BUBBLE BLOBS & BUBBLE WORMS page too!


Jam Jar Fairy House / Jam Jar Gnome Home

The other night I had a hard time falling asleep because I couldn’t stop brainstorming about how to turn a jar into a fairy house. (Only me…I know.) I knew I wanted to make it so at night the windows and door would light up; the house needed to be sturdy enough to stand up to the elements outdoors; and I wanted to use craft materials we already had around the house. Finally I had a eureka moment…why not use my beloved hot glue gun!?! So many people think hot glue guns are just for gluing things together, but they can add texture and dimension to your work as well. I’m super excited to share with you this simple tutorial for making JAM JAR FAIRY HOUSES & GNOME HOMES! They really are adorable!


Materials needed:

  • jars
  • hot glue gun and glue
  • acrylic paints
  • preserved moss, tree bark, or dried leaves
  • dried flowers
  • a bead or button
  • tea lights (battery operated)


First, decide which direction you’d like your jar to stand. For instance, my smallest JAM JAR FAIRY HOUSE stands on its lid, but the larger one (made from an apple sauce jar) stands upright. Using your hot glue gun, “draw” a door and windows on your house. Then, fill in the walls of the house with vertical lines of your hot glue. Try to draw them on in long, fluid strokes, but the house by no means needs to be perfect. Each lil blip or quirk, will give your fairy house more character!


Next, paint the inside of the jar where your windows and door are located. Keep in mind that you’ll want some light to shine through at night, so don’t pick colors too dark or layer the paint too thick.


After you’ve painted the inside, paint the outside of the jar brown. Carefully go around each window and the doorway.


After the paint dries, the final step is gluing on dried moss and some tiny dried flowers. For our little jam jar fairy house, I glued moss on the top of the house (bottom of the jar) and along the edges of the lid. You can find preserved moss at your local craft store or, if you like, just use natural materials found in your own backyard…twigs, tree bark, fallen leaves, helicopter seeds, acorns.


You can display your fairy houses inside or outside. To light them up at night, just place a little, battery operated, tea light inside. Enjoy!


If you’re giving a JAM JAR FAIRY HOUSE away as a gift, don’t forget to include some fairies and some fairy furniture tucked away inside the jar!

DIY Fairy Folk

DIY Flower Fairies

Fairy Furniture

DIY Fairy Wands


The Mud Kitchen

Our MUD KITCHEN might just be my favorite kids’ project yet! I’ve been dreaming of building one for L since late last Summer and this Spring we went for it! Collecting things and building it was definitely fun for me…I love scouring antique shops and junk stores with an idea in mind. And now L has a blast playing in her MUD KITCHEN nearly every day! She’s always loved digging in her dirt pit, so we set the mud kitchen up right beside it.


Materials needed:

  • old pots and pans, muffin pan, mixing bowls, old tea set
  • cooking utensils and/or garden tools
  • old rags
  • shelving unit
  • DIRT!!!

The best places to find things for your MUD KITCHEN are yard sales, flea markets, antique and junk stores. If you find a water-proof set of shelves or little bench, that would work great! We ended up making ours out of some lumber and cinder blocks. L helped sand and paint the wood, I painted two lil burners on the top pieces, and we finished it off with a few coats of polyurethane. I love that L was able to make it her own!


We found this perfect mirror to attach to the kitchen for only $15 at a local antique store. I wanted a mirror for a bit of a “kitchen window” effect, plus it makes our tiny yard look a bit bigger! It was the only one I could find that had a wooden backing to it…most others were particle board or cardboard. Our mud kitchen is up against our house, a little bit protected by the weather, but when it pours rain the kitchen still gets wet. Make sure everything on your kitchen is more-or-less waterproof.

Along with the burners I painted on top of the mud kitchen, we also attached two lil knobs (to turn the stove and oven on, of course)! You can find knobs really cheap at your local Habitat for Humanity or at your local hardware store. Since ours were attached to solid wood, I just glued them on with some superglue. So far it’s worked great!

On the side of our mud kitchen, we attached two cute lil hooks. Again, we found them at a local antique/junk store for $1. They couldn’t be more perfect! L hangs her lil dish rags on there and when she’s all done playing with her kitchen each day, I have her clean it up. She brushes the dirt off with a dry rag, follows up with a wet rag, and she puts all her pots and pans away.


Like many activities like this, my biggest tip to you would be to withhold some of the kitchen supplies, giving your kids a lil more day by day. On the first day I gave L her pot, pan, and mixing bowls. On the second day, we added an empty milk carton, egg carton and vanilla bottle. After that, we threw in a muffin pan and some old silicon muffin cups. I have an old child’s tea set I’m saving for a special day as well. Keep things interesting and mix it up!


Sparkle bottles would be a fun addition to your mud kitchen too! Not to mention, making some potions out there as well. (Tell me I’m not the only one who mixed up “magic potions” with water, dirt, wild onions and herbs as a kid!)

How much would your child LOVE a mud kitchen??? Mmm…mmm…mud pies, mud spaghetti, dirt scrambled eggs, mud muffins…


DIY Ant Farm

I’m so super excited to share this project with you. ANT FARMS are fun to make and fascinating to observe with your little ones! L and I have been staring at our jar all day, reading kids books on insects, watching some National Geographic clips on ants, and we’ve found some fun facts along the way. Within the first 24 hrs of placing your ants inside your DIY ANT FARM, they will dig tunnels and make chambers right before your eyes!

The ants you collect will most likely be “worker ants” and all worker ants are female…pretty amazing! Most ant colonies contain one queen ant who lays all the eggs, male ants whose only job is to make babies with the queen, and worker ants who gather food, dig tunnels, and protect the colony. When collecting ants you want to be sure to only collect ants from one colony, otherwise the ants will fight to their death inside your jar.

Materials needed:

  • large jar (pickle jar)
  • small jar (jam jar or spice jar)
  • loose, sandy soil (Cactus/Citrus Soil works great!)
  • spoon
  • small jar or cup
  • jam or sugar water

To make your ant farm, place the small jar upside down, inside the larger jar.

Next, carefully spoon the soil into the jar. L would place a spoonful on the top of the little jar and then brush the soil down along the sides. It does not have to be packed tightly, just filled to the top.


To collect ants, put about one tsp. of sugar water or jam into a separate jar or cup and place it outside on its side. This is your ant trap. You may want to set a few ant traps around your garden and be patient. It can take a few days for the ants to discover your bait, but once they do many will follow!

After your ant farm is made and the ants have been caught, quickly and carefully dump your ants inside your ant farm and screw on the cap. You’ll want about 10-20 ants. I think we have about 5 ants in our jar…it takes a couple minutes to find them, but works just fine! They are busy digging all those tunnels and chambers all by themselves!


Once a week, open the lid to your jar and place a few drops of sugar water and/or a couple pieces of bird seed. You don’t want to feed them too much, once a week is plenty! When you open your jar to feed the ants, plenty of fresh oxygen will enter the jar as well…no need for holes! Keep your ant farm indoors, not too hot and not too cold, away from direct sunlight.

For more info on ants, check out some books at your local library and click here to see some fascinating photos and videos from National Geographic! Enjoy!!!


DIY Flower Fairies

I first made FLOWER FAIRIES with my youngest sister when we were kids. They are just so sweet, I couldn’t wait to make them again with my girls! L and I made these fairies this past week and we plan on making more tomorrow…I’m thinking garlands, magnets, and of course, just flower fairy dolls for playing pretend!


Materials needed:

  • florist wire
  • fabric flowers
  • wooden beads
  • other beads (wooden, plastic; colorful, plain)
  • acrylic paint
  • embroidery thread
  • scissors
  • hot glue gun and glue

First, paint simple, little faces on your wooden beads.

While your beads dry, take the artificial flowers apart. All you’ll need is the fabric petals. If you have any tiny flowers, set them aside to use for head decorations.

Cut a 14-inch piece of wire, and an 8-inch piece of wire. Fold the 14-inch piece in half.

With the smaller piece, bring both ends towards the center and twist the wire, leaving a little loop on each side for the fairy’s “hands.” Set aside.


Select the colors of embroidery thread you’d like to use for the fairy’s hair. Wrap the thread around all four of your fingers.

Place your looped, embroidery thread into the fold of the 14-inch piece of wire. Twist the wire, once to secure it in place.

Next, thread a “head” onto the wires (the large wire folded in half), followed by a couple small or medium-sized flowers.


Take the small wire piece (already folded and twisted into arms) and place it under the flowers, but in-between the two wires. If you like, you can fold each arm over once to secure the arms in place a little more.

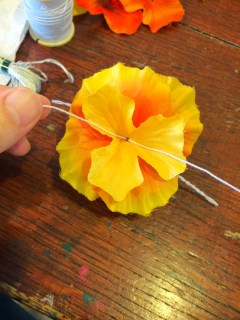
Next, thread a bead onto the wire, followed by 2, 3, or more large flower petals.

At this point, separate the long wires into two legs. Fold each one in half and twist the wire, leaving a little loop on each end for the fairy’s “feet.”


Time to style some hair! You can twist the hair and glue it on top the fairy’s head. You can simply cut the thread loops and let it hang wild and free. Get creative with it!


To finish each flower fairy, glue a small flower on top of the hair. Too cute!!!


To host a tea party for your flower fairies, be sure to check out our “It’s Tea Time! Tea Party Ideas” page!