Road Trip Survival Kit: 10+ Activities for On-the-Go

Every Summer my family likes to take a 7-hour trip to the beach…well, the 7 hours isn’t exactly the part we like, but we do it and we make the best of it! I’m not a fan of giving my kids a screen to look at for the entire trip, because I feel there’s so much that they will be missing out on. Remember when we were kids, going through the entire stash of cassette tapes? Staring out the window watching the terrain change and landmarks pass as we got closer and closer to our destinations, the excitement building? All those silly word games or family air guitar shenanigans? See…I don’t want my kids to miss out on that! I want us to talk. I want them to play, to be entertained, but to experience the trip with us, rather than plugged in and tuned out.

IMG_1696

We started with this ROAD TRIP SURVIVAL KIT when L was just 2. As the kids grow, some things will change, but many will continue to entertain at any age!

Pipe Cleaners, Shoelaces, and Beads

If you have any of those snack cups with the slits on top, they’re the perfect thing to hold beads and prevent spilling! Just tie a shoelace to the handle and you’re good to go!

IMG_3076

Slinky

Who doesn’t love a slinky? You can buy 2 for a dollar at most dollar stores…definitely worth that dollar! We don’t usually play with ours at home, rather we save them for long trips!

IMG_3083

“I Spy” Books

These books are fun for kids age 2 to 100 to look at, no reading required!

IMG_3082

Musical Instruments

When the kids get whiny, bored, tired, put on some jams, some sunglasses and start a family band! Sometimes we even bring out the cow bell – yikes! The kids love it though!

IMG_3081


Paper and Coloring

Go ahead and buy some fun, new crayons for your big trip, as well as a blank composition book, new coloring books, or even post-it notes!

IMG_3080


Figurines and Cars

Even if these things are “old” and have been played with a million times at home, when pulled out one-by-one as a surprise on the 4th hour of your trip, your kids will be delighted…I promise!

IMG_3084

Fairy Folk

L loves her “fairy folk” and will play pretend with them for nearly an hour at home. I scooped up a few of them and their accessories for our last trip. Get the DIY here: DIY Fairy Folk.

IMG_3085

Lacing Boards

If you don’t have lacing boards at home, they’re simple to make. Just cut out a shape from an old cereal box and punch some holes around the edge. Tie a shoelace and and you’re good to go!

IMG_3075

Magna Doodles

These come in all shapes and sizes…and all of them are perfect for the road!

IMG_3073

Kaleidoscopes and View Masters

I always throw one of these in the bag!

IMG_3086

Re-usable Sticker Books

“Melissa & Doug” brand sticker books and Water Wow! books are great for the road. Virtually no mess and they can be used over and over and over and over!

IMG_3077

“I Spy” Bottles

We made this game years ago, and the kids love it! It’s something that can be played with one person or many! Get the DIY here: I Spy Bottle and Games.

IMG_0280


The Tray

We found this traveling tray at Hobby Lobby a few Summers ago. I’m sure you can find one online too! They’re perfect for coloring and containing all those little toys and food.

IMG_3072


It’s hard to believe, but all of this stuff plus more will fit in one medium-sized bag! We usually put the bag off to the side, when we get home, ready to grab-and-go for the next road trip!

IMG_3087


Happy traveling!!! What are some of your favorite activities for on the road?

IMG_1706


Hidden Fairy Bath Bombs

Have you ever bought bath bombs for yourself or for your kids? Bath bombs were originally intended for adults to use in the bath…their scents make the water smell wonderful and many times the bath bombs contain epsom salts to soften and refresh your skin. The thing that many people don’t know is that kids LOVE them too!!! The fizzy, bubbly, sizzling chemical reaction is just too cool! In the past, we’ve bought bath bombs and given them to our girls in their stockings at Christmas or for their birthdays…but now, we’ll never buy them again! These bath bombs are so quick and easy to make and there’s a surprise hidden inside each one! I found inspiration for this DIY on a fellow blogger’s site; she makes “Hidden Train Bath Bombs” for her little boys…adorable and genius!

DSC_0574

Materials needed:

  • 2 cups baking soda
  • 1 cup citric acid
  • food coloring
  • essential oil
  • water in a spray bottle (not pictured)
  • plastic fairies (flowers, dinosaurs, cars…)
  • silicone molds or a muffin tin

DSC_0547

First, mix two cups of baking soda and 1 cup of citric acid together in a large bowl.

DSC_0548

Next, add about 10-15 drops of food coloring and some essential oil, and mix. You can add more coloring and oil to suit your preference. I used a “sweet orange” oil and yellow food coloring. Even though the bath bombs themselves were not super-vibrant in color, the bath water certainly was! The kids loved it!

DSC_0553


Now, spray your mixture with water and mix quickly! I would give our mixture about 3 squirts, mix, then repeat. The baking soda and citric acid will start to fizz a bit, but once you mix, it will stop. Repeat this process until the mixture clumps together like breadcrumbs.

DSC_0554

Spoon the mixture into your silicone molds. Fill about halfway and pack it down firmly with your hands.

DSC_0555

DSC_0557

Now, add your fairies. We added a silk flower to one of ours as well.

DSC_0560

Fill the molds the rest of the way with the baking soda-citric acid mixture and pack it down firmly. Once the bath bombs set, they will expand. The next time I make bath bombs, I may not fill them all the way up to the top…or I may do so purposely and make them look like frosted cupcakes!

DSC_0563

DSC_0564

Let your bath bombs set up for a few hours until they are hard. (Can you believe how ours expanded and “grew”!?!) Flip the bath bombs over and gently pop them out of the molds.

DSC_0565

DSC_0566

Now for the fun part, surprise your kids with the bath bombs! The chemical reaction is just so cool!!!

DSC_0576

DSC_0586

They will be doubly-surprised to find fairies hidden inside!

DSC_0582

The walls, tile and bathtub in our bathroom are all white…the bath water was so, so yellow the whole bathroom glowed!!!

DSC_0601

DSC_0584

DSC_0603

This recipe can easily make 7-8 bath bombs…plenty for you and a friend! Enjoy!!!


Lemonade Play Dough

We love scented play dough at Our Beautifully Messy House and summertime is the perfect time to make LEMONADE PLAY DOUGH!

I came up with this recipe a couple weeks ago, while mixing up some play dough to take with us on vacation to the beach. And the kids LOVED it!!! It’s always nice having play dough handy for any down-time whether you’re at the beach with family or you’re having friends over for a play date.

I’ve tried making citrus-scented play dough in the past with lemon extracts and oils, but that summery lemonade scent never comes through. Adding a packet or two of lemonade mix did the trick…it was super-quick and easy and smells delicious! I suggest using a sugar-free lemonade mix (Crystal Light brand works great!) so your play dough doesn’t get super sticky with the added sugar.

When I made our lemonade play dough I wanted to make both yellow and pink dough, so I split the dough and added the food coloring before kneading it. The colors came out just fine! This play dough takes only a few minutes to make, but stored in a gallon-sized bag or an air-tight container, it’ll keep for nearly a year! This recipe makes plenty for 2 or 3 kids to play with!

My tip to keep your kids entertained playing with play dough for longer: Start off with plain play dough. Let them play 15 or 20 minutes, then throw some glitter into the mix. Once their attention starts to drift, add some colorful beads or buttons. Add some measuring cups and kitchen utensils, some lil plastic dinosaurs or army men. Just don’t give them everything at once, instead add to the play dough in intervals…works every time!

Ingredients:

  • 2 cups + 1/2 cup flour
  • 1/2 cup salt
  • 2 Tbsp cream of tartar
  • 2 Tbsp vegetable oil
  • 1.5 cups boiling water
  • food coloring
  • 1-2 packets lemonade mix

First, put the water on to boil. Add a few drops of food coloring to the water (yellow or pink). As the water is heating up, mix 2 cups of flour, salt, cream of tartar and one packet of lemonade mix in a large mixing bowl. Then add and mix the vegetable oil into the flour mixture. Once the water is boiling, add it to the bowl and mix with a spatula. The dough will be a sticky mess while warm. Mix it as best you can, then let it cool off. After a few minutes cooling off, sprinkle your working surface with some of the remaining flour. Dump the play dough onto the flour, adding more flour to the top, and knead the dough. Continue working with the dough, adding a bit of flour as needed, til the dough is not sticky anymore and you’ve reached the desired consistency. If you like, sprinkle in another packet of lemonade mix to dough! Yum yum, Summer!!! Enjoy!

Splatter Paint Fun!!!

While SPLATTER PAINT FUN! can be done anytime of the year, we thought it would be an exceptional craft to do on the 4th of July! This can get messy, so be sure to cover your work area with old newspapers or, better yet, take it outside! I helped L with the cut-outs, but let her do most of the splattering on her own. It’s so much fun splattering paint, I bet you’ll want to join in the fun too!

Materials needed: 

  • toothbrush and/or kitchen scrub brush
  • paint
  • construction paper
  • old cereal box
  • scissors
  • old newspapers, towels, etc.

First, cover your work area with old newspapers. After all, the paint will splatter!

Next, cut some fun shapes out of your old cereal box. We did some wavy stripes, stars, and a city skyline for the 4th of July.

Lay the shapes atop your construction paper. You can do all the shapes at once or, as we did, layer them.

Next, dip your toothbrush bristles into paint. Facing the toothbrush downwards (bristles facing the paper) have your kids run their fingers along the bottom of the brush splattering the paint. When splattering around shapes, the more the better!


After splattering is complete, remove cardboard shapes carefully.

If layering paint and patterns, you can now lay more shapes down and splatter with a different color of paint.


Experiment! Have fun! Make messes!


With the kitchen brush, we didn’t “splatter” necessarily. (But you could!) Instead, L dipped the brush into paint and then pushed the bristles down on her paper to make her own, unique fireworks display! So cute and easy!


For more fun painting ideas check out our page “10 New Ways to Paint“! Enjoy!!!

Fizzy Ice Chalk Fun

After we made “Homemade Sidewalk Chalk” the other day, I couldn’t wait to make some FIZZY ICE CHALK as well! I looked around online and found all kinds of recipes and methods for ice-chalk and fizzy or erupting ice-chalk. L and I experimented and tried all the tricks…we added some of our own variations, and I’m happy to share those that worked best! I suggest making FIZZY ICE CHALK in the morning on a hot summer day, let it set-up for a few hours, and bring it outside to play with in the afternoon. We have a few batches sitting in our freezer right now, just waiting for a lull in the action so we can bring it outside to play with again. This time we made lots so there’d be plenty for the neighborhood kids to play with as well! We can’t wait!


Materials needed:

  • 1/2 cup cornstarch
  • 1/2 cup baking soda
  • food coloring (or tempera paint)
  • 1 cup water
  • measuring cup
  • silicone molds (or ice tray)
  • spoon
  • toothpicks
  • vinegar
  • spray bottle, squirt bottle, or infant medicine dropper

Using a measuring cup, combine 1/2 cup cornstarch with 1/2 cup baking soda. Mix together with a fork or spoon.

Add 1 cup water and mix gently, but thoroughly.

Next, carefully pour your mixture into the silicone molds or into your ice tray. If you don’t have either available, you could use paper cups as well!

Add a few drops of food coloring or a squirt of tempera paint to each mold. (We tried both…the food coloring mixed better, but both worked fine!)


Using toothpicks, carefully mix each color.


Put the molds into the freezer for a few hours, til they set-up completely.

Before bringing the ice chalk out to play with, prepare your vinegar. You can put it into spray bottles, into squirt bottles (empty dish soap bottles work great), or pour the vinegar into small cups paired with a medicine dropper. All are great for little hands and developing motor skills…L’s favorite is the medicine dropper method!

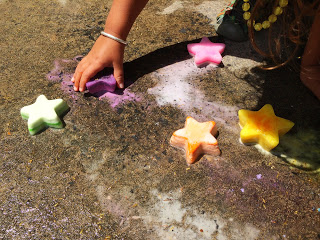
After the ice chalk is thoroughly frozen, bring it outside to play! One page online suggested painting the sidewalk first with water…we tried it, but didn’t see much benefit in having the pavement wet. We had more fun coloring with the chalk on dry pavement! Experiment with it though…see what works for you!


After the kids are finished coloring (if they can wait that long!), it’s time to bring out the vinegar. Spray or squirt the vinegar onto the ice-chalk and the ice-chalk pictures to watch it sizzle, fizz and erupt! This is definitely everyone’s favorite part!


Take a moment to talk to your kids about chemical reactions and the result of a base (the baking soda) and an acid (the vinegar) coming together. L always likes to taste how salty the baking soda is compared to the sour smell of the vinegar. Summer science fun…I just love it! Enjoy!!!

Tin Foil River and DIY Boats

This morning the girls and I went to an awesome, little program for kids where we learned about the waterways in our town and L got to make her own toy boat. When we came home I decided to make our own “waterway” in the backyard with some tin foil. Too easy and so much fun!!! All you need is some aluminum foil, water, and some toy boats to float along! I mean, seriously…who wouldn’t like a TIN FOIL RIVER in their yard?


Boat ideas and links:


First, decide which direction you’d like your TIN FOIL RIVER to flow. If your yard or driveway is on a slope, it’s pretty easy to figure out how to get the water to flow…start at the top and end at the bottom. If you yard is flat, you can prop some of the river up or make it in a donut shape. We decided to make ours interesting, starting the river on the slide, having it flow under a chair, and bend and twist across the yard.


Making the waterway is pretty simple…you can be a perfectionist about it and try to make all the sides even or just wham-bam make it, play with it. We tore large strips of aluminum foil and double-layered the foil to prevent any leaks. Fold the sides up. At any joints (places where you’re attaching two sections of foil) you can add another layer of foil underneath. Same with the end of your river…we tried making our sides a little higher and extra-sturdy at the end.


If you need to, you can weigh your foil down with some smooth rocks. Makes fun little obstacles too! If a side of your river starts to sag, it’s pretty easy to prop it up with a brick or flower pot…whatever you have handy. The TIN FOIL RIVER allows for some terrific problem solving and experimenting with your little ones! I can’t wait to see what L comes up with next for our backyard waterway!


Enjoy!


Fairy Mud

I first saw a recipe for FAIRY MUD a year or two ago on a blog called Happy Hooligans. When L’s cousins came over to play on a hot day last summer it was the perfect activity! Fairy Mud is just as much fun for the kids to make as it is to squish between your fingers and play with! With the temperatures rising and our fairy garden in full bloom, we’ll be making it again this week!


Materials needed:

  • 1 1/2 bars of soap
  • 2 rolls of toilet paper
  • food coloring
  • 1.5 to 2 cups of WARM water
  • glitter, sequins, buttons, jewels, flower petals
  • cheese grater
  • 2 large bowls or tubs

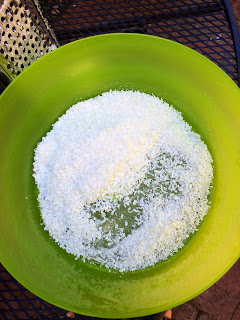
First, grate the bars of soap into a large bowl. If you have older kids, they can certainly help with this process!


While you’re busy grating soap, have the little ones unravel 2 rolls of toilet paper. So silly, they’ll just love it! Gather the toilet paper into the second large bowl.


Once the soap is grated and the toilet paper unravelled, pour the WARM water into the bowl with the soap and add a few drops of food coloring as well. Squish and squeeze the soap shavings until you have some consistently melted and mushy soap blobs.


Pour the water and soap over the toilet paper in the second bowl and continue to mush and mold the fairy mud concoction.


While the kids are playing, add some glitter into the mix. Followed by jewels, flower petals, anything you and the kids can come up with!

Don’t forget to pull out some measuring cups, spoons, and muffin tins so you can make some fairy mud pies as well! Amazingly fun!!! Enjoy!


The Mud Kitchen

Our MUD KITCHEN might just be my favorite kids’ project yet! I’ve been dreaming of building one for L since late last Summer and this Spring we went for it! Collecting things and building it was definitely fun for me…I love scouring antique shops and junk stores with an idea in mind. And now L has a blast playing in her MUD KITCHEN nearly every day! She’s always loved digging in her dirt pit, so we set the mud kitchen up right beside it.


Materials needed:

  • old pots and pans, muffin pan, mixing bowls, old tea set
  • cooking utensils and/or garden tools
  • old rags
  • shelving unit
  • DIRT!!!

The best places to find things for your MUD KITCHEN are yard sales, flea markets, antique and junk stores. If you find a water-proof set of shelves or little bench, that would work great! We ended up making ours out of some lumber and cinder blocks. L helped sand and paint the wood, I painted two lil burners on the top pieces, and we finished it off with a few coats of polyurethane. I love that L was able to make it her own!


We found this perfect mirror to attach to the kitchen for only $15 at a local antique store. I wanted a mirror for a bit of a “kitchen window” effect, plus it makes our tiny yard look a bit bigger! It was the only one I could find that had a wooden backing to it…most others were particle board or cardboard. Our mud kitchen is up against our house, a little bit protected by the weather, but when it pours rain the kitchen still gets wet. Make sure everything on your kitchen is more-or-less waterproof.

Along with the burners I painted on top of the mud kitchen, we also attached two lil knobs (to turn the stove and oven on, of course)! You can find knobs really cheap at your local Habitat for Humanity or at your local hardware store. Since ours were attached to solid wood, I just glued them on with some superglue. So far it’s worked great!

On the side of our mud kitchen, we attached two cute lil hooks. Again, we found them at a local antique/junk store for $1. They couldn’t be more perfect! L hangs her lil dish rags on there and when she’s all done playing with her kitchen each day, I have her clean it up. She brushes the dirt off with a dry rag, follows up with a wet rag, and she puts all her pots and pans away.


Like many activities like this, my biggest tip to you would be to withhold some of the kitchen supplies, giving your kids a lil more day by day. On the first day I gave L her pot, pan, and mixing bowls. On the second day, we added an empty milk carton, egg carton and vanilla bottle. After that, we threw in a muffin pan and some old silicon muffin cups. I have an old child’s tea set I’m saving for a special day as well. Keep things interesting and mix it up!


Sparkle bottles would be a fun addition to your mud kitchen too! Not to mention, making some potions out there as well. (Tell me I’m not the only one who mixed up “magic potions” with water, dirt, wild onions and herbs as a kid!)

How much would your child LOVE a mud kitchen??? Mmm…mmm…mud pies, mud spaghetti, dirt scrambled eggs, mud muffins…


DIY String Bowls

Before we packed up our Easter stuff, I decided to make some fun and funky STRING BOWLS with L…we used the bottoms of our Easter eggs for molds. How cute are these? And even better, all the materials needed we already had lying around the house…you probably do too! If you don’t have Easter egg bottoms to use, any small or medium-sized bowls will work for molds.

Materials needed:

  • small plastic bowls or Easter egg bottoms
  • yarn or string
  • white glue
  • water
  • plastic wrap
  • scissors
  • glitter (optional)
  • hair dryer (optional)

First, cover your molds with plastic wrap.

In a small bowl, mix a little bit of water into some white glue. If you like, mix some glitter into the glue as well.

Next, cut your string into small pieces and stir it into the glue. You can experiment with this step…we did one bowl using 1-inch pieces of yarn, another using 2-3 inch pieces, and one bowl using one long piece of string.


Remove each piece of string from the glue, one at a time, and lay them across your mold. If the glue is thick on the string, you can squeeze some of the excess glue off.


Once all your string is laid out across and around your molds, lay them aside to dry. It may take a couple days for the glue to dry completely, or you can speed up the process by using a hair dryer.

After the glue has dried, turn your bowls over. Remove the molds and the plastic wrap.


Using fine-tipped scissors, you can trim any string or glue that you may need to off the edges.


Beautiful and fun! Perfect for rings, hair clips, buttons and trinkets!

Rainbow-Shaving Cream Sensory Play

This is such a fun activity for kids and even more fun if you surprise them with it! I prepared our RAINBOW-SHAVING CREAM SENSORY PLAY activity beforehand and when I called L to the kitchen to play, draw and discover she was delighted! She kept saying, “Hey, how’d the rainbow get in here!?!” Like many of our crafts and activities, this one is done with things we already had around the house…so no need to go to the store to buy supplies! For what it’s worth, a can of cheap shaving cream equals hours of fun for kids…we always have one on hand!


Materials needed:

  • large, oven-safe pan
  • aluminum foil
  • broken crayons
  • sharp knife & cutting board
  • oven
  • shaving cream

First, line your pan with aluminum foil. Spread it out as smooth and flat as possible.

Cut your crayons into shavings…we did the colors of the rainbow, but you can do any combination of colors.

Sprinkle the crayon shavings out on the foil-lined pan.

Bake in the oven at 200 degrees F for 5 minutes. Remove from the oven, careful not to tip or shake the pan, and let the pan and crayons cool completely.

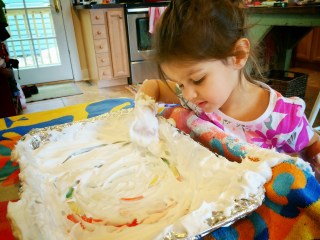
Next, squirt shaving cream onto the pan and spread it out evenly…about 1/2 inch thick.


Here comes the fun part…time for your little ones to play!!!


They can practice drawing shapes, writing letters and numbers in the shaving cream.

We had fun taking turns, playing “pictionary” too! Enjoy!!!