Knuckle-Print Carrots

How cute are these KNUCKLE-PRINT CARROTS we made for Easter? They’re not only fun to make with your little ones, but they make sweet gifts for parents and grandparents too!

Materials needed:

  • paper
  • orange and green paint
  • little knuckles

Just a little note: Whenever doing projects like this, I like to have a sheet of paper to practice on first. Our practice paper is the big white one here, giving us lots of room to experiment with before making little Easter cards for the grandparents.

First, paint your kid’s knuckles orange. Have them stamp the paper with their knuckles. We found that it worked best if L was standing or on her knees doing this part, making sure she was well above the paper.


Next, I marked each carrot lightly with a pencil, so we knew which side would be best to put the “leaves” on.

Using your child’s thumb or index finger, have them make little leaves atop each carrot. I had to help L with this part…as you can see in the picture below, when left to do it alone, she was happy putting green dots all over her carrots! Ha!


So sweet! Happy Spring!

Shimmery Snowflakes

Another fun winter craft for you and your lil ones…SHIMMERY SNOWFLAKES! I love “winter” crafts because they can stay up to decorate our house a couple months longer than the “Christmas” ones. Plus, it’s nice to share ideas that everyone can do this time of year, not just families that celebrate Christmas.


I first saw similar snowflakes in the Parents magazine a year or two ago…I knew one day, when L was a bit older, we’d have to make them! So glad that day finally came…these snowflakes sparkle and twirl in our kitchen window when the sun shines in on them. So sweet!

Materials needed:

  • wagon wheel pasta
  • hot glue gun and glue
  • white paint
  • Elmer’s glue
  • glitter
  • ribbon

First, brainstorm a little bit by playing with the wagon wheel pasta. Arrange it into snowflake shapes until you find something you like.

Next, using the hot glue gun, assemble your snowflakes. You could use Elmer’s glue for this step, but I just love how quick and easy the hot glue gun is!

After the snowflakes have been glued together, time to paint! Paint both sides of the snowflakes. If the holes get filled in just blow the paint out or use a tooth pick to poke the paint through.


Acrylic paint dries pretty quickly. Once you and the kids are done painting the last snowflake, the first one will probably be dry enough to add the glitter. First, paint a thin, messy layer of Elmer’s glue on the snowflake. Then, sprinkle with glitter! Allow to dry for an hour or so.

Thread some pretty ribbon through the one of the snowflake holes and hang the SHIMMERY PASTA SNOWFLAKES up in a place where all can enjoy! Happy crafting!

Thumbprint Christmas Lights Gifts

I’m super-excited about how easy these THUMBPRINT CHRISTMAS LIGHTS were to do and how cute the finished products turned out! L and I made pictures for her grandparents and this adorable little onsie for her baby sister. I think we’ll be making more of these shirts this coming week…one for L and some for her friends too. The THUMBPRINT CHRISTMAS LIGHTS are just too cute!


Materials needed (shirts):

  • tshirt
  • acrylic paints
  • cardboard (old cereal box works)
  • Sharpie marker, black

Materials needed (card or picture):

  • paper
  • acrylic paints
  • Sharpie marker, black

First, when making prints onto clothing, put a piece of cardboard up through the middle of the shirt. A collapsed cereal box works great for little ones. This will keep any of the paint or marker from seeping through to the other side.

Next, draw a curly line across the shirt with the black Sharpie.

With the paint, help your little one make thumbprints along the line. The thumbprints shouldn’t all touch the line, though it’s okay if a few do.


Once the paint has dried completely, go back with the Sharpie and draw 2, 3, or 4 lines under each thumbprint to make them look like a string of Christmas lights.

So stinkin’ cute! Huh? WB approves!


To make a Christmas card or picture, simply do the same on a piece of card stock paper.


What else could you put THUMBPRINT CHRISTMAS LIGHTS on? A tablecloth, napkins, a small board of wood, little boy’s pants, boxer shorts for dad, ball ornaments…so many possibilities!!! Enjoy!

Gnome Village Advent Calendar

I’m so super-excited about our GNOME VILLAGE ADVENT CALENDAR this year! Starting on the 1st of December the kids will lift up a gnome home each day…the house numbers will correspond with the day. Underneath each house will be a little surprise: a hershey kiss, a candy cane, a miniature ornament for the tree, or a special message. The “special messages” may include,

  • “Make cookies for a neighbor.”
  • “Make Christmas cards for friends and family.”
  • “Leave little notes written in chalk around the neighborhood.”
  • “Make a Gingerbread House today!”


Making the GNOME VILLAGE was a little time consuming, but very easy to make. You could always make your gnome houses very simply with a standard door, windows and house number and they’d look just as cute! Just mix up the colors for some variations!

Materials needed:

  • mulit-colored card stock (or you could use toilet paper rolls)
  • doilies
  • markers and/or paint
  • glitter
  • Elmer’s glue
  • hot glue gun
  • sequins, stickers, etc (optional)

First, cut the card stock in half horizontally, then take about 3 inches off the end. I like using card stock instead of regular construction paper because it doesn’t fade as easily and it’s sturdier. I’m hoping to use our GNOME VILLAGE year after year!

After your paper is cut, it’s time to decorate! We decorated some of our gnome houses with markers, some with paint and embellished them with sequins, jewels and glitter. Have fun and be creative! They certainly don’t all have to be Christmas-y, just colorful!


Once the houses have been colored and painted, shape the paper into little tubes and use a hot glue gun to secure them in place.


To make the gnome house roofs, make a cut to the center of a doily. (I actually used two doilies stacked for a sturdier roof.) Overlap the ends and glue into place…should make a little rooftop-cone.


To add snow to the roofs, very gently roll each roof in Elmer’s glue and then sprinkle with glitter. This was definitely L’s favorite part!


Using the hot glue gun again, attach each rooftop to a house. All done! Pretty easy, huh?


We plan to display our GNOME VILLAGE ADVENT CALENDAR on one of our mantels this year…with a little snow, mini-pine trees, and a few gnomes it will surely become one of our favorite Christmas decorations for years to come! So. Much. Fun! Enjoy!


DIY Floppy Newspaper Hats

Oh, we had so much fun making these FLOPPY NEWSPAPER HATS today! I thought I’d write up this tutorial this weekend, but I just couldn’t wait…they’re just so much fun! If you have little boys in your messy house, please don’t think you can’t make these with them…a hat’s a hat! A floppy hat’s a floppy hat! I’m sure they’ll love them just as much as any girls will! Do it! There will be lots of giggling for sure.

Materials needed:

  • newspaper
  • acrylic paint
  • painters tape
  • tissue paper, poof balls, feathers, etc.
  • white glue

First, prepare your painting area. I taped some trash bags to the floor to protect it from paint…not usually necessary for painting, but the newspaper sheets are just so large.

Next, paint, paint, paint! Paint an entire sheet of newspaper, just one side though. Don’t worry if some  of the newspaper can be seen through the paint, nobody will notice when the hat is finished! Allow the paint to dry completely.


After the paint is dry, lay the paper overtop of another sheet of newspaper…two sheets will make the hat a little more durable. Fold the papers twice, once in each direction, and cut the paper so when you open them back up, you have a circle. The circle really doesn’t have to be perfect, it’ll look great when you’re done!


Next is the tricky part because kids tend to wiggle…lay the paper over your child’s head and scrunch fold it into shape. As you go around, use painters tape to hold the the folds in place. The great thing about painter’s tape is that you can fix any little mistakes and it won’t tear up the paint or paper.


In making WB’s orange hat, I just shaped it around my knee and it worked just fine. I also experimented and used a stapler instead of the painters tape. Stapling worked great and looks fantastic, but it is a little trickier to do. The paper tears a little easier with staples in it too.

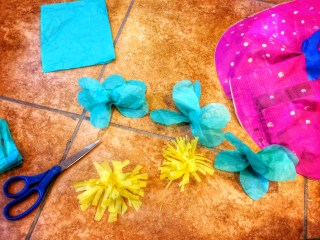
Now to decorate your hat! You can cut flowers out of tissue paper or just cut squares and scrunch them up. If you layer the tissue paper a bit, the flowers are a little fluffier and prettier. You can also glue on poof balls, jewels, feathers, anything you can think of and find around your house!


Super cute, huh!? Forget Easter bonnets, we’ll be wearing these to Thanksgiving dinner!!! That is if they survive a month’s worth of tea parties…


Wouldn’t these be adorable for a birthday party? You could make the hats beforehand and let the kids decorate them at the party…so many fun possibilities! Enjoy!


Leaf Prints…Pillowcases and T-Shirts

Ever since we put up L’s “big girl bed” a couple months ago I’ve been looking for the perfect pillow sham. I finally decided, “Why not just make one!?” And that’s exactly what we did today! I love the outcome…it turned out even better than I imagined it would! The pillow cover will last for years and we can always look back on this perfect Autumn day. We followed it up by making some matching Fall shirts for the girls as well!


Pillow Cover

Materials needed:

  • pillowcase, ironed if needed
  • a few scraps of cardboard
  • paper towels
  • acrylic paints
  • brushes and palettes (we use old, plastic lids)
  • leaves


Before you start painting, prepare your area. You’ll need a piece of cardboard to paint the leaves on top of and a piece of cardboard to slide into the middle of the pillowcase, so no paint seeps through. If the cardboard inside the pillowcase is ridged, you may want to add an old, silicone cutting board or piece of card stock underneath as well. You wouldn’t want the ridges to effect the leaf prints.

Starting with the larger of your leaves, paint the underside of the leaf and then carefully press it onto the pillowcase. Repeat with different colors, different shades and different sizes until you’re happy with your final project. We started with various shades of orange and then added a few reds, yellows and greens. Likewise, we started with large leaves and ended with a few tiny ones.


T-Shirts

Materials needed:

  • t-shirts, ironed if needed
  • a few scraps of cardboard
  • paper towels
  • acrylic paints
  • brushes and palettes (we use old, plastic lids)
  • leaves

You will basically make leaf prints onto your t-shirt in a similar manner as with the pillowcase above. The only difference is that you’ll want smaller cardboard pieces to slide into the shirt and one really narrow piece to slide into the sleeve. As you can see, after printing leaves on the center of the shirt I added one tiny, falling leaf to the sleeve.


Cute, huh!? And easy! What else will you make leaf prints on? I think an Autumn table runner would be beautiful as well! There are so many possibilities! Enjoy!

Play Dough Funny Faces w/ DIY Outlet Covers

When I saw a variation of this craft years ago, I stored it away in the back of my mind, just waiting for L to be old enough to make and play with these! The outlet covers I saw were made using Sharpie Markers, but I love the color we brought to ours with paint! The outlet-cover funny faces are as much fun to make as they are to play with! L and I spent one day painting the outlet covers, let them dry overnight, then the next day, we were able to glue on the googlie eyes and stick them in our play dough! So silly and so much fun!


Materials Needed:

  • outlet covers
  • paint (acrylic and/or puffy paint)
  • googlie eyes
  • jewels (optional)
  • hot glue gun and glue
  • your favorite play dough
  • egg cartons (optional)


The first thing I did, preparing our work station, was to cut off the center tips of an egg carton. I then put an outlet cover in each opening so L could paint them with ease.


Then, paint away! I tried to paint mouths and noses on the outlet covers, while I let L paint hers however she pleased. I figured the ones she painted could be used to glue on the eyes and jewels later on.


After the glue dries, you can go over some with puffy paint too! I thought it was a fun effect for big, puffy lips!

Using a hot glue gun, attach some googlie eyes and jewels to a few of the other outlet covers.


Now it’s time to play! Just push the outlet covers into your favorite play dough…the funny face possibilities are endless!


I love how the play dough doesn’t stick to the outlet covers, rather it just falls off, making clean-up a breeze! Please share pictures of your funny faces…we’d love to see them! Enjoy!

New Ways to Paint

I have never met a person, young or old, who didn’t love to paint! So here are over 10 new ways to paint…time to get messy and have some fun!!!


Some tips before we start:

  • Use an old shirt or apron for a smock shirt…or on a hot day, have your kids take off their shirts!
  • When using finger paints, tempera paints or liquid watercolors squirt the paints onto food container lids (Gladware, Tupperware, etc.). Then you can just rinse and toss into the dishwasher to clean them…better for the environment than paper plates!
  • After your child’s done painting outside, find a big rock or brick for them to paint too…this will hold the paper down and keep it from blowing away while the paint dries. We just keep the rocks outside and the rain washes them clean so they’ll be ready for next time.


New Ways to Paint:

“Clean” paintingPaint with water!

This is a great activity for the beginner painter! Inside, have your kids paint with water on construction paper. As the water dries, the paper can be used over and over again. Outside, kids can paint with water on a cement driveway or sidewalk with the same effect. It’s simple, clean, and kids love it!


Paint in a Bag

So quick, so easy and no mess! Put any kind of paint in a gallon-sized bag and tape it to a window! It’s fun to mix and swirl the colors together, making different textures in the paint with your hands. *hint: To get the white label off your plastic bags, just use an alcohol wipe! Easy peasy!


Paint with Flowers

This is definitely a Spring or Summer-time craft! Have your kids walk around outside, picking different sized flowers and grasses to paint with. The outcome is pretty cool!


Paint with Bubbles

I remember doing this one as a kid in school. In a small cup or bowl mix together a lot of paint, a tablespoon or two of dish soap, and a very little bit of water. Then, using a straw, have your kids blow bubbles in the cup until the bubbles rise up and over the edge. At this point you can quickly lay paper over the cup to leave a bubble print. You can also place the cup on a piece of paper before you start and let the bubbles pour over the cup and onto the paper. This one is fun to experiment with!


Paint with Cotton Balls

Clip clothespins onto the cotton balls and use in the place of brushes. L enjoyed making dots with this one. I’ve seen “cloud” pictures before where you make a cloud stencil with a piece of cardboard, lay the stencil over blue paper and use cotton balls and white paint to paint the clouds.


Paint with PomPoms

This is similar to painting with cotton balls. Here are some of my friend Katie’s kids using pompoms instead of brushes. So many colors and so much fun!


Finger Paint

This one is not new, but it is fun! You can always take it to the next level and paint with your feet instead! At Easter this year, we used finger paints and our knuckles to make knuckle carrots.


Paint with Household Brushes

We made fireworks with kitchen brushes this 4th of July. Old toothbrushes would work great too!


Paint with Sponges

Similar to household brushes, use sponges to paint. You can cut up sponges into shapes to stamp with or you can also find a variety of sponge-brushes at your craft store.


Paint Each Other

You don’t have to use face paint to paint your face. Watercolors work great too and wash off in seconds with warm water. I mean, why not let your kid paint green dots on your face?


Paint like the Masters

There’s no reason not to teach even the youngest kids about the extraordinary masters of the paint world. You can let your kids paint like Michelangelo and set-up a mini-Sistine Chapel; using Q-tips have them paint dots like Georges Seurat; or lay paper under the swing-set out back, having your kids swing on their stomach, paint brush in hand, creating a Pollock-like masterpiece.


For some Monet inspired art, check out this post:

Playing Monet.

I’m sure there are other fantastically fun ways to paint that L and I haven’t tried yet. Which ones have you done??? Please share in the “comments” section below!